How to Take a Professional Headshot

May 26, 2025

By RocketPages

Person taking a professional headshot at home using a smartphone with ring light and plain background

A headshot in 2025 is more than just a photo—it's your visual handshake. Whether for LinkedIn, your personal website, or a creative portfolio, a strong headshot communicates confidence, professionalism, and authenticity.


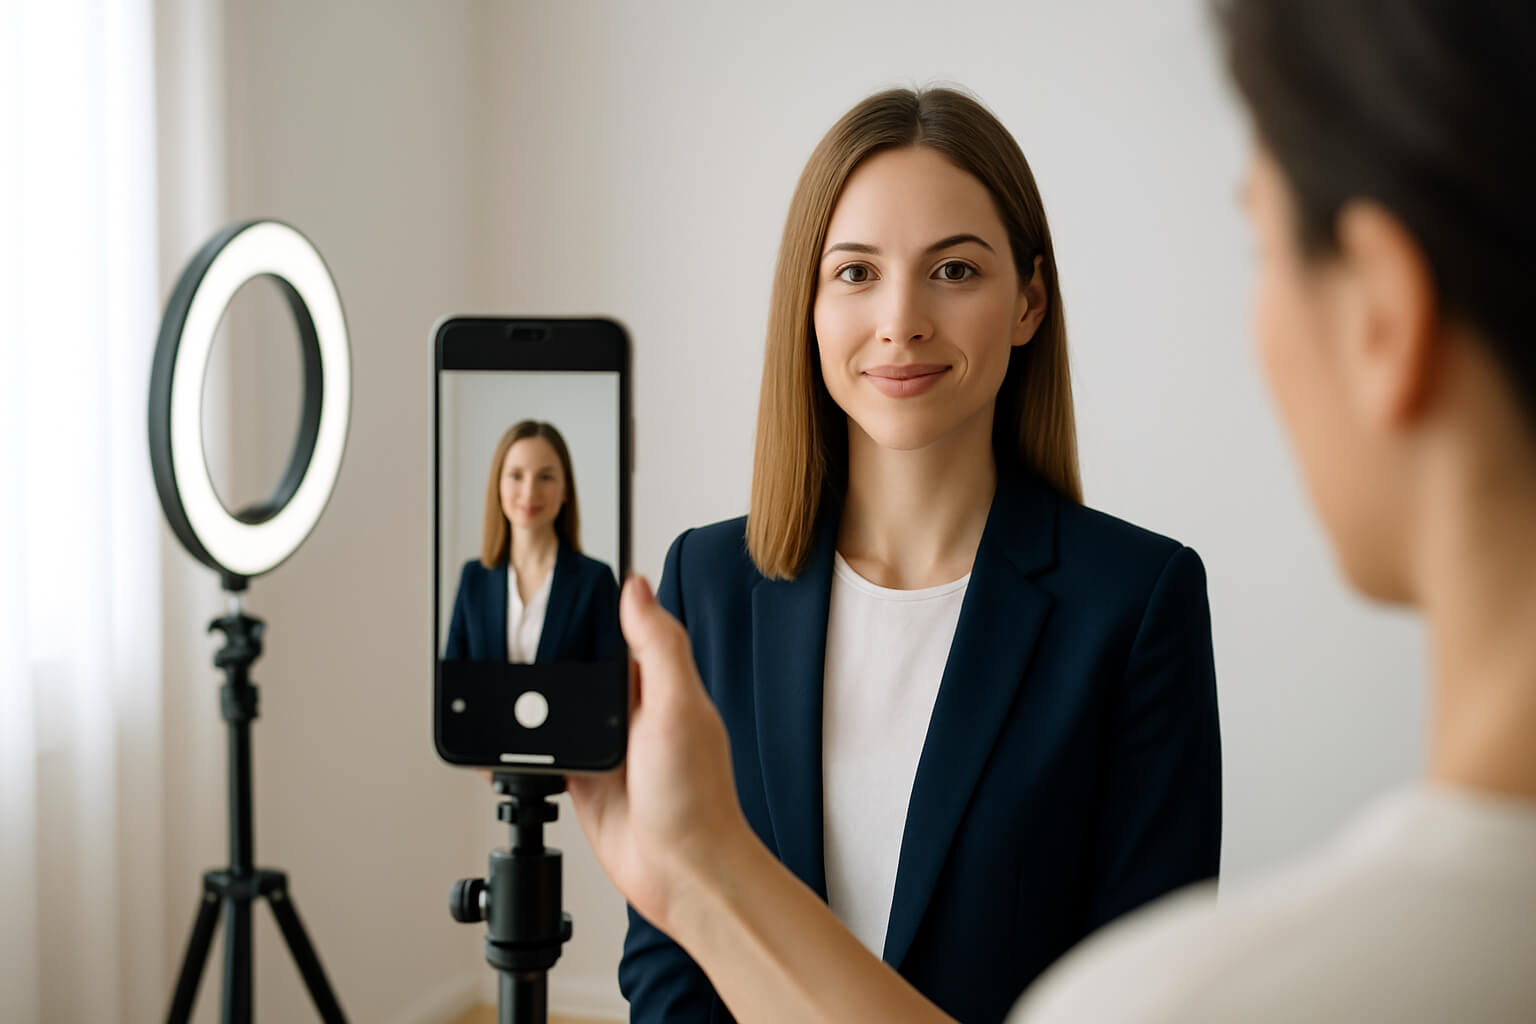
The best part? You no longer need an expensive studio or professional photographer. With the right gear, lighting, and techniques, you can capture a studio-quality headshot from the comfort of your home.


Step 1: Choose the Right Camera or Smartphone


Your choice of camera sets the foundation for clarity and depth. While DSLRs and mirrorless cameras provide the highest quality with better control over aperture and background blur, modern smartphones with portrait modes are more than sufficient for digital headshots.


📱 What to Use:


  • DSLR or Mirrorless Camera – Best for fine control and high resolution.
  • Flagship Smartphones (2023–2025) – Devices like iPhone 15 Pro, Google Pixel 8 Pro, or Samsung S24 offer stunning portrait results with computational depth-of-field and sharpness.


📖 Recommended Reading:


This guide covers entry-level cameras that offer crisp detail, autofocus on eyes, and natural depth for headshots.


Step 2: Use Soft, Professional Lighting


Lighting is the most important variable in portrait photography. It determines mood, clarity, and skin tone accuracy. Soft, directional lighting highlights your features while avoiding harsh shadows.


How to Light Your Headshot:


1. Natural Light Setup:

  • Face a large window with indirect sunlight.
  • Use white curtains to diffuse harsh daylight.


2. Artificial Light Setup:

  • Position a ring light or softbox at a 45° angle to your face.
  • Avoid overhead lighting which creates unflattering shadows.


Explore Lighting Techniques:


📖 Photography Artificial Lighting – A Beginner’s Guide

📖 What is Split Lighting in Portrait Photography


These references explain how positioning lights can subtly shape the face for a more dimensional, flattering portrait.


Step 3: Choose a Neutral Background & Proper Composition


A busy background can distract from your face—the focal point of a headshot. Use a neutral or blurred background to maintain attention on you.


Setup Tips:


  • Stand 3–6 feet in front of a plain wall or backdrop to reduce shadows and create separation.
  • Keep the camera at eye level for natural perspective.
  • Frame the photo from the chest upward, with a little space above the head.
  • Use a tripod or stack of books to stabilize and align your device.


Gear Guide:


A good tripod is essential for getting level, repeatable shots—especially when using the timer function.


Step 4: Dress for the Role You Want to Represent


Your appearance in a headshot should reflect your personal brand or industry expectations. Choose outfits that are clean, professional, and non-distracting.


Style Suggestions:


  • Solid colors work best—avoid stripes, patterns, or logos.
  • Dress one level more formal than your day-to-day wear.
  • Choose colors that contrast your background and complement your skin tone.
  • Minimal jewelry or accessories—keep attention on your expression.


For creative fields, a slightly more relaxed style is acceptable, but keep it intentional and clean.


Step 5: Take Multiple Shots with Variations


The key to a great headshot is options. Don’t rely on a single frame—shoot in bursts, and make small adjustments between shots.


Try Variations In:


  • Expression: Full smile, soft smile, serious but approachable
  • Angles: Face straight on, slight head turn left/right
  • Lighting: Experiment with soft fill light vs. stronger directional shadows


Take at least 10–15 photos in one session. You’ll thank yourself later when comparing options.


Step 6: Edit the Headshot Like a Pro


Once your best photo is chosen, editing brings it to life. This doesn’t mean heavy retouching—just a few enhancements to polish the image.


What to Edit:


  • Adjust brightness and contrast for clean exposure
  • Sharpen facial details while keeping skin texture natural
  • Use spot healing to remove blemishes or lint
  • Apply subtle filters to even out tone and give a consistent look


Best Tools for Editing:


  • Snapseed – Free, mobile-friendly, with precise healing and tuning tools.
  • Lightroom Mobile – Great for lighting correction and presets.
  • Photoshop Express – Offers blemish removal, cropping, and one-touch adjustments.


📖 Recommended Resources:


These guides will walk you through both the technical and creative sides of editing.


Step 7: Put Your Headshot to Work


Your headshot is now polished and ready—but its value comes from how and where you use it.


Strategic Use Cases:


  • Upload it to LinkedIn, About pages, digital resumes, and email signatures
  • Use it in press kits, speaker bios, or course platforms
  • Create matching branded avatars for social media consistency


If you’re a photographer or creative professional, you can also:


  • Offer headshot sessions as a freelance service
  • License your portraits as stock photography
  • Build a portfolio of creative headshots


📖 Monetization Resources:


Bonus: Take Your Headshot to the Next Level


Once you master basic headshots, experiment with creative portraiture to evolve your personal brand.


Explore Advanced Styles:


1. Double Exposure Portraits


2. Cinematic Portrait Lighting


3. Restoration of Old Headshots


These advanced techniques let you stand out from the crowd and build a unique visual identity.


Conclusion: Headshots Without a Studio—Professional, Accessible, Powerful


Creating a professional headshot in 2025 is no longer reserved for those with access to a studio or expensive equipment. With the right knowledge, tools, and mindset, you can produce headshots that exude professionalism, warmth, and confidence—all from home.


Whether for LinkedIn, your creative portfolio, or client work, follow this guide to:


  • Frame yourself properly
  • Use flattering light
  • Dress intentionally
  • Edit subtly
  • Share widely and strategically


Remember: Your headshot isn’t just a photo—it’s a statement. Make it count.

Recent Articles

Stay up to date with the newest tips, gear reviews, and step-by-step guides to elevate your photography journey from home and beyond.

A DSLR camera showing a 3x3 grid on the screen to illustrate the rule of thirds.
What Is the Rule of Thirds in Photography
Composition is the backbone of every powerful photograph—and few techniques are as universally recommended for beginners and pros alike as the Rule of Thirds. It’s a simple yet transformative principle that helps you place subjects and elements in a way that feels natural, engaging, and aesthetically pleasing.Whether you're capturing a candid street moment or staging a dramatic studio portrait, understanding this rule adds clarity, tension, and structure to your frames.What Is the Rule of Thirds?Imagine your camera viewfinder or screen divided by two vertical and two horizontal lines, forming a 3x3 grid—like a tic-tac-toe board. The places where these lines intersect are called “power points.” These points are naturally appealing to the human eye and are ideal spots to place your subject or focal elements.Instead of centering everything, positioning your subject along one of these lines—or at an intersection—creates a more dynamic composition that subtly guides the viewer’s attention.Example: In portrait photography, placing a subject's eyes at the top third of the frame immediately creates visual connection and impact.Why the Rule of Thirds WorksHumans naturally seek balance in visual media—but perfect symmetry often feels static or formal. By placing elements slightly off-center, the rule of thirds introduces visual movement and tension—encouraging the viewer’s eye to explore the whole frame.This technique promotes:Asymmetrical balance: More visually interesting than centered compositions.Spatial storytelling: Allows background and foreground elements to support the subject.Natural engagement: The eye follows lines and intersections instinctively.Where It Shines: Real-World Photography ExamplesPortrait Photography : Aligning a subject's eyes with the top third, and placing them slightly off-center, adds intimacy and allows for leading lines or blurred backgrounds to support the composition. Explore examples in Portrait Photography Ideas.Photojournalism : This rule keeps subjects grounded while allowing the environment to tell the story. It brings harmony and hierarchy to scenes captured in real time, like those featured in What is Photojournalism?.Wedding & Cinematic Photography : Used masterfully in Cinematic Wedding Photography, it helps create drama—balancing subjects against romantic backdrops or emotional scenes for timeless results.Practical Applications 1. LandscapesPlace the horizon along the upper or lower third line. This directs attention to the sky (e.g., for sunsets) or to the ground (e.g., for foreground texture).Position elements like trees or people at one of the vertical thirds to balance negative space. 2. PortraitsCompose with your subject’s eyes at the top-third line and offset their position to the left or right. This leaves room for gesture, direction, or storytelling elements in the frame. 3. Still Life / Product PhotographyPosition your product on one-third of the frame, and use surrounding negative space to highlight it. This works especially well in advertising and e-commerce shots.Rule of Thirds + Lighting = Maximum ImpactLighting dramatically affects how the rule of thirds plays out in your images. Strategic use of light enhances focus and emotional tone.Explore Artificial Lighting Guide for Beginners to understand how directional lighting can emphasize off-center subjects.Combine the rule with lighting techniques like Split Lighting to add mood, especially in portrait and fashion work.Tools and Pro TipsUse the Grid Overlay: Most modern cameras and smartphones have a built-in grid display, making it easy to apply the rule in real-time.Editing Software: Post-processing tools in the Best Photo Editing Apps of 2025 let you crop or realign based on the rule of thirds.Use a Tripod: Tripods from Best Travel & Studio Tripods keep your framing steady—critical for studio work or long exposures where precise composition is essential.Should You Always Use the Rule of Thirds?No—and that’s the beauty of it. Once you fully understand this rule, you can break it intentionally. Centered compositions can convey strength, stillness, or confrontation. But doing so consciously, with a clear purpose, separates skilled photographers from casual shooters.Think of the rule of thirds not as a limitation, but as a launchpad for creative choices.Final ThoughtsThe Rule of Thirds is a timeless foundation for visual composition. Whether you're just starting out or refining your artistic eye, this technique helps bring clarity, energy, and intent to your photos.Apply it thoughtfully, combine it with lighting and editing tools, and you’ll see immediate improvements in your storytelling and visual impact.
Read More
post-image
What is Depth of Field in Photography
Depth of Field (DoF) is one of the most fundamental principles in photography. It refers to the range of distance within a photo that appears acceptably sharp. Whether you're photographing a single flower or a sweeping mountain range, understanding how to manipulate depth of field gives you powerful creative control. With it, photographers can isolate a subject, guide a viewer’s eye, and infuse a scene with emotion or narrative intent.Want a soft, blurred background that makes your subject pop? Or a crisp, detailed shot from the foreground to the horizon? DoF is the key to achieving both.Depth of Field ExplainedDepth of Field determines how much of your image is in focus, both in front of and behind your subject.Shallow Depth of Field: Achieved by using a wide aperture (low f-stop like f/1.4 to f/2.8), this creates a narrow focus zone—ideal for drawing attention to one element while artistically blurring everything else. Commonly used in portraiture, macro photography, and creative bokeh effects.Deep Depth of Field: A narrower aperture (higher f-stop like f/11 to f/22) results in more of the image being in focus from front to back. Perfect for landscapes, architecture, and street photography where overall scene clarity matters.High-quality cameras and lenses listed in Best Cameras for Professional Photography Beginners in 2025 offer manual controls that allow you to fine-tune your depth of field, especially when paired with lenses featuring wide aperture capabilities.What Affects Depth of Field?Depth of field doesn’t rely on just one factor—it’s influenced by several key settings: 1. Aperture (f-stop)A wide aperture (e.g., f/1.8) lets in more light but reduces DoF, making it ideal for low-light environments and isolating subjects.A narrow aperture (e.g., f/16) reduces light but increases DoF, making it suitable for daylight landscapes or scenes with multiple elements in focus. 2. Focal LengthTelephoto lenses (e.g., 85mm or 200mm) compress the background and inherently produce a shallower DoF, making them ideal for dramatic portraits.Wide-angle lenses (e.g., 24mm) expand the scene and naturally render more in focus, great for architecture and landscapes. 3. Distance to SubjectThe closer you are to your subject, the more exaggerated the shallow DoF becomes—especially useful in macro and portrait photography.When to Use Shallow vs Deep DoFPortrait Photography : Use shallow DoF to separate your subject from the background, focusing sharply on key features like the eyes while allowing other elements to fade into creamy bokeh. This not only adds mood but makes portraits feel more personal. For creative ideas, check out Portrait Photography Ideas.Photojournalism or Street Photography : Deep DoF allows viewers to absorb all elements of a scene, preserving narrative and contextual clarity. This is vital in storytelling genres where every detail can matter. For more on documentary composition, explore What is Photojournalism?.Wedding Photography : A unique blend of both DoF styles is often used here. Wide apertures can spotlight emotional moments, while narrower settings preserve detail in sweeping venue shots. For tips on this cinematic style, see Cinematic Wedding Photography.Lighting + DoF = Creative PowerDepth of field doesn't exist in isolation—it interacts with light. The amount of available light often determines what aperture (and therefore DoF) you can use.In low light, a wider aperture may be needed to properly expose your image, naturally resulting in a shallower DoF.With sufficient lighting, such as from strobes or softboxes, you can afford to use narrower apertures without underexposing.Explore lighting basics in Artificial Lighting Guide for Beginners, and take it further with techniques like Split Lighting in Portraits, which pairs beautifully with shallow depth of field for artistic, mood-driven portraits.Editing Tips for Depth of FieldWhile authentic DoF is always preferred, there are situations where post-processing tools help enhance or mimic it:Tools like radial and lens blur in mobile or desktop editors can simulate shallow DoF, especially in portraits or product shots.Use these features sparingly and with care, particularly in factual or editorial content where realism is critical. See ethical considerations in What is Photojournalism?.For a list of top apps offering these tools, see Best Photo Editing Apps of 2025.Practical Tools & GearMaximize your control over depth of field with the right equipment:Lenses: Look for fast prime lenses (like 50mm f/1.8 or 85mm f/1.4) for creamy backgrounds and strong subject isolation.Tripods: Essential when using smaller apertures that require slower shutter speeds. Top options are detailed in Best Tripods in 2025.Mobile Gear: Many smartphones now use AI-powered blur simulation. Apps from the Best Photo Editing Apps even allow manual DoF adjustments in portrait mode.Final ThoughtsDepth of field is more than a technical setting—it’s a storytelling tool. Whether you're crafting intimate portraits or expansive landscapes, learning how to control DoF helps you bring emotion, focus, and visual impact to your photography.Once you understand how to manipulate it through aperture, distance, and lens choice, you'll unlock a new dimension of creative freedom. So grab your camera, adjust your focus, and start seeing the world with depth.
Read More
Photojournalist capturing live protest using professional camera in dynamic urban environment.
What is Photojournalism Definition Techniques and How to Start in 2025
Photojournalism stands at the powerful intersection of photography and journalism, merging the visual and narrative aspects of storytelling to inform, evoke emotion, and document reality. Through the lens of a photojournalist, we are granted a direct window into the world—whether it’s a devastating natural disaster, an intense political protest, or a quiet, everyday moment. These images don’t just capture the scene; they preserve the raw emotion and significance of what is happening, providing a documentary record for history.Unlike other forms of photography—such as staged portraits or studio work—photojournalism is grounded in truth and context. It's about capturing moments as they unfold without alteration, manipulation, or embellishment.What Makes Photojournalism Unique?Photojournalism is defined by its ability to capture authentic moments in time. This authenticity is critical because the images we see in the news, magazines, or online often shape how we perceive the world around us. As a photojournalist, there are key factors that define your work:Truthful Representation : The essence of photojournalism lies in its truthfulness. These images are meant to reflect reality, and anything that distorts that reality—whether through retouching, manipulation, or staged scenes—is strictly avoided. In the realm of photojournalism, there is a clear understanding that photographs are historical records of truth.Pro Tip: This means no dramatic changes in the lighting or contrast that would alter the meaning of the image. Unlike other forms of photography, where artistic edits are common, photojournalism must retain its documentary integrity.Context Matters : A powerful photojournalistic image has context that tells a larger story. Without the narrative behind it, an image may lose its significance. It’s the context that allows a photo to serve its function—informing or evoking an emotional response from the viewer.Pro Tip: When photographing in the field, think about the environment in which the image was captured, and consider how the location, subject, and action interconnect to tell the broader story.Ethics First : Ethics are at the heart of photojournalism. Since the truth is paramount, photojournalists are prohibited from altering the reality of a scene. This means that ethical practices—like avoiding staged photos, altering scenes, or overly retouching images—are foundational.Pro Tip: The Color Correction vs. Color Grading debate is often a consideration in photojournalism. While color correction ensures the image looks true to life, color grading could change the emotion or perception of the scene, and therefore, must be avoided.📖 Color Correction vs Color Grading in Photography – Key Differences ExplainedEssential Gear & Camera SetupWhile you don’t need the most expensive gear to get started in photojournalism, choosing the right camera gear can be pivotal to success. Reliability, versatility, and portability are crucial, as photojournalists often need to move quickly and capture moments without hesitation.Camera : A good starting point is a DSLR or mirrorless camera with fast shutter speeds and high dynamic range. This allows you to capture fast-moving subjects and ensure your images have accurate detail in both bright and dark areas.Pro Tip: Choose a camera that balances image quality and portability. A full-frame camera offers exceptional quality, but a crop sensor model might be more convenient and lightweight for fieldwork.📖 Best Camera for Professional Photography Beginners in 2025Tripod : While not always needed, a sturdy travel tripod is crucial for long-exposure shots or for low-light situations where stability is key. A good tripod should be compact, lightweight, and easy to adjust while on the go.Pro Tip: Look for tripods with quick-release plates for fast camera setup and breakdown, allowing you to quickly adapt to changing conditions.📖 Best Tripods for Travel and Studio Photography in 2025Mobile Editing : Since photojournalists often work in the field, being able to edit and share photos on the spot is a game-changer. Apps like Snapseed, Lightroom Mobile, and Photoshop Express are essential tools that allow for quick edits, especially in breaking news situations. 📖 Best Photo Editing Apps in 2025 – Edit Like a Pro on Mobile or DesktopLighting in the FieldIn the world of photojournalism, you rarely get the luxury of controlled environments. Whether it’s a fast-paced protest or a sudden natural disaster, lighting conditions can be unpredictable. Understanding how to use light effectively in dynamic settings is crucial.Natural Light : When possible, natural light should be your go-to source. The golden hour or blue hour can add beautiful tones to your images, but midday sun can be harsh and create deep shadows. Positioning yourself carefully to capture the right light is key.Artificial Lighting : Sometimes natural light isn’t enough, especially when documenting events indoors or during nighttime. In these cases, understanding the basics of artificial lighting can make a world of difference. Simple tools like portable flashes and reflectors can help fill in shadows and bring out detail in low-light situations.📖 Photography Artificial Lighting – A Beginner’s Guide to Studio and Creative LightingSplit Lighting : Split lighting is a dramatic technique where light divides the face or subject into two distinct halves—one illuminated and the other in shadow. This method can create a sense of tension or conflict within your frame, a powerful tool when photographing stories about crisis or protest.📖 What is Split Lighting in Portrait Photography – A Creative Guide for BeginnersClean Editing without MisrepresentationWhile editing is essential for enhancing your images, it’s equally important to preserve the authenticity of your photos. Editing in photojournalism should never distort the truth of the moment—minor adjustments are acceptable, but dramatic alterations that change the meaning of the image are strictly avoided.Remove Unwanted Objects : Sometimes, distractions such as bystanders, trash, or other irrelevant objects can detract from the power of an image. Using tools like object removal can help create a cleaner image, but it’s important not to manipulate the scene or alter the context of what is happening.📖 How to Remove Unwanted Objects from Photos – Best Tools and TipsMinimal Adjustments : Adjusting exposure, sharpening, or correcting colors to accurately represent the scene is acceptable. However, altering key details such as facial expressions, body language, or environmental context is unethical.📖 Color Correction vs Color Grading in Photography – Key Differences ExplainedCan You Earn from Photojournalism?Photojournalism can be both a passion and a profession. Many photojournalists work on assignment for newspapers, magazines, or news agencies, but others thrive as freelancers. Here's how you can get started:Stock and Editorial Photography : Many photojournalists monetize their work by uploading their images to stock photography platforms that accept editorial content. Images documenting current events or important moments have the potential to sell.📖 Best Photo Selling Websites 2025Freelancing : Freelance photojournalists have the opportunity to document real-time events and offer their services to news outlets, NGOs, or independent media.Pro Tip: Pricing your work correctly is key to making a living as a photojournalist. Always understand the value of your images and avoid underpricing yourself.📖 How to Price Your Photography Services in 2025 – Step-by-Step Pricing GuidePassive Income : If you start uploading your work to the right platforms, it is possible to earn a passive income over time.📖 How to Sell Your Photos Online for Passive Income in 2025Creative Styles Within PhotojournalismEven in the strict realm of truthful representation, photojournalists can infuse their work with creative techniques:Framing and Composition : Use techniques like leading lines, symmetry, and natural frames (doorways, windows, etc.) to add depth and emotion to your images. These compositions can evoke feelings of isolation, hope, or tension without altering the authenticity of the scene.📖 How to Take Cinematic Wedding PhotosVisual Metaphors : While photojournalism should avoid manipulative techniques like double exposure, visual metaphors such as reflections or layers can add depth and meaning to your images.📖 How to Create Artistic Double Exposure PhotosArchiving & Restoring Photojournalism HistoryPhotojournalism has long been an important record of historical events. Over time, these images can degrade due to handling, exposure to the elements, or simply the passage of time.AI Restoration Tools : Luckily, AI-powered restoration tools can help preserve these important images by enhancing the quality and repairing any damage to historical photographs.📖 Best Photo Restoration Software in 2025 – Revive Your MemoriesFinal ThoughtsPhotojournalism is about more than just pressing the shutter; it’s about bearing witness to events and capturing the truth of the world through the lens. The images you take become part of the historical record, offering insight, clarity, and emotion to the stories that shape our lives. By focusing on ethical standards, mastering the gear, and continually honing your technique, anyone can contribute to this dynamic and impactful field.
Read More