
May 14, 2025
Double exposure photography blends two separate images into one captivating visual story. Once limited to analog film cameras, this technique has been revived in the digital age, allowing photographers to create artistic, dreamy, and often surreal compositions with precision and creative freedom. Whether you're a beginner or an experienced photographer, this guide will teach you how to master double exposures in 2025.
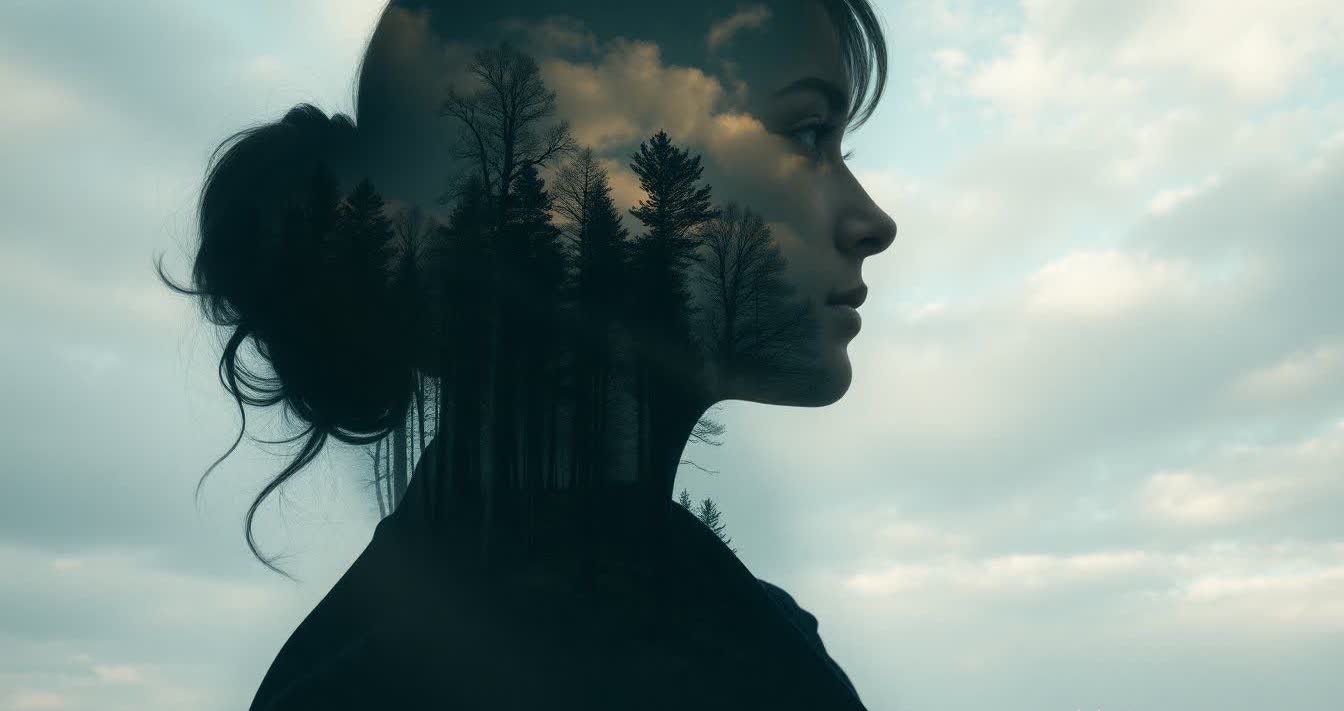
Double exposure (also known as multiple exposure) involves overlaying two photographs to create a single, cohesive image. The result is a layered visual that combines silhouettes, landscapes, textures, and emotions into one artistic expression.
Common double exposure effects include:
Double exposure is about contrast, concept, and emotion. The key is thoughtful blending.
Pro Tip: Some mirrorless cameras allow live preview of multiple exposures—great for precision layering.
Step 1: Set the Base Image
Choose a high-contrast subject—usually a silhouette against a bright background. Portraits work well.
Step 2: Select Your Second Image
Pick a visually rich texture or scene—like clouds, flowers, forests, or cityscapes.
Step 3: Align & Compose
Use live preview (if available) to align key elements creatively. Think storytelling.
Step 4: Shoot & Evaluate
Use your camera's multi-exposure mode to shoot and preview the result. Adjust if needed.
Experiment with negative space in your first image. It allows your second image to shine through naturally.
Step 1: Open Two Images
Import your portrait and overlay image into Photoshop as layers.
Step 2: Convert Portrait to Black & White
Use desaturation or gradient maps to isolate contrast.
Step 3: Change Blending Mode
Set the overlay layer to Screen or Lighten to blend it softly.
Step 4: Mask & Refine
Use layer masks to fine-tune areas where the second image appears.
Step 5: Color Grade
Apply cinematic LUTs or color overlays to unify the final look.
For a professional finish, add subtle grain, vignette, and tone curves.
Think metaphorically—what emotion or story are you trying to convey?

In 2025, double exposure photography continues to evolve as an accessible and expressive art form. With modern gear, powerful editing tools, and creative vision, you can transform two simple photos into a compelling visual story. Master these techniques to produce work that is both technically impressive and deeply emotional—photos that linger in the viewer's imagination.
Stay up to date with the newest tips, gear reviews, and step-by-step guides to elevate your photography journey from home and beyond.