How to Remove a Person from a Photo

May 27, 2025

By RocketPages

Person editing a photo to remove someone using AI-powered photo editing software on a laptop

Removing someone from a photo is now simpler than ever before. Whether you're erasing an ex from a vacation snapshot, removing an accidental photo-bomber, or just want to improve a group shot, 2025’s AI-powered tools have made the process incredibly easy. These tools automatically fill in background areas, ensuring that your photos remain looking natural with minimal effort on your part.


In this guide, we’ll walk you through the exact steps to follow, including the best tools, creative fixes, and editing tips. Plus, we'll explore how you can repurpose your edited photos for commercial use or personal gain.


Step 1: Select the Right Tool for the Job


When it comes to removing someone from a photo, the first step is to pick the right editing tool. Not all photo editors are created equal—some are better for simple edits, while others provide more detailed control for advanced users. Here’s a breakdown of the most popular tools that can help you:


  • Cleanup.pictures – The most user-friendly option. It offers a drag-and-drop interface that requires minimal effort to use. Just upload your photo, mark the person you want to remove, and the AI does the rest.
  • Photoshop (Content-Aware Fill) – Perfect for users who want more control over their edits. Photoshop’s Content-Aware Fill tool analyzes the surrounding area and automatically fills in the blank space. It’s ideal for more intricate details, like facial features or more complex backgrounds.
  • Fotor Object Remover – A mobile-friendly tool that’s simple to use. Fotor allows you to quickly remove objects or people from your photos directly from your smartphone.
  • Snapseed (Healing Tool) – Another excellent mobile option. Snapseed’s Healing Tool works great for quick touch-ups and minor removals, especially for smaller objects or people in the background.


Learn More: Best Photo Editing Apps in 2025

Related: How to Remove Unwanted Objects from Photos


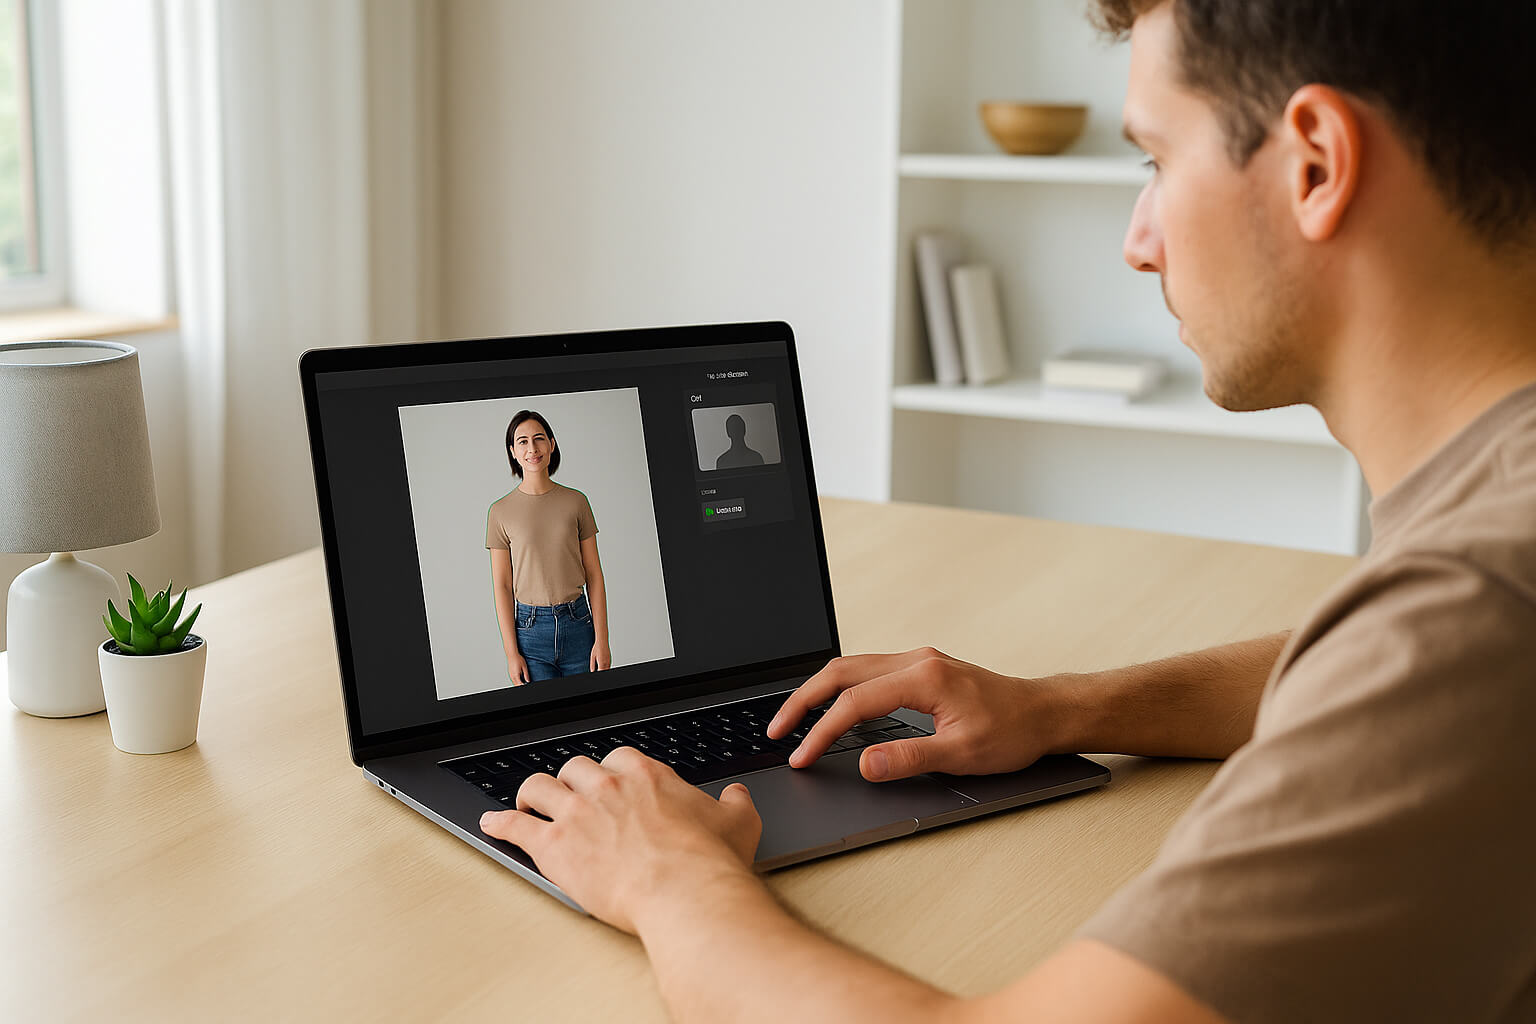
Step 2: Mark the Person or Area for Removal


Once you’ve chosen your tool, it’s time to mark the person or object you wish to remove. Most editing tools allow you to "brush" over the area you want to eliminate, making this step intuitive. Here's how to do it:


  • Zoom in on the person or object you want to remove. This ensures precise marking, especially when working with detailed backgrounds.
  • Use a soft brush for a smoother transition between the marked area and the surrounding space. A hard brush can create noticeable edges that may make the edit look unnatural.
  • Don’t forget to mark any shadows or reflections that might remain after the person is removed. These subtle details are essential for maintaining the realism of the final image.


Pro Tip: If you’re working with a complex background (like a busy street or a crowd), make sure to mark all relevant areas, including the edges of the subject. This will ensure that the AI fills in the space seamlessly.


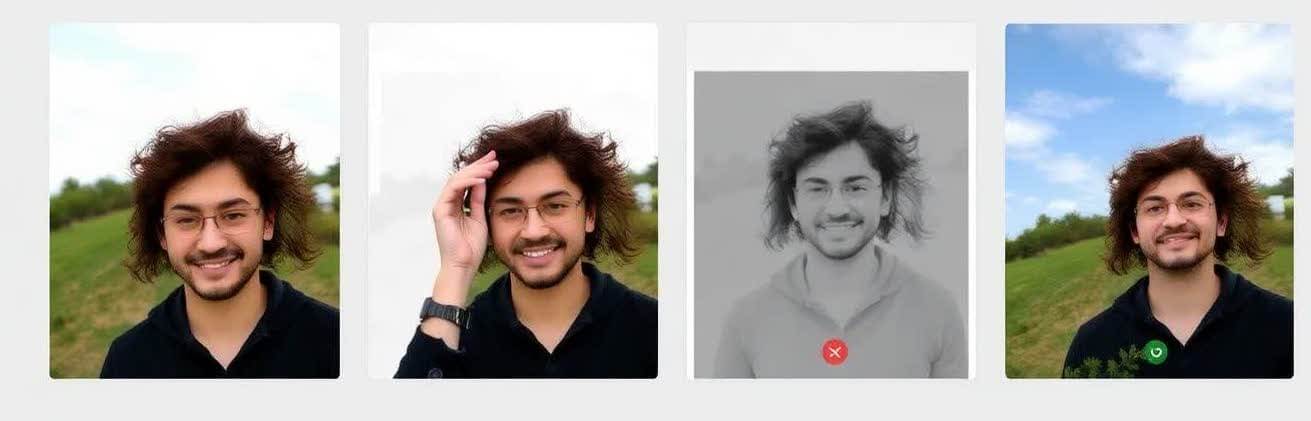
Step 3: Let AI Fill in the Background


After marking the area for removal, your editing tool will automatically fill in the background. This is where AI comes into play—analyzing the surrounding environment and reconstructing the missing part of the image. The technology has improved dramatically in 2025, offering better results than ever before.


  • Review the auto-filled background to ensure it blends naturally with the rest of the image. If the tool is doing a good job, the transition should be almost invisible.
  • If you notice any imperfections (like unusual textures or patterns), use the manual clone or patch tool to refine the area. These tools allow you to copy and paste similar pixels from other areas of the image to create a more consistent look.
  • Zoom out regularly to check the overall composition of your photo. Sometimes the AI might fill the background in a way that looks fine close up but off when viewed at a distance.


Related: What Is Split Lighting in Portrait Photography?


Step 4: Retouch for Realism


If the automatic fill still looks a bit unnatural, don’t worry—you can always retouch the image to restore realism. These fine-tuning steps are crucial for making your edit look seamless:


  • Use the clone stamp tool to duplicate textures from other areas of the photo and apply them to the blank space. This is especially useful if there are patterns, textures, or details (like bricks or grass) that need to match.
  • The healing brush is perfect for blending areas where the AI fill might look a little rough or inconsistent. It helps to create smooth transitions between the edited area and the rest of the image.
  • Adjust color and brightness to match the surrounding area. If the filled area is too light or too dark, it can create an unnatural appearance.


Related: Color Correction vs. Color Grading


Step 5: Experiment with Background Swaps (Optional)


If the background left behind after removing a person looks complicated or difficult to fix, try replacing it altogether. This is especially helpful for complex scenes where natural fills just don’t work. Tools like Canva, Photoshop, or Fotor allow you to swap in a new background with ease.


  • Stock backgrounds can be a great option—simply find one that complements your subject and replace the original background with it.
  • Alternatively, blurred backgrounds help to maintain the focus on the subject and add a soft, professional look.


Additionally, you can experiment with lighting effects (using software like Photoshop or Lightroom) to ensure the lighting on the new background matches that of the subject for a more natural appearance.

Related: A Beginner’s Guide to Creative Lighting


Monetize Your Edited Photos


Once you've finished editing, don’t just let the photo sit on your hard drive—use it! Edited images can be repurposed for multiple purposes, including:


  • Stock photography websites: Upload your finished image to platforms like EyeEm, Shutterstock, or Picfair. Stock photography sites allow you to sell your work for a passive income.
  • Freelance services: If you're a photographer or editor, you can offer retouching services on freelance platforms like Fiverr or Upwork.
  • Personal branding: Edited images can be used in your own portfolio or on social media to showcase your skills.


Learn More: How to Sell Photos Online

Related: Pricing Your Services


Bonus Tip: Restore the Image Later


Sometimes, you may go a bit overboard with the editing. If you find that you’ve removed too much or created a less-than-ideal result, don’t panic. Several photo restoration tools can help you restore the image to its original state or make minor adjustments to bring back key elements.


Learn More: Best Photo Restoration Software in 2025


Final Thoughts


Removing someone from a photo has never been more accessible. Whether you’re using Cleanup.pictures for quick edits or Photoshop for detailed work, these AI-powered tools make the process effortless. With a little retouching and background management, you can create natural-looking images in no time.


Key Takeaways:

  • Use tools like Cleanup.pictures, Snapseed, or Photoshop for easy removal.
  • Always retouch for a natural result—zoom in and refine!
  • If necessary, replace complicated backgrounds.
  • Consider selling your photos or offering retouch services to monetize your edits.


Recent Articles

Stay up to date with the newest tips, gear reviews, and step-by-step guides to elevate your photography journey from home and beyond.