Night photography allows you to capture the magic of the nighttime world, whether it's the twinkling stars above, the glowing city lights, or the serenity of a moonlit landscape. However, shooting at night can be tricky due to low light and the need for longer exposures. Knowing how to adjust your settings is key to getting clear, crisp, and visually stunning night shots. This comprehensive guide will walk you through the best settings, gear, and techniques for mastering night photography.
Why Night Photography Is Special
Night photography stands apart because it allows you to capture a unique blend of contrast, light, and shadow that simply isn't possible during the day. The stillness of night paired with the brightness of artificial lights creates dramatic compositions, often evoking feelings of mystery and wonder. Here’s why it’s such a special genre:
- Captures Dramatic Contrasts Between Darkness and Light
- One of the most striking aspects of night photography is the contrast between the dark environment and the sources of light, such as streetlights, car headlights, or the moon. These contrasts can produce images with high dynamic range (HDR), where shadows and highlights coexist in a compelling way.
- Reveals Starry Skies, Neon Lights, and Glowing Cityscapes
- Whether you're capturing the stars above, neon signs reflecting off puddles, or the bustling lights of a cityscape, night photography allows you to portray a world that changes dramatically after the sun sets. The vibrancy of city lights or the ethereal beauty of a starry sky offers a completely different mood than daytime photography.
- Creates Moody, Atmospheric Compositions
- Nighttime scenes often evoke a sense of solitude or mystery. With low-key lighting and long exposure techniques, you can create portraits, landscapes, and urban scenes that are full of depth, mood, and atmosphere. The shadows, textures, and contrasts come to life, helping you tell stories that feel cinematic or surreal.
- Related: How to Take Professional-Looking Photos 2025
- Related: What Is Cinematic Photography?
Essential Camera Gear for Night Photography
Having the right equipment is crucial when you're capturing photos in low-light environments. Here's a list of essential gear that will help you get the best results:
Camera
- To get high-quality night photos, you need a full-frame DSLR or mirrorless camera. These cameras generally have larger sensors, which allow for better performance in low light. Full-frame sensors capture more light, helping you achieve less noise, better detail, and sharper images at higher ISOs.
- Recommendation: Popular options include the Canon EOS R5 or the Nikon Z7, which are both full-frame mirrorless cameras with excellent low-light performance.
- Best Cameras for Beginners in 2025
Lens
- A fast prime lens with a wide aperture (such as f/1.4 or f/1.8) is ideal for night photography. Lenses with wide apertures allow more light into the camera, helping you achieve brighter, clearer images without increasing ISO too much. Additionally, primes (fixed focal lengths) tend to offer better sharpness and clarity than zoom lenses.
- Tip: A 35mm or 50mm prime lens is great for general night photography. If you want to capture wide scenes, a 24mm f/1.4 lens can work wonders for starry skies.
- Best Lenses for Portrait Photography
Tripod
- A sturdy tripod is essential for long-exposure shots. Without one, any slight camera shake will result in blurry images. A tripod keeps your camera perfectly still, especially during long exposure photography, where even a fraction of a shake can ruin the shot.
- Tip: Opt for a carbon fiber tripod for better portability or a heavy-duty metal tripod for added stability, especially in windy conditions.
- Best Tripods for Travel and Studio Photography
Remote Shutter or Timer
- Using a remote shutter release or the camera's timer function is a great way to prevent any camera shake when pressing the shutter button. Even slight movements from pressing the shutter can cause blurriness, especially during long exposures.
- Must-Have Camera Accessories for Every Photographer
The Best Settings for Night Photography
Now that you know the essential gear, let’s talk about the camera settings that will help you capture amazing night photos:
Mode: Manual (M) Mode
- For night photography, Manual Mode (M) is your best friend. It allows you to control ISO, aperture, and shutter speed independently, which is essential for getting the perfect exposure in challenging low-light conditions. With manual mode, you can fine-tune each setting based on the scene and your creative vision.
ISO: 800–3200 (or higher)
- ISO determines how sensitive your camera’s sensor is to light. For night photography, you’ll likely need to raise the ISO to capture more light. Start with ISO 800 and increase it to ISO 1600 or 3200 if necessary. While higher ISO settings can introduce noise, most modern cameras (especially full-frame models) perform well in low light, giving you clean results without too much grain.
- Tip: If you're shooting star trails or other long exposures, you can even push your ISO higher, but be sure to check the image for noise.
Aperture: f/1.4 to f/4
- The aperture controls how much light enters the camera. In night photography, a wide aperture (low f-stop) is essential to allow as much light as possible to hit the sensor. Apertures like f/1.4 to f/2.8 are ideal for capturing stars, neon lights, or cityscapes. If you're photographing landscapes or need more depth of field, you can close the aperture a little to f/4, but keep it as wide as possible for the best results.
- Tip: Use the wide-open aperture for star photos to capture the most light and create beautiful bokeh effects in cityscapes or portraits.
Shutter Speed: 5 to 30 Seconds
- A long shutter speed allows you to gather more light, but it also comes with the risk of motion blur. For star photography, aim for 15-25 seconds of exposure to avoid star trails. If you’re capturing cityscapes, you can often use 5-10 second exposures, depending on the ambient light.
- Tip: Experiment with long exposures (up to 30 seconds) to get stunning light trails from cars or smooth out flowing water in long exposure landscapes.
- How to Photograph the Milky Way Step by Step
Focus: Manual Focus
- Autofocus often struggles in low-light conditions, which is why manual focus is essential for night photography. You can use live view on your camera’s screen and zoom in on a bright object (such as a streetlight or a distant building) to fine-tune your focus. This ensures your shot will be sharp, especially when photographing stars or landscapes.
White Balance: 3500K–4500K
- White balance adjusts the overall color temperature of your photos. For night photography, setting the white balance between 3500K and 4500K will help create more accurate colors in the artificial light. A cooler white balance will balance the yellow streetlights and give the image a more natural feel without the overly warm look.
- What Is White Balance in Photography
Creative Night Photography Techniques
Once you have your basic settings dialed in, you can experiment with these creative techniques to take your night photography to the next level:
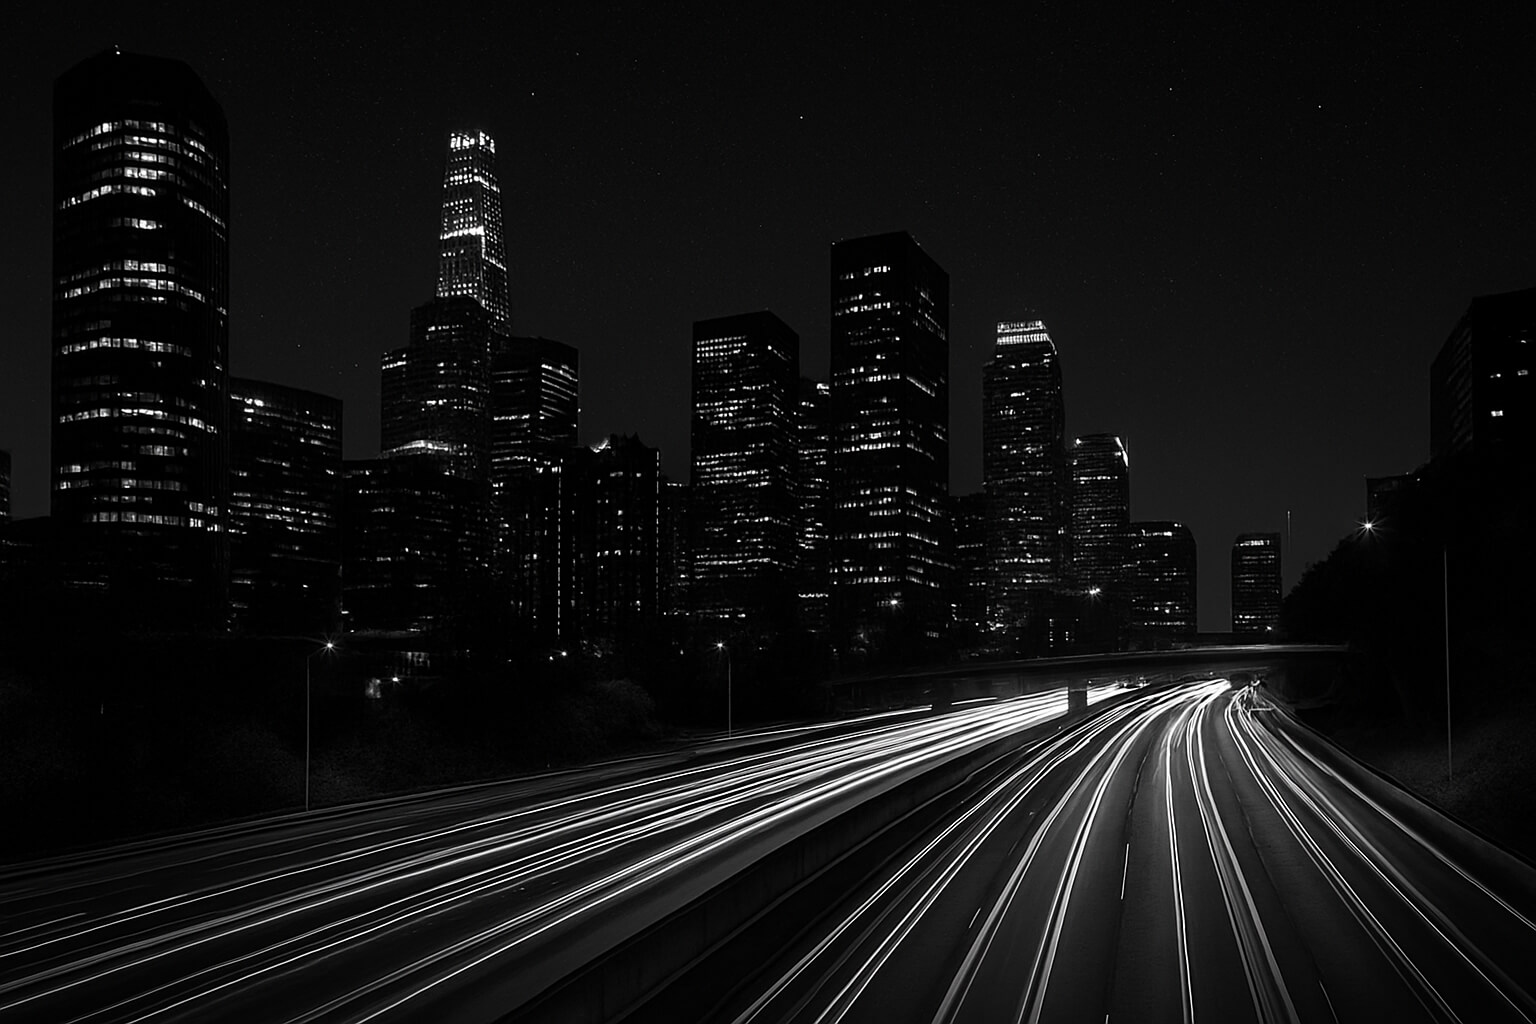
Use Leading Lines
- Leading lines, such as roads, bridges, or railways, can guide the viewer’s eye towards the subject or focal point in your photo. At night, streetlights or light trails from cars can create beautiful leading lines that add depth and interest to your composition. What Are Leading Lines in Photography?
Capture Motion Blur
- Night photography is perfect for capturing light trails from moving vehicles or the subtle motion of clouds. Use longer exposures (5–30 seconds) to create dynamic images with motion, adding an element of energy or mystery to your shots. How to Capture Light Trails in Photography
Long Exposure Landscapes
- Use long exposures to smooth out water, create soft cloud movements, and make the scene feel more ethereal. This is particularly effective for capturing the motion of water in rivers, lakes, or oceans, as well as softening the clouds in dramatic landscapes. Mastering Long Exposure Landscape Photography
City Lights & Neon Colors
- The glowing city lights and vibrant neon signs are a hallmark of urban night photography. Try capturing reflections in puddles or shooting through glass to add creative layers to your compositions. How to Photograph Neon Colors
Post-Processing Tips for Night Photography
Once you’ve captured your night photos, it's time to fine-tune them in post-processing:
Noise Reduction
- High ISO settings can introduce noise, so use Lightroom or Photoshop to reduce grain and smooth out your images. Both programs offer noise reduction tools that will clean up the digital noise without losing too much detail.
Contrast & Highlights
- Night images often feature bright lights alongside deep shadows. Use the contrast and highlight sliders to bring out detail in the highlights while maintaining rich, dark shadows.
Color Grading
Pro Tips for Better Night Shots
Scout Locations During the Day
- Knowing your location is essential for effective night photography. Scout your spots in the daylight to understand lighting conditions, composition, and potential challenges.
Use Apps like PhotoPills for Star Positions
By mastering these settings and techniques, you’ll be able to capture stunning night photos, whether you're aiming for starry skies, cityscapes, or light trails. Experiment and find your creative voice as you explore the beauty of the night! Happy shooting!