
June 12, 2025
White balance is a fundamental setting in photography that plays a crucial role in ensuring that the colors in your photos are true to life. Whether you’re capturing a portrait under natural daylight or photographing a product under fluorescent lights, proper white balance ensures that whites appear as neutral as possible and that all other colors are rendered correctly. In this article, we’ll break down the concept of white balance and provide practical tips for mastering it.
White balance is essentially the camera’s method for compensating for the color temperature of different light sources. Light sources have varying color temperatures, measured in Kelvin (K), and they impact the colors that appear in your photos. Our eyes adjust naturally to these shifts in light, but cameras require assistance in interpreting them. Without proper white balance, photos can look unnatural, with strong color casts that distort the true colors of the scene.
By adjusting the white balance, you can either warm up or cool down the colors in your image to match what you see in real life.
Related: Different Types of Lighting in Photography
Related: What is Artistic Photography?
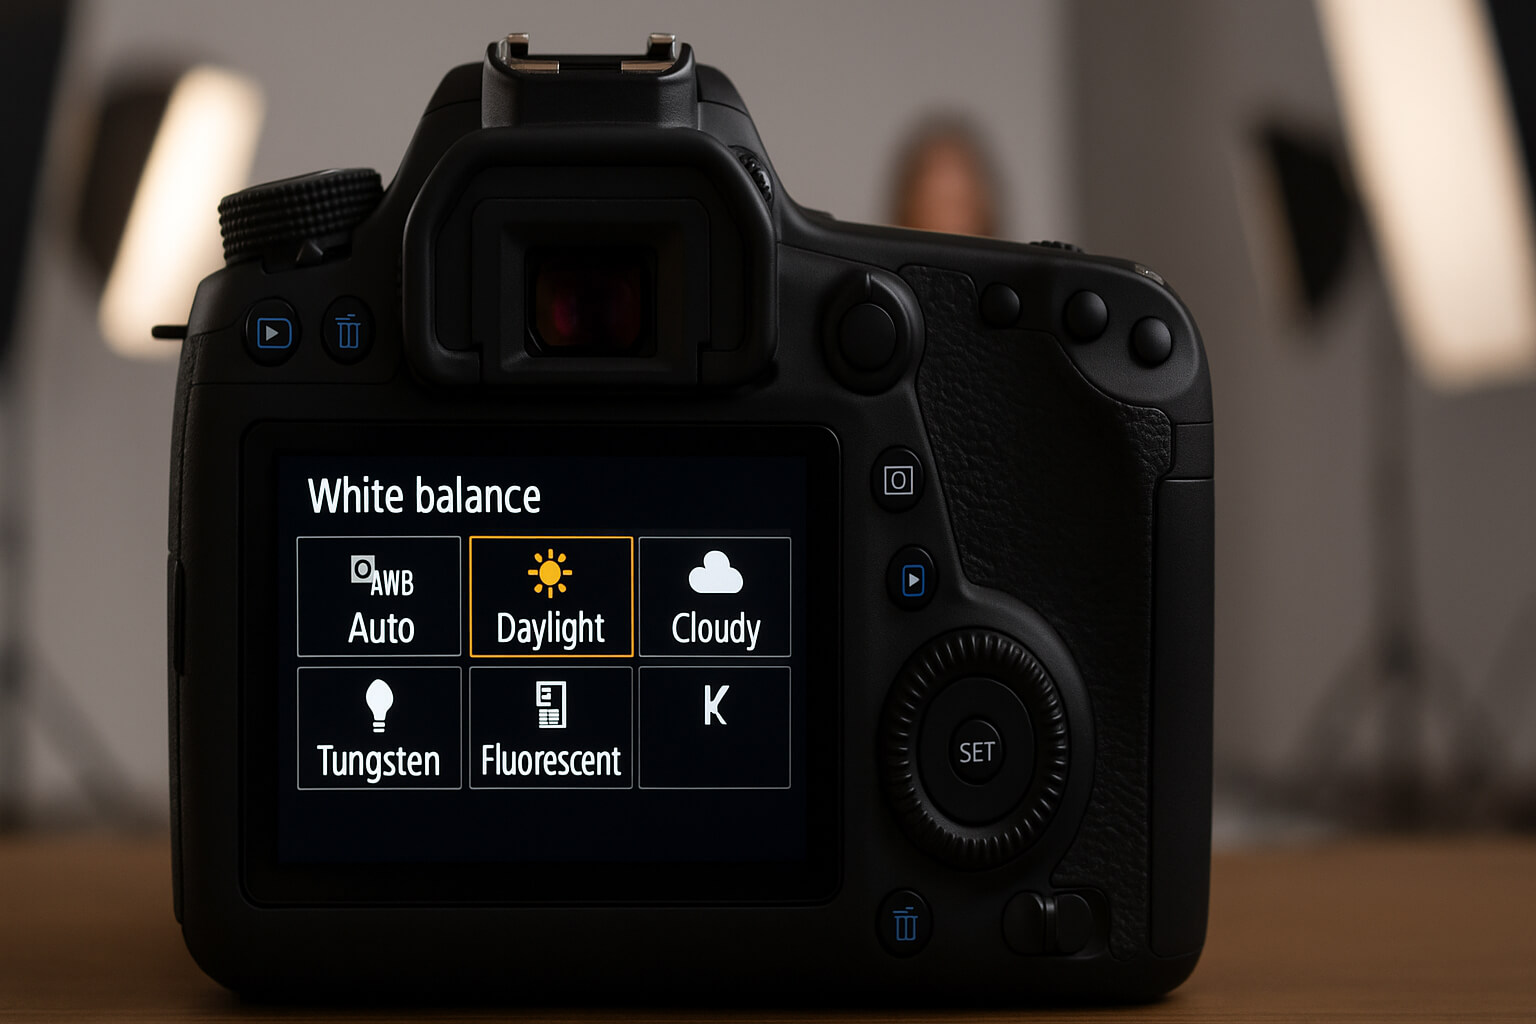
Most modern cameras come equipped with a range of preset white balance modes, making it easier for photographers to quickly adjust for different lighting conditions. Below, we explain each setting and how it impacts your images.
This is the default setting in most cameras, where the camera automatically attempts to adjust the white balance based on the scene's light. While it works well in many situations, AWB can sometimes be inaccurate under tricky lighting, such as mixed indoor lights or scenes with unusual color temperatures.
This setting is ideal for capturing images in direct sunlight. It compensates for the warm tones of sunlight (around 5500K), ensuring that colors appear as natural as possible. Use this setting when shooting outdoor scenes on clear days.
Cloudy white balance compensates for the cooler light under overcast skies, adding warmth to your images. It’s perfect for shooting on cloudy days when the sunlight is diffused and cooler than usual.
This mode adds extra warmth to compensate for the cool, bluish tones found in shaded areas. If you're shooting in the shade during a sunny day, this setting will help make your images appear warmer and more natural.
Tungsten white balance is used to correct the yellow/orange hue produced by incandescent light (like lightbulbs). This setting cools down the image, neutralizing the warm tones caused by indoor lighting.
Fluorescent lights often produce a greenish tone. The fluorescent white balance setting neutralizes this by adding a bit of magenta, making the colors in your image appear more natural.
For perfect accuracy, you can manually set your white balance using a grey card or white balance target. This option is particularly useful when shooting in challenging lighting conditions or when you want absolute control over the color temperature.
If you prefer total control, the Kelvin setting allows you to manually dial in a specific color temperature. This is ideal when you want to achieve a specific mood or look that the presets can't provide.
Related: Best Lighting Setup for Product Photography
Related: Best Lighting Setup for Streaming in 2025
Related: Photography Artificial Lighting
While adjusting white balance in-camera is ideal, sometimes the lighting conditions are too tricky to get it perfect. Luckily, white balance can be easily corrected during post-processing.
Mastering white balance takes practice and understanding the way light behaves. Here are a few pro tips to help you improve your white balance accuracy and creativity:
For perfect custom white balance, always carry a grey card or color checker. These tools allow you to set the white balance precisely before you shoot, ensuring that your images come out perfectly color-balanced. Simply photograph the grey card under the same lighting conditions, and set your camera’s custom white balance to the grey card’s color temperature.
In tricky lighting conditions—such as mixed indoor lights or when shooting under colored LED lights—Auto White Balance (AWB) can often be inaccurate. In these situations, it's better to manually adjust your white balance using presets or custom settings.
If you're unsure whether your white balance is correct
, take a moment to review your shots on the camera’s display. Zoom in and check the whites—are they truly white? If not, adjust the white balance and re-shoot.
Experience is the best teacher when it comes to white balance. By learning to observe different light sources and their temperatures, you’ll be able to anticipate how your photos will turn out and adjust your white balance accordingly.
Related: How to Use Natural Light for Stunning Photos
Related: Common Mistakes in Photography
By understanding and mastering white balance, you can greatly enhance the quality and professionalism of your photography. Whether you’re aiming for perfect color accuracy or using white balance creatively, getting it right will ensure your images always look their best.
Happy shooting!
Stay up to date with the newest tips, gear reviews, and step-by-step guides to elevate your photography journey from home and beyond.