Best Lighting Setup for Product Photography: A Complete Guide for Stunning Results

June 06, 2025

By RocketPages

Best lighting setup for product photography using softboxes, tripod, and reflectors in a studio

In product photography, lighting is more than just illumination—it’s your storytelling tool. It defines shape, sets the mood, reveals texture, and draws the viewer’s eye to what matters. Whether you're capturing artisanal crafts, glossy tech gadgets, or jewelry, the right lighting setup can turn a simple object into a compelling image that sells.


In this guide, you'll learn the best lighting setups, gear recommendations, and pro tips that not only improve your photos—but help grow a profitable photography business.


Why Lighting Is the Foundation of Product Photography


When someone sees your product photo, lighting is what creates that first emotional reaction. Harsh shadows, poor exposure, or dull tones can instantly make even a premium product look cheap.


  • Lighting builds trust: Clean, well-lit photos signal professionalism and quality—crucial for converting online shoppers.
  • Enhances detail & texture: Proper lighting reveals material, craftsmanship, and surface quality, making products look more desirable.
  • Differentiates your brand: Consistent lighting gives your brand a recognizable visual style across platforms.


📘 Ready to take your skills pro? Learn how others launched and scaled their careers in this beginner’s guide to building a photography business and step-by-step path to going full-time.


Natural Light vs. 💡 Artificial Light: Which Should You Use?


Both types of light can produce stunning results—but they come with trade-offs depending on your environment and goals.


1. Natural Light


  • Best for: Lifestyle product shots, handmade crafts, food photography
  • Pros: Soft and flattering; ideal for minimal setups; zero cost
  • Cons: Changes quickly with weather/time of day; hard to control consistency

Use natural light when you're shooting near a window with indirect sunlight. Add reflectors to fill shadows and get a clean, airy look perfect for Etsy shops or Instagram.


2. Artificial Light


  • Best for: Consistent product catalogs, shiny or reflective items, nighttime or indoor studios
  • Pros: Total control over brightness, shadows, and color temperature
  • Cons: Requires setup time, space, and equipment investment

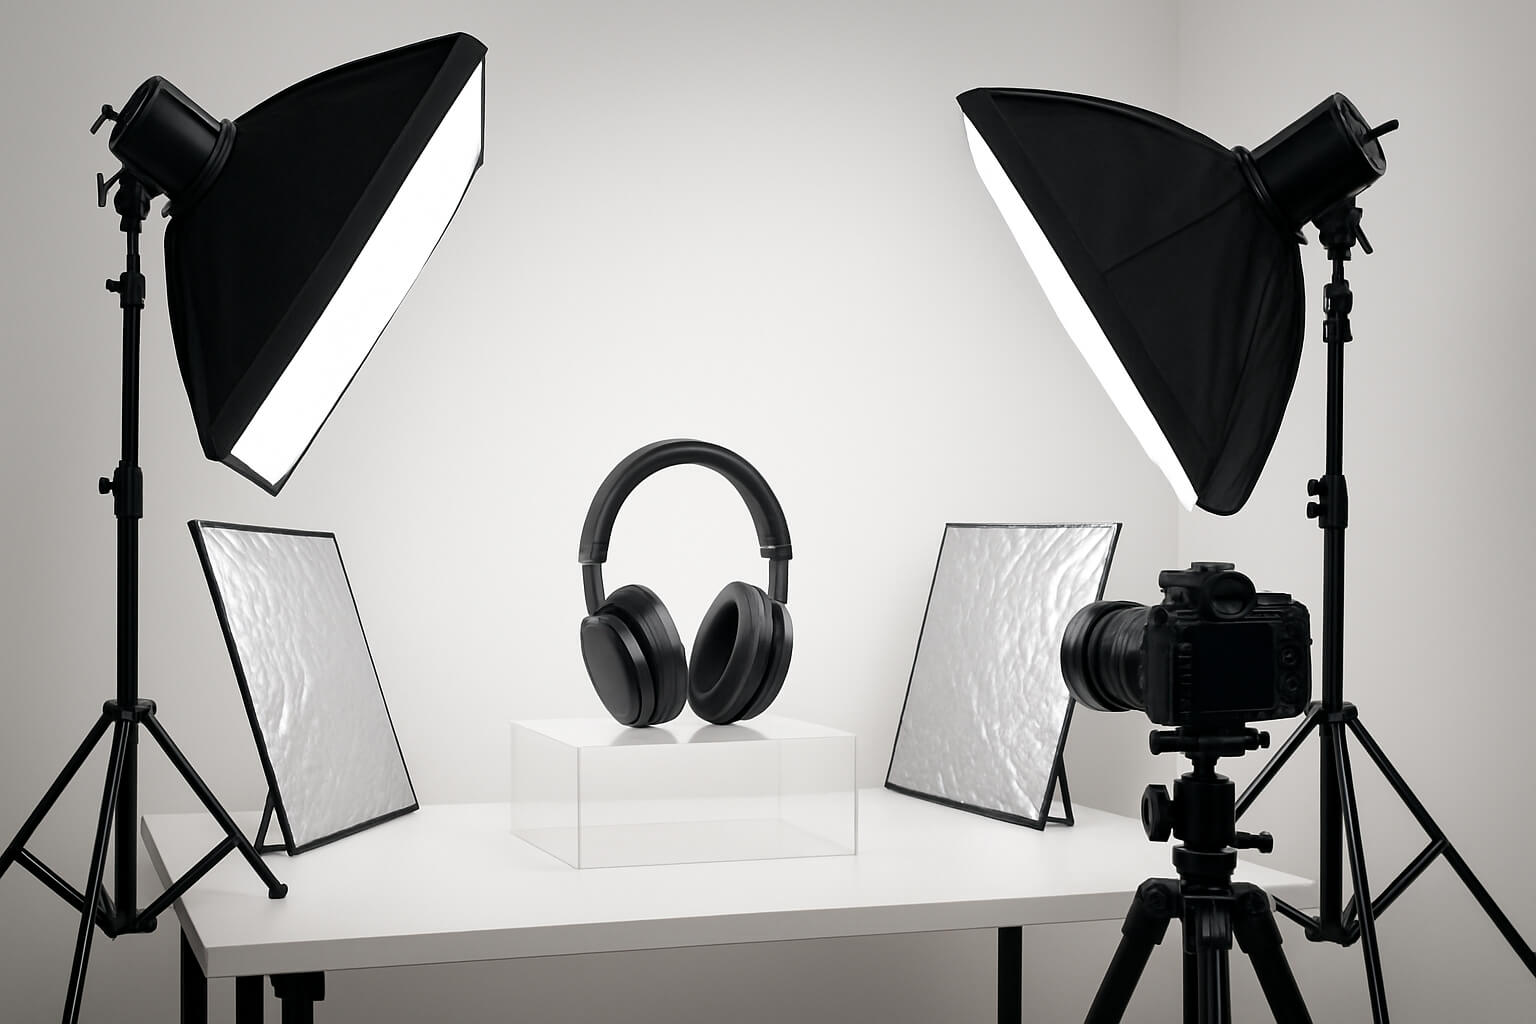
Artificial lighting is a must if you're shooting frequently or want consistency across hundreds of SKUs. LED panels, softboxes, and strobes allow you to fine-tune every photo.

Want to earn from your shots? Check out this guide on top websites to sell photos in 2025.


Essential Lighting Gear for Product Photography


Getting the right tools ensures your lighting setup works efficiently and professionally—without wasting time in post-editing.


  • Softboxes : Softboxes diffuse harsh light into a smooth, even glow, minimizing shadows and reflections. Place two at 45° angles facing the product to create even illumination.
  • Tip: Use larger softboxes for bigger products to avoid hard edges.


  • Light Tent (Light Box) : Ideal for small objects like watches, glasses, and jewelry, a light tent is a fabric enclosure that evenly distributes light and reduces glare from reflective surfaces.
  • Tip: Place lights on multiple sides of the tent for balanced exposure.


  • Reflectors : Reflectors bounce existing light back onto the subject to fill in shadows. Each color has a unique effect:
  • White: Neutral fill, great for balancing
  • Silver: Adds bright, cool highlights
  • Gold: Warms up skin tones or product colors


  • LED Panels & Ring Lights


Adjustable, portable, and beginner-friendly. Use them for top-down flat lays, beauty products, or when recording BTS content for marketing.


Looking to earn passively? Learn how to sell your product photos online


Product-Specific Lighting Setups (With Examples)


Each product type demands a tailored lighting setup to best showcase its features. Here's how to approach them:


1. Clean White Background for eCommerce


  • Setup: Two softboxes on the left and right at 45° + one overhead fill light
  • Use Case: Amazon, Shopify, eBay product listings
  • Key Tip: Keep your white backdrop wrinkle-free and ensure no color casts


White backgrounds are essential for clean, distraction-free product pages. They also help with background removal and automation.


2. Jewelry & Reflective Products


  • Setup: Light tent + side reflectors + soft overhead light
  • Use Case: Rings, watches, polished metal, or glass items
  • Key Tip: Use black flags or foam boards to block unwanted reflections


Position the lights carefully to highlight the sparkle of stones while avoiding mirror-like reflections that can ruin the shot.


3. Food & Textured Items


  • Setup: Side natural light or LED panel + opposite-side white reflector
  • Use Case: Restaurant menus, food blogs, social media
  • Key Tip: Side light emphasizes textures and makes food look fresh


Consider using a backlight for transparent drinks or a top-down soft fill to reduce harsh overhead shadows.


Want to make your images searchable? Optimize product photos for SEO and social platforms.


Perfecting Angles & Shadow Control


Each lighting angle creates a different look. Knowing when to use them is key:


  • Side Light: Adds depth and shape. Perfect for textured objects (e.g., fabrics, food).
  • Back Light: Highlights edges or transparent features, creating dramatic or ethereal effects.
  • Front Light: Flattens detail—good for documentation or clear product ID shots.
  • Overhead Fill: Minimizes harsh shadows under products, keeping the frame clean.


Want to protect your visual assets? Learn how to edit and secure your copyrighted photos.


How to Make Lighting Work for Your Business


Even the best lighting setup won’t grow your career unless paired with smart business practices. Here’s what pros are doing:


Final Pro Tips for Flawless Product Photography Lighting


Here’s how to ensure every shoot runs smoothly:


  • 🎨 Match color temperature: Use lights with the same Kelvin value (typically 5500K for daylight-balanced) to avoid color inconsistencies.
  • 🧪 Use a white balance card: It saves you hours of editing and ensures true-to-life colors.
  • 📸 Shoot in RAW: Allows greater flexibility in exposure and white balance adjustments later.
  • 🎯 Keep your editing consistent: This builds brand recognition and professionalism across all platforms.


In Summary


Lighting is not just a technical detail—it’s a creative decision with real business impact. When done right, it makes your photos not only more beautiful but more effective. It boosts conversions, attracts clients, and elevates your brand.

Recent Articles

Stay up to date with the newest tips, gear reviews, and step-by-step guides to elevate your photography journey from home and beyond.