In photography, leading lines are a powerful and visually engaging compositional tool. They naturally guide the viewer’s eye through the image, often leading directly to the subject. Whether you’re photographing landscapes, portraits, or architecture, incorporating leading lines can add balance, depth, and dynamism to your shots. In this guide, we’ll explore what leading lines are, why they matter, how to use them effectively, and how to make the most of them in post-processing.
What Exactly Are Leading Lines?
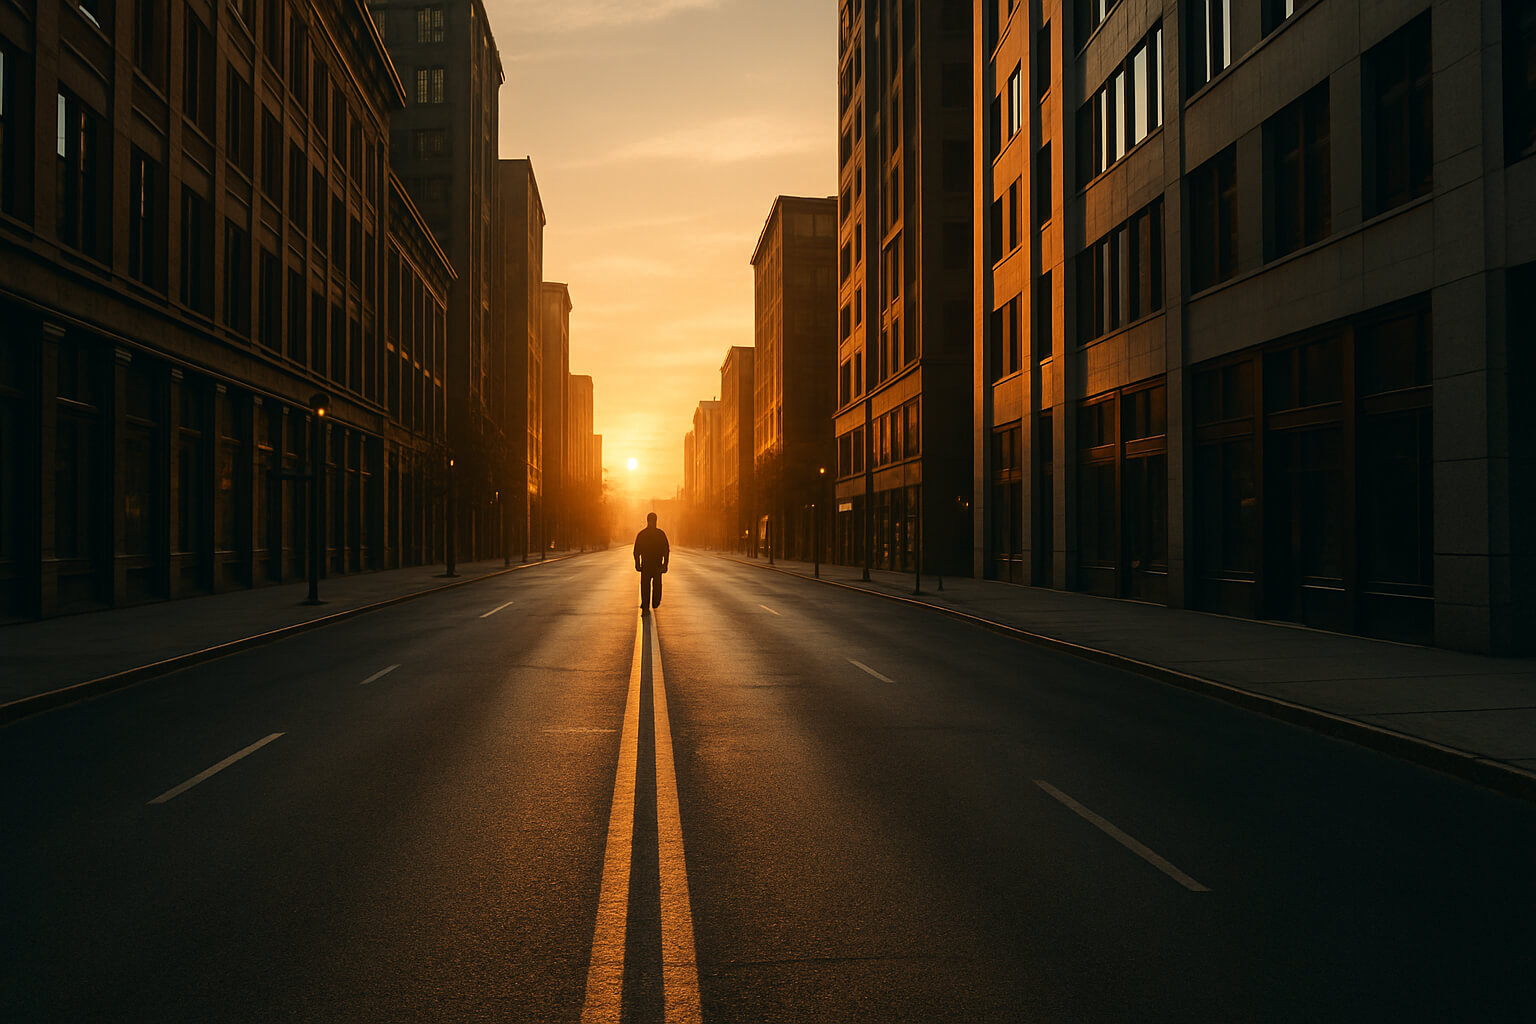
Leading lines are any lines in an image that draw the viewer’s eye toward a specific area of the photo, typically toward the main subject. These lines can be straight, curved, diagonal, or even implied, creating a visual path for the viewer to follow. The beauty of leading lines lies in their versatility — they can be found in almost any setting, both indoors and outdoors.
Some common examples of leading lines include:
- Roads and Pathways: Natural lines in landscapes or urban scenes.
- Rivers and Shorelines: Water features that naturally curve or follow a direction.
- Fences, Walls, and Railings: Architectural features that frame and guide attention.
- Bridges and Architecture: Man-made structures with clean, linear designs.
- Shadows and Light Patterns: Light and shadow can also create lines that lead the eye.
- Rows of Trees or Crops: Rows in nature or fields can provide leading lines that create a sense of depth.
Leading lines aren’t limited to literal lines — they can also be implied, such as the gaze of a person in a portrait or patterns in nature.
For more on composition, check out: What is Negative Space in Photography?
Why Leading Lines Matter
Leading lines can make a huge difference in the impact of your photos. Here’s why they are so important:
- Direct Attention to the Subject: Leading lines create a natural path that guides the viewer’s eyes toward your main subject. This makes it easier for the viewer to understand where to look and what to focus on in the photo.
- Create Depth and Dimension: Leading lines help you create the illusion of depth in a two-dimensional image. By creating a sense of perspective, leading lines give the image a 3D quality, which makes the scene feel more immersive and real.
- Enhance Storytelling: Just like in film, leading lines can help tell a story. By leading the viewer’s eye through the image, you can guide them to important elements, whether that’s the subject, the environment, or an important detail.
- Add Dynamism and Energy: Leading lines can add energy to your images. Whether it’s the tension created by diagonal lines or the calm flow created by curved lines, these visual paths introduce movement that adds life to your composition.
Types of Leading Lines
There are several types of leading lines that can be utilized in your photography, each evoking a different emotion or visual effect. Let's break them down:
- Straight Lines
- Examples: Roads, highways, train tracks, and bridges.
- Visual Impact: Straight lines often evoke a sense of stability, order, and predictability. They can create a strong, unbroken path that directs the viewer’s eye confidently toward the subject.
- When to Use: Straight lines are great for conveying themes of direction, journey, or even the passage of time. They are especially effective in architectural and urban photography.
- Curved Lines
- Examples: Rivers, winding roads, garden paths, and architectural elements like staircases or arches.
- Visual Impact: Curved lines add fluidity and elegance to an image. They lead the viewer’s eye in a gentle, flowing manner and can make the composition feel softer and more organic.
- When to Use: Curved lines work well in natural settings, such as landscape photography, as they mimic the flow of nature. They also add a sense of grace and serenity.
- Diagonal Lines
- Examples: Hillsides, stairs, or shadows cast at an angle.
- Visual Impact: Diagonal lines add a sense of movement and dynamism. They create a feeling of tension and energy in the frame, and often convey action or dramatic intensity.
- When to Use: Diagonal lines are perfect for high-energy scenes, such as sports photography, action shots, or images where you want to evoke excitement and urgency.
- Converging Lines
- Examples: Two lines meeting at a vanishing point, such as railway tracks or roads converging in the distance.
- Visual Impact: Converging lines are a powerful perspective tool. They emphasize depth and the scale of a scene, often creating a dramatic sense of perspective.
- When to Use: Converging lines are great for wide-angle shots, particularly in landscapes and architecture. They make the viewer feel as though they are entering the scene or being pulled into the distance. Mastering Long Exposure Landscape Photography
- Implied Lines
- Examples: Lines that are suggested by the positioning of subjects, such as the gaze of a person, the alignment of objects, or even light and shadow patterns.
- Visual Impact: Implied lines are subtle yet effective. They often guide the viewer’s eye indirectly, using elements that aren’t strictly linear but still create a flow.
- When to Use: Implied lines are great for portraits or any situation where you want to create a natural, organic flow without relying on a hard, visible line.
- For portrait composition, also see: Best Lenses for Portrait Photography
How to Use Leading Lines Effectively
To make the most of leading lines in your photography, here are some key tips:
- Scout for Natural Lines: Look for locations or environments that naturally have leading lines, such as urban areas with roads or fences, beaches with shorelines, or forests with tree rows. Even indoors, things like hallways, doorways, and windows can provide great leading lines.
- Position Your Subject at the Convergence Point: Place your subject where the leading lines converge or lead. This draws attention directly to them and makes the composition feel balanced and intentional.
- Experiment with Different Angles: To emphasize the leading lines in your frame, experiment with shooting from different angles. Try shooting low to the ground to exaggerate the lines, or shoot from above to show the full extent of the lines and their convergence.
- Use Wide-Angle Lenses: Wide-angle lenses are fantastic for exaggerating the effect of leading lines, especially in landscape photography. They allow you to capture more of the scene, making the lines appear more dramatic.
- Best Cameras for Beginners in 2025
Post-Processing for Leading Lines
Post-processing allows you to refine and emphasize the leading lines in your image. Here are some tips:
- Crop for Emphasis: Crop your image to place the leading lines more effectively in the frame. This can enhance the flow and strengthen the directionality of the lines.
- Dodge and Burn: Lighten the areas along your leading lines using the dodge tool, or darken the surrounding areas using the burn tool. This adds contrast and guides the viewer’s eye more powerfully toward the subject.
- Color Grading: Subtle shifts in color grading can make the leading lines stand out. For example, adjusting the warmth or saturation of the lines can make them pop against the rest of the image. What is Color Grading in Photography
For cleanup and refinements, check out: How to Remove Unwanted Objects from Photos
Final Tips
To wrap it all up, here are a few final tips to perfect your use of leading lines:
- Practice Regularly: The more you shoot, the better you’ll become at spotting and using leading lines. Try practicing in different environments to see how lines work in various settings.
- Combine with Other Composition Rules: Don’t just rely on leading lines. Combine them with other compositional techniques, like the rule of thirds, to create a balanced and compelling image.
- Study Great Photographers: Look at the works of renowned photographers to understand how they use lines to enhance storytelling and composition.
Bonus: How to Take Professional Looking Photos