How to Take Silhouette Landscape Photos at Sunrise
Silhouette photography at sunrise is a powerful style that evokes mood, emotion, and a sense of mystery. By positioning your subject against the brightly lit sky, you can capture stunning images that combine simplicity with drama. In this guide, we’ll cover everything from the perfect gear to detailed camera settings, composition tips, and post-processing techniques to help you master this breathtaking photography style.
Why Sunrise is Perfect for Silhouettes
The conditions during sunrise are uniquely suited for silhouette photography. Here's why:
- Soft, Diffused Light: The light at sunrise is soft and diffused. Unlike the harsh, direct light of midday, the morning light gradually illuminates the landscape, creating gentle gradients in the sky and reducing the likelihood of harsh shadows. This is ideal for capturing clean and smooth silhouettes.
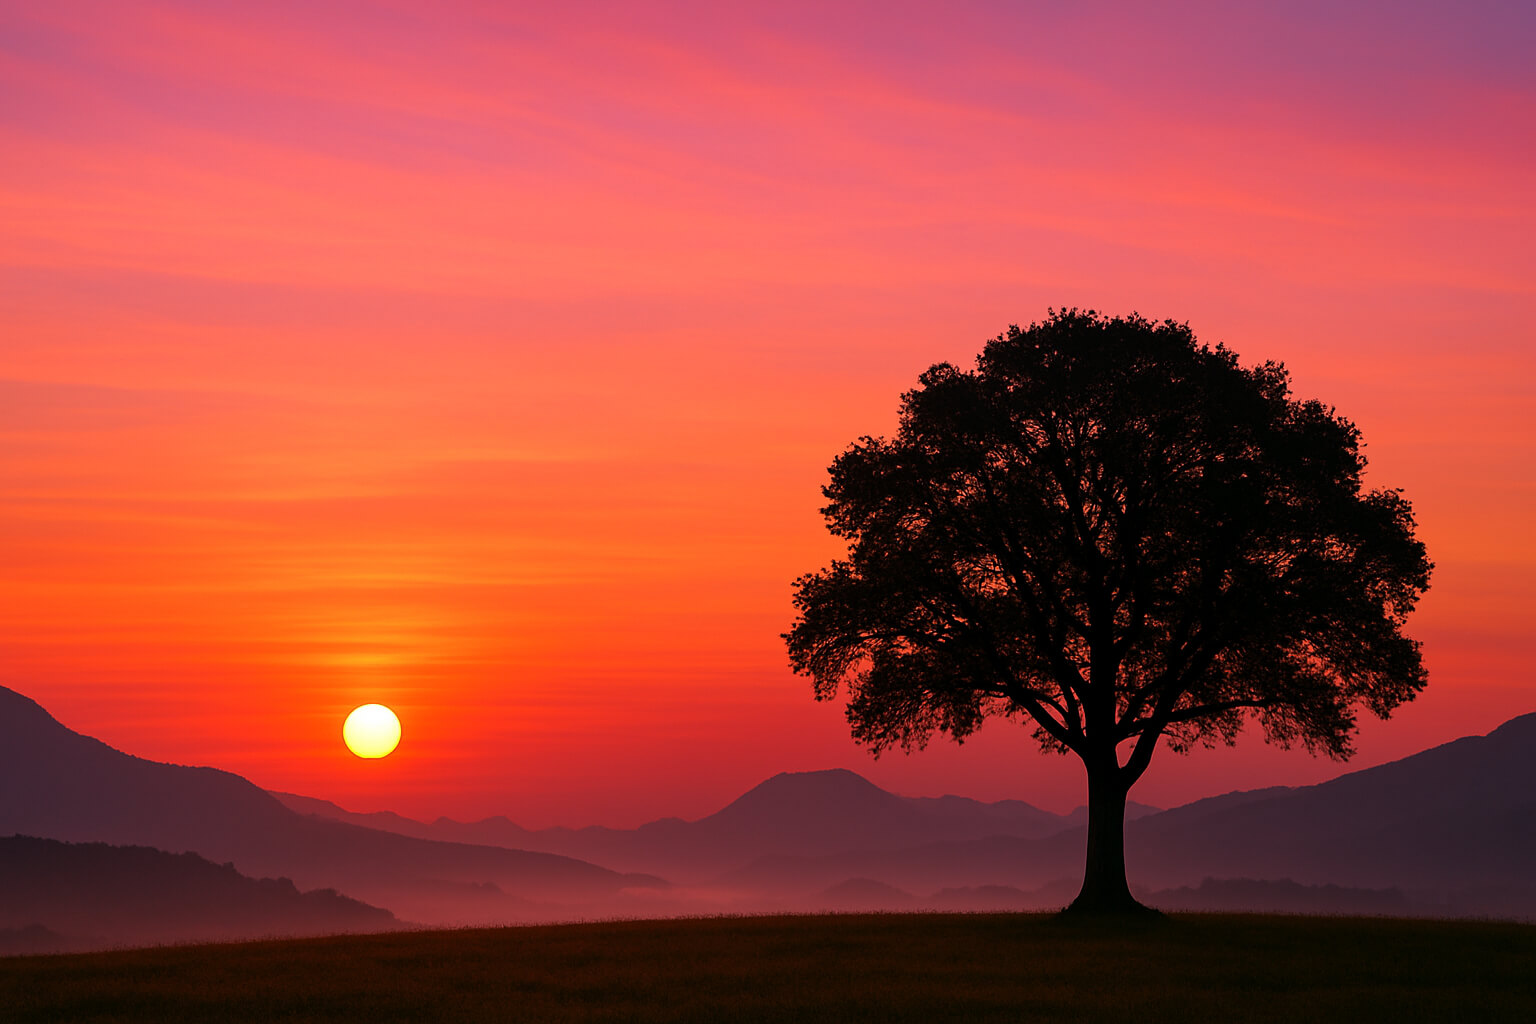
- Vibrant Sky Colors: As the sun rises, the sky is painted in rich, vibrant hues of orange, pink, purple, and gold. These warm tones create a striking contrast with the dark outlines of your subject, making the silhouette stand out beautifully.
- Atmospheric Elements: Sunrise often brings mist, fog, or low-hanging clouds, adding layers of depth and texture to your scene. These elements contribute to the ethereal and dramatic quality of your photo, helping convey a sense of mystery and tranquility.
- Explore related:
- Mastering Long Exposure Landscape Photography (to enhance your sunrise shots)
- How to Photograph Foggy Landscapes for an Ethereal Look (tips on incorporating mist into your photos)
Gear You Need
To capture the best silhouette landscape photos at sunrise, it’s essential to have the right gear. The right tools will allow you to capture crisp details, manage light exposure, and maintain stability during long exposures.
- Camera: A DSLR or mirrorless camera with manual controls is highly recommended. Manual controls allow you to fine-tune settings like shutter speed, ISO, and aperture, which is crucial for silhouette photography. If you're just starting, even some smartphone cameras now offer manual controls and can produce stunning results. (Best Camera for Beginners)
- Lenses: Wide-angle lenses are ideal for capturing expansive landscapes and the dramatic sky that will be the backdrop for your silhouette subject. Lenses in the 14mm to 35mm range give you a broader field of view, allowing you to frame both the subject and the sky. A wide-angle lens helps capture the grandeur of the scene while keeping the subject in proportion to the surrounding elements. (Best Lenses for Landscape Photography)
- Tripod: Since sunrise shots often require long exposure times (to capture the softer light and vibrant colors), a tripod is essential. It keeps your camera steady and prevents any blurriness caused by hand shake. Look for a lightweight yet sturdy tripod that’s easy to carry to remote locations. Many tripods now come with adjustable legs for shooting at different angles and heights. (Best Tripods 2025)
- Remote Shutter Release: A remote shutter release allows you to take photos without touching the camera, preventing any vibrations or camera shake, especially when shooting at slower shutter speeds. It’s a small but invaluable tool for getting sharp, clear images. Some camera models even offer wireless options.
- Filters: Filters like graduated ND (Neutral Density) or polarizing filters help balance the exposure between the bright sky and darker foreground. A graduated ND filter allows you to darken the bright sky while maintaining proper exposure in the foreground, ensuring the subject of your silhouette remains visible but not overexposed. A polarizer, on the other hand, enhances contrast and reduces glare from water or wet surfaces, adding depth to the shot. (Best Filters for Dramatic Landscape Photography)
Camera Settings
Getting the exposure and focus right is key to capturing a beautiful silhouette. Here’s a more detailed breakdown of the settings you should use:
- Mode: Use manual mode to have full control over your camera settings. Silhouette photography relies on precise exposure control, and manual mode allows you to adjust the settings for your specific scene.
- ISO: Keep your ISO low (100-200) to reduce noise and ensure clean, sharp images. The higher the ISO, the more grainy the image will be, which could detract from the sharp contrast between the subject and the background.
- Aperture: Set your aperture between f/8 and f/16 for a deep depth of field. This ensures both the foreground and background are in sharp focus, which is important when you’re capturing a landscape scene. A smaller aperture also keeps the horizon and distant elements clearly visible.
- Shutter Speed: The ideal shutter speed depends on the brightness of the scene. Start with a slower shutter speed (around 1/60s to 1/250s) and adjust as needed. If you’re shooting during golden hour, a slower shutter speed will allow enough light to hit the sensor without overexposing the sky. Consider bracketing your shots (taking multiple exposures) to ensure you get the perfect shot.
- Focus: Use manual focus for precise control. In silhouette photography, autofocus might struggle, especially in low light, so setting the focus manually ensures sharpness. Focus on your subject or use hyperfocal distance to achieve maximum depth of field.
- Metering: Use spot metering to expose for the brightest part of the sky (often near the horizon). This technique ensures that the sun or sunrise colors are correctly exposed without overexposing the silhouette subject.
- Explore:
- How to Take Cinematic Wedding Photos (this also covers key composition and camera settings)
Composing the Silhouette
Effective composition is critical to creating a visually stunning silhouette photograph. Here are detailed tips for arranging your subjects:
- Position Your Subject Against the Sky: The key to creating a strong silhouette is ensuring your subject is placed between the camera and the light source (the sun). Whether it's a person, tree, building, or mountain, position it against the bright sky to create a defined shape.
- Rule of Thirds: Using the rule of thirds helps create a balanced, dynamic composition. Place your subject off-center (either to the left or right of the frame), allowing the background sky to fill the remaining space. This not only adds interest but also guides the viewer’s eye across the image.
- Defined Edges: The clearer and more defined the edges of your subject, the better your silhouette will appear. Avoid having your subject blend into the background or have messy outlines that detract from the image’s impact. Look for strong shapes or natural lines that contrast well with the sky.
- Incorporate Foreground or Background Elements for Depth: Adding layers to your composition, like mist, rocks, or distant hills, enhances the three-dimensional feel of the image. It also creates a sense of depth, making the silhouette feel more embedded in the landscape.
- Learn more:
- What is Negative Space in Photography (understanding how to use space effectively in your compositions)
Lighting Tips
Silhouette photography is all about playing with light. Here’s how to harness the lighting during sunrise:
- Backlight Your Subject: To achieve a silhouette, the light source must be behind the subject. Position the sun or sunrise just below the horizon line to create a sharp contrast between the dark subject and the colorful sky.
- Golden Hour Timing: Arrive early and capture the soft light during the golden hour—the time shortly before and after sunrise. This is when the light is the most flattering, and the colors in the sky are at their richest.
- Utilize Fog or Mist: Mist or fog can add a beautiful atmospheric quality to your image. It softens the edges of the subject and creates a dreamlike mood. Look for scenes where fog rolls through the landscape for added texture and depth.
- Explore:
- How to Photograph Foggy Landscapes
Post-Processing
Once you’ve captured your silhouette photos, it’s time to bring them to life in post-processing. Here are some advanced tips for enhancing your images:
- Increase Contrast: Enhancing contrast will deepen the silhouette effect, making your subject stand out sharply against the bright background. Increase the blacks in your image while adjusting the midtones to maintain detail in the scene.
- Adjust Color Vibrancy: Boosting the vibrancy of the sunrise colors can enhance the mood of the photo. Focus on bringing out the rich oranges, pinks, and purples in the sky.
- Remove Distractions: Use spot healing or the clone tool to remove any distractions or unwanted elements from the frame. This is especially important for eliminating any light artifacts or objects that might detract from the silhouette subject.
- For color toning:
- Color Grading in Photography
- Color Correction vs. Grading
Mistakes to Avoid
To make the most of your silhouette landscape shots, avoid these common mistakes:
- Overexposing the Sky: While it's tempting to let the bright colors in the sky shine, overexposing will result in a loss of detail. Ensure you adjust your exposure so the sunrise colors remain rich and the silhouette stays dark and defined.
- Underexposing the Scene: While silhouettes should be dark, they should not be completely underexposed. Ensure the subject has clear outlines and doesn’t blend into the dark foreground.
- Not Stabilizing the Camera: Long exposure shots require a stable camera. Always use a tripod to avoid any movement, and consider a remote shutter release to eliminate camera shake.
- Cluttered or Messy Subjects: Choose subjects with clean, bold lines. Avoid scenes with too much clutter or overlapping shapes that can make the silhouette unclear and reduce the visual impact.
With these detailed tips and techniques, you're all set to capture stunning silhouette landscape photos at sunrise. Remember, practice is key—experiment with different settings, compositions, and timings, and soon you’ll master the art of silhouette photography.
