
June 09, 2025
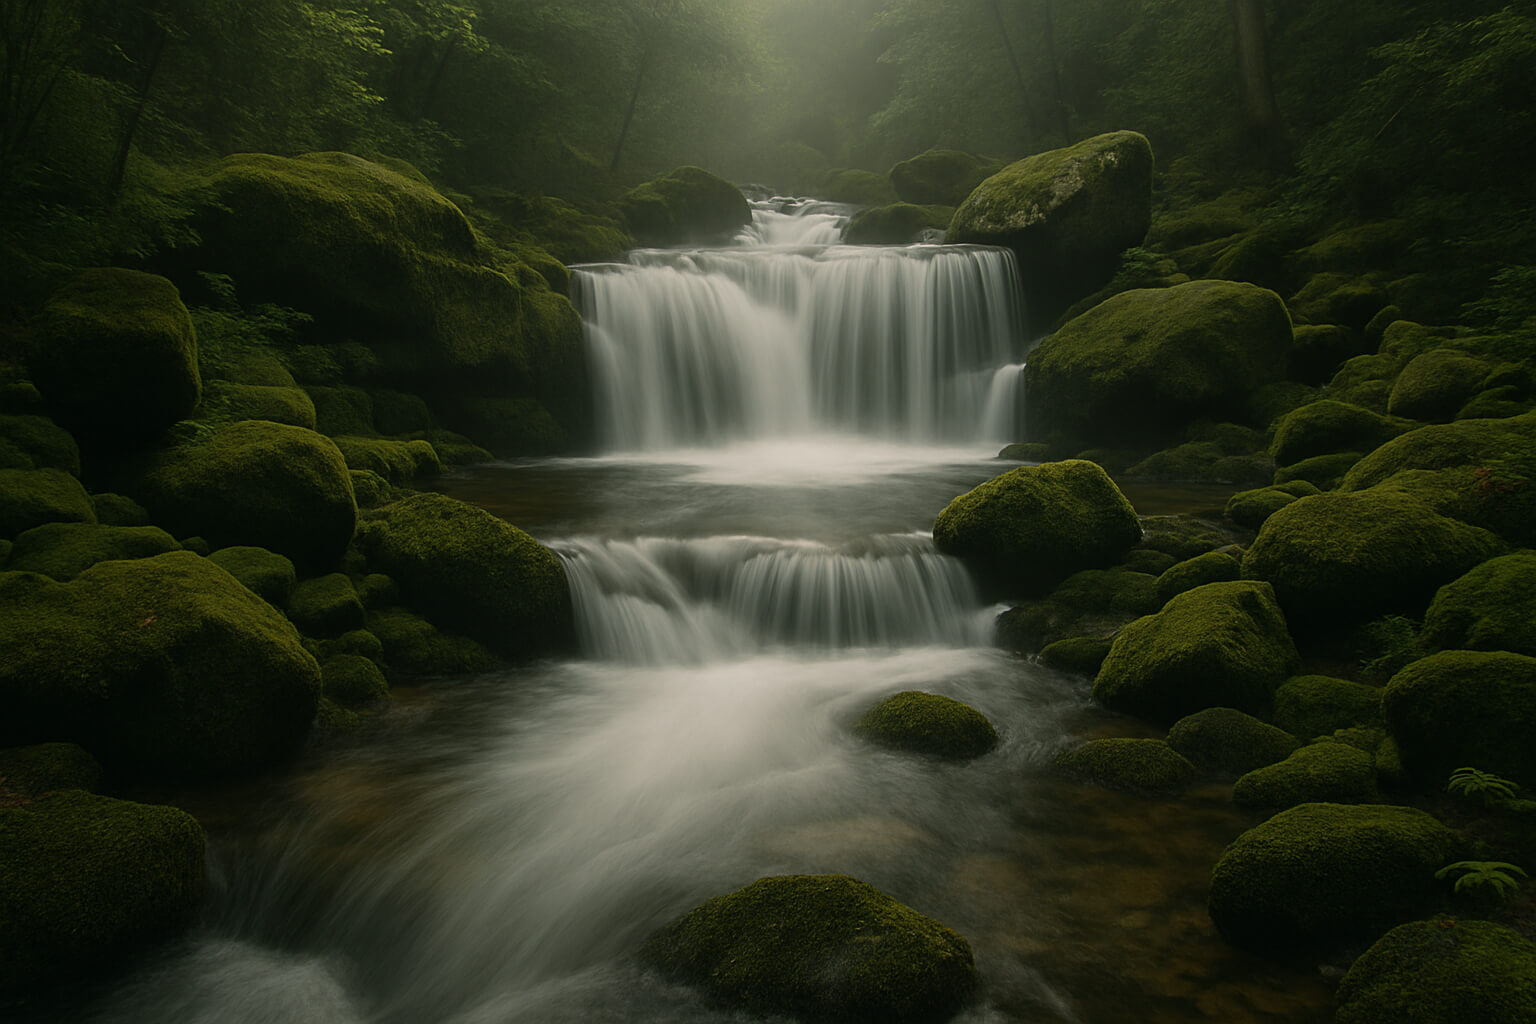
Capturing the smooth, silky flow of waterfalls through long exposure photography is a timeless way to transform a simple natural scene into an ethereal work of art. This technique requires balancing technical skill with creative vision. Here’s a step-by-step deep dive into the process to help you master the dreamy waterfall shot.
Slow shutter speeds, necessary for creating that smooth blur effect in waterfalls, can range from fractions of a second to several seconds or more. When your camera’s shutter is open that long, even the tiniest movement causes unwanted blur, ruining sharpness across your entire frame.
A high-quality tripod is your foundation. It must be sturdy enough to prevent wobble on uneven terrain—often found near waterfalls—but portable enough for hiking to remote locations. Popular choices like the Manfrotto Befree Advanced provide an excellent balance of strength and compactness, while the Peak Design Travel Tripod offers lightweight versatility favored by travel photographers.
Investing in a good tripod isn’t optional — it’s essential to consistently capture sharp, professional images during long exposures.
Check the latest options here: Best Tripods for Travel and Studio Photography
The hallmark of dreamy waterfall photos is the sense of motion captured by long exposures. A slow shutter speed blurs the rapidly moving water while keeping static elements—like rocks and trees—sharp.
However, long exposures in daylight risk overexposure (excessive brightness). To control this, photographers use Neutral Density (ND) filters that act like sunglasses for your lens, reducing light intake without altering color.
Popular ND filters include the NiSi ND1000 (10-stop filter), which lets you use multi-second exposures even in bright sun, and the Tiffen Variable ND, which offers adjustable light reduction for versatility.
These filters open up creative possibilities and are invaluable gear for waterfall and other long exposure photographers.
Explore ND filters: NiSi ND Filters
Selecting your aperture and ISO carefully helps balance exposure and maximize image quality.
Combining low ISO and narrow aperture requires a slower shutter speed to maintain proper exposure—exactly what creates the waterfall’s blur effect.
Manual mode is essential here. It lets you control all three parameters—shutter speed, aperture, and ISO—fine-tuning your exposure based on light conditions and desired creative effect.
Waterfalls can be tricky subjects under harsh light because strong direct sun creates high contrast, harsh shadows, and blown highlights in water. To capture texture and detail without losing the mood, soft, diffused light is ideal.
Aim to shoot:
Soft light helps preserve detail in flowing water, wet rocks, and surrounding greenery, producing images that feel immersive and balanced.
Learn more about harnessing natural light effectively: How to Use Natural Light for Stunning Photos
Even with a tripod, pressing the shutter button introduces subtle vibrations that can blur images, especially at slower shutter speeds.
Avoid this by:
This extra step ensures your images stay sharp and your waterfall retains that crystal-clear detail around the flowing blur.
Composition is key to transforming a simple waterfall into a compelling photo.
Leading lines—such as streams, fallen logs, or water trails—guide the viewer’s eye through your photo and strengthen storytelling.
Post-processing is the final, crucial stage for elevating your waterfall photos.
Editing software like Adobe Lightroom provides precise control for these adjustments, while AI-enhanced tools such as Luminar Neo can speed up your workflow and offer creative filters.
Discover more editing possibilities: Best Photo Editing Apps in 2025
Silky, blurred waterfall photography combines technical precision with artistic creativity. It requires patience to experiment with exposure times, lighting conditions, and compositions, but the payoff is images that capture both motion and tranquility in breathtaking harmony.
Armed with a sturdy tripod, neutral density filters, thoughtful composition, and post-processing know-how, you’re well-equipped to craft stunning, dreamy waterfall photos that resonate emotionally and visually.
Related Reads:
Stay up to date with the newest tips, gear reviews, and step-by-step guides to elevate your photography journey from home and beyond.