
June 12, 2025
Infrared photography opens up a new realm of possibilities, allowing photographers to capture breathtaking, surreal images of the world around them. Unlike traditional photography, which only uses visible light, infrared photography uses light wavelengths that the human eye cannot see, often resulting in dreamlike or otherworldly images. Whether it's glowing white foliage, dramatic dark skies, or unique reflections in water, infrared photography transforms ordinary scenes into extraordinary works of art. This comprehensive guide will introduce you to the fascinating world of infrared photography, the gear you need, and pro tips to get the most out of this captivating technique.
Infrared (IR) photography captures wavelengths of light that are longer than visible light, typically between 700nm to 900nm. These wavelengths are beyond what the human eye can perceive, allowing you to capture a world unseen by the naked eye. Unlike regular photography, which depends on visible light, infrared photography uses the unique way that different surfaces reflect or absorb infrared light.
Key Features of Infrared Photography:
Infrared photography is a powerful tool for creating stunning and surreal images. It is especially useful for fine art photography, landscape photography, and experimental projects where you want to create a dreamlike or cinematic atmosphere.
Related: What Is Artistic Photography?
While you can use some of your regular gear for infrared photography, certain specialized equipment can help you achieve the best results. Here’s a breakdown of the essential tools you'll need to get started.
1. Infrared-Converted Camera: Infrared photography requires a camera that can capture infrared light, but most digital cameras are designed to block infrared light in order to produce normal color images. The solution? Infrared-converted cameras. These cameras are modified by removing the infrared blocking filter inside the camera body and replacing it with a filter that allows infrared light to pass through to the image sensor.
Many DSLR or mirrorless cameras can be converted to infrared by specialized companies. Popular options include the Canon EOS 5D Mark III or the Nikon D750. Alternatively, you can use your existing camera and attach a specific infrared filter to your lens, though this can result in longer exposure times and requires more post-processing work.
If you’re just starting out and unsure whether to invest in a converted camera, testing an infrared filter on your current camera is a great way to experiment with infrared photography.
2. Infrared Filters: For those not using a converted camera, infrared filters are essential. These filters block visible light while allowing infrared light to pass through. They come in different strengths depending on the amount of visible light you want to block. Common options include the R72 filter, which blocks most visible light and only allows infrared light, and the 590nm filter, which allows some visible light through while predominantly focusing on infrared wavelengths.
Using a filter will help you explore the infrared aesthetic without having to convert your camera.
3. Tripod: Infrared photography typically requires long exposure times, especially when shooting in lower light conditions or when using infrared filters. A sturdy tripod is essential to ensure your camera remains still during these extended exposures. A good tripod helps avoid camera shake, which can blur your image and ruin the surreal effect.
Related: Best Tripods for Travel and Studio Photography
4. Lens Selection: For infrared photography, wide-angle lenses and prime lenses are often the best choices. Wide-angle lenses allow you to capture large landscapes, which are ideal for infrared photography because the stark contrast between foliage and sky creates striking compositions. Prime lenses offer sharpness and clarity, which is crucial for infrared shots.
However, it’s important to note that some lenses are prone to hot spots, which occur when bright areas of the image appear with unnatural color shifts or overexposure. To avoid this, it's advisable to test lenses before using them for infrared photography.
Related: Best Lenses for Portrait Photography
Also explore: Must-Have Camera Accessories
Infrared photography requires specific camera settings due to the unique nature of infrared light. Here’s what you need to adjust to get the best results.
1. ISO
In infrared photography, it’s important to use a low ISO setting (usually between 100-400) to minimize noise in your images. Since infrared light is less intense than visible light, a higher ISO could introduce graininess and reduce the overall quality of your photos. A low ISO ensures cleaner, more detailed images.
2. Aperture
To ensure sharp focus throughout the image, use an aperture setting of f/8 to f/11. A smaller aperture will give you a greater depth of field, which is essential when capturing landscapes or wide scenes. A wider aperture (e.g., f/2.8) may result in parts of the scene being out of focus, which can be undesirable unless you’re aiming for a specific effect.
3. Shutter Speed
Infrared photography often requires longer exposure times since infrared light is less intense than visible light. Depending on the strength of your filter and the light conditions, you may need to experiment with shutter speeds ranging from several seconds to minutes. For example, when shooting in bright sunlight, you may need to adjust your shutter speed to capture enough infrared light without overexposing the image.
4. White Balance
White balance is especially important in infrared photography, as it can dramatically affect the final result. Most infrared photographers use a custom white balance setting to ensure the colors are accurately rendered. Adjusting the white balance can help you achieve the iconic “blue-sky, white-foliage” look or create a unique color palette for your images.
Infrared photography works best in specific lighting conditions. While traditional photography often avoids harsh midday sun, infrared photography thrives in these bright conditions. Here are the best lighting situations for shooting infrared photos:
1. Midday Sun
Unlike traditional photography, infrared photography benefits from bright midday sunlight. The intense light enhances the contrast between the bright foliage and dark sky, helping to create the dramatic and surreal effects infrared is known for.
2. Clear Skies
Clear skies are ideal for infrared photography, as the sunlight interacts with the atmosphere in unique ways, resulting in a darkened sky. This contrast helps to emphasize the glowing foliage and adds to the otherworldly effect of your images.
3. Cloudy Days
On overcast days, you’ll experience softer, more even lighting. Cloud cover diffuses the sunlight, resulting in more subtle tones in your infrared images. This is perfect for capturing dreamy or ethereal scenes with less dramatic contrast.
Related: How to Use Natural Light for Stunning Photos
Even though infrared photography provides a unique aesthetic, composition remains essential. Here are some techniques to make your infrared images stand out:
1. Leading Lines
Using leading lines in your composition—such as rivers, paths, or fences—can guide the viewer’s eye through the image. This adds depth and makes the photo feel more dynamic. In infrared photography, leading lines can help break up the surreal elements of the image and provide structure.
Related: What Are Leading Lines in Photography?
2. Negative Space
Infrared photography is great for minimalist compositions. By using negative space—empty space around your subject—you can create a serene, almost mystical effect. This is especially effective with large landscapes, where the empty sky or barren ground can balance the glowing foliage.
Related: What is Negative Space in Photography?
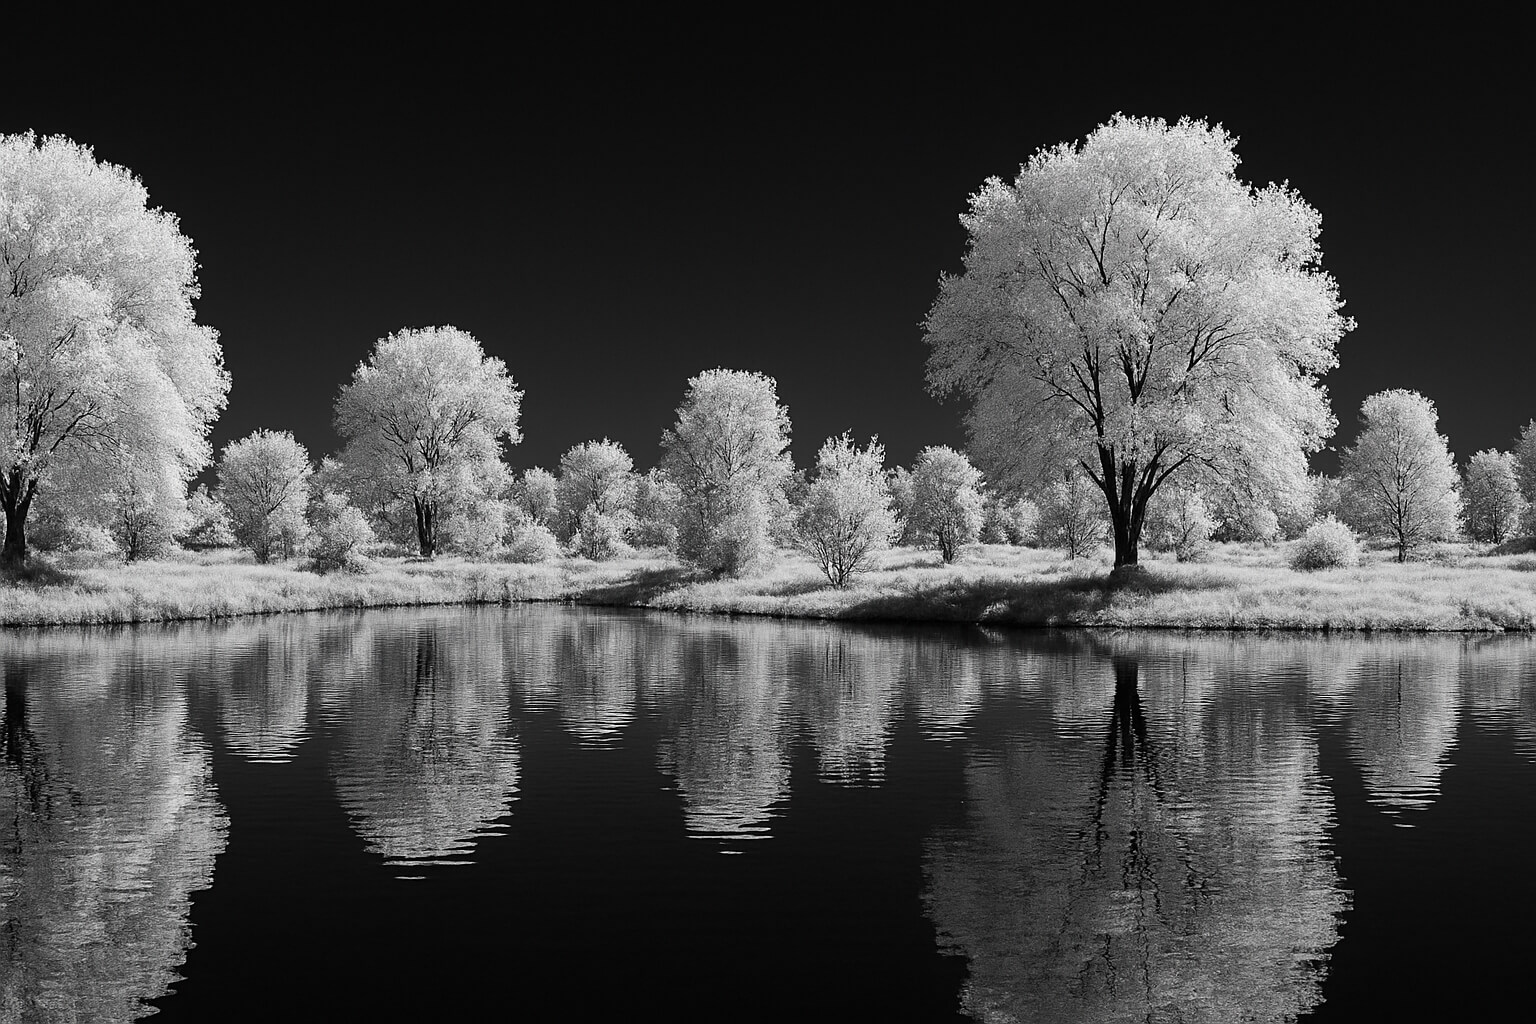
3. Reflections
Look for reflections in
water or windows to add an extra layer of depth to your infrared shots. The unique way infrared light interacts with reflective surfaces can create striking effects that you wouldn't see in regular photography.
Related: How to Take Creative Reflection Photos
Post-processing is essential to bring out the full potential of your infrared photos. Here’s how to enhance your infrared images in post-production:
1. White Balance Correction
After shooting infrared, it’s likely that the colors in your image will need to be adjusted. You can shift the white balance to create the desired effect, such as a blue sky with glowing white foliage or a more subtle tone.
2. Channel Swapping
One of the most popular techniques in infrared photography is channel swapping. By swapping the red and blue channels in your image, you can achieve the iconic look of blue skies and white or light-toned foliage, a signature of infrared photography.
3. Contrast & Clarity
Enhance the contrast and clarity of your infrared images to bring out the surreal textures and striking details. Adjusting contrast will make the light and dark areas of the image more pronounced, adding to the dramatic effect.
4. Color Grading
Color grading is used to set the overall mood of your infrared images. You can apply cinematic tones, giving your images a more stylized and artistic look. This process allows you to experiment with various color schemes and atmospheres.
Related: Color Grading in Photography
Also explore: Best Photo Editing Apps
Related: How to Remove Unwanted Objects from Photos
Here are a few professional tips that will help you make the most of your infrared photography experience:
1. Start with Infrared Filters
Before committing to an infrared-converted camera, try an infrared filter on your current camera to get a feel for the style. This is a low-cost way to explore infrared photography before investing in more specialized gear.
2. Shoot in RAW
Always shoot in RAW format. RAW files retain more image data than JPEGs, providing you with more flexibility for post-processing, especially when making adjustments to white balance, color channels, and contrast.
3. Avoid Windy Days
Wind can cause foliage to move, which can blur your infrared shots, especially during long exposures. For the best results, try shooting on calm days when the vegetation stays still.
4. Experiment
Infrared photography encourages experimentation. Don’t hesitate to play with different compositions, lighting conditions, and post-processing techniques to discover your own unique style. The surreal quality of infrared photos makes it an ideal medium for creative experimentation.
Related: How to Take Professional-Looking Photos
Infrared photography offers an exciting way to capture hidden details and surreal, dreamlike images. By using the right gear, adjusting your camera settings, and honing your post-processing skills, you can create breathtaking images that go beyond the visible spectrum. Happy shooting!
Stay up to date with the newest tips, gear reviews, and step-by-step guides to elevate your photography journey from home and beyond.