
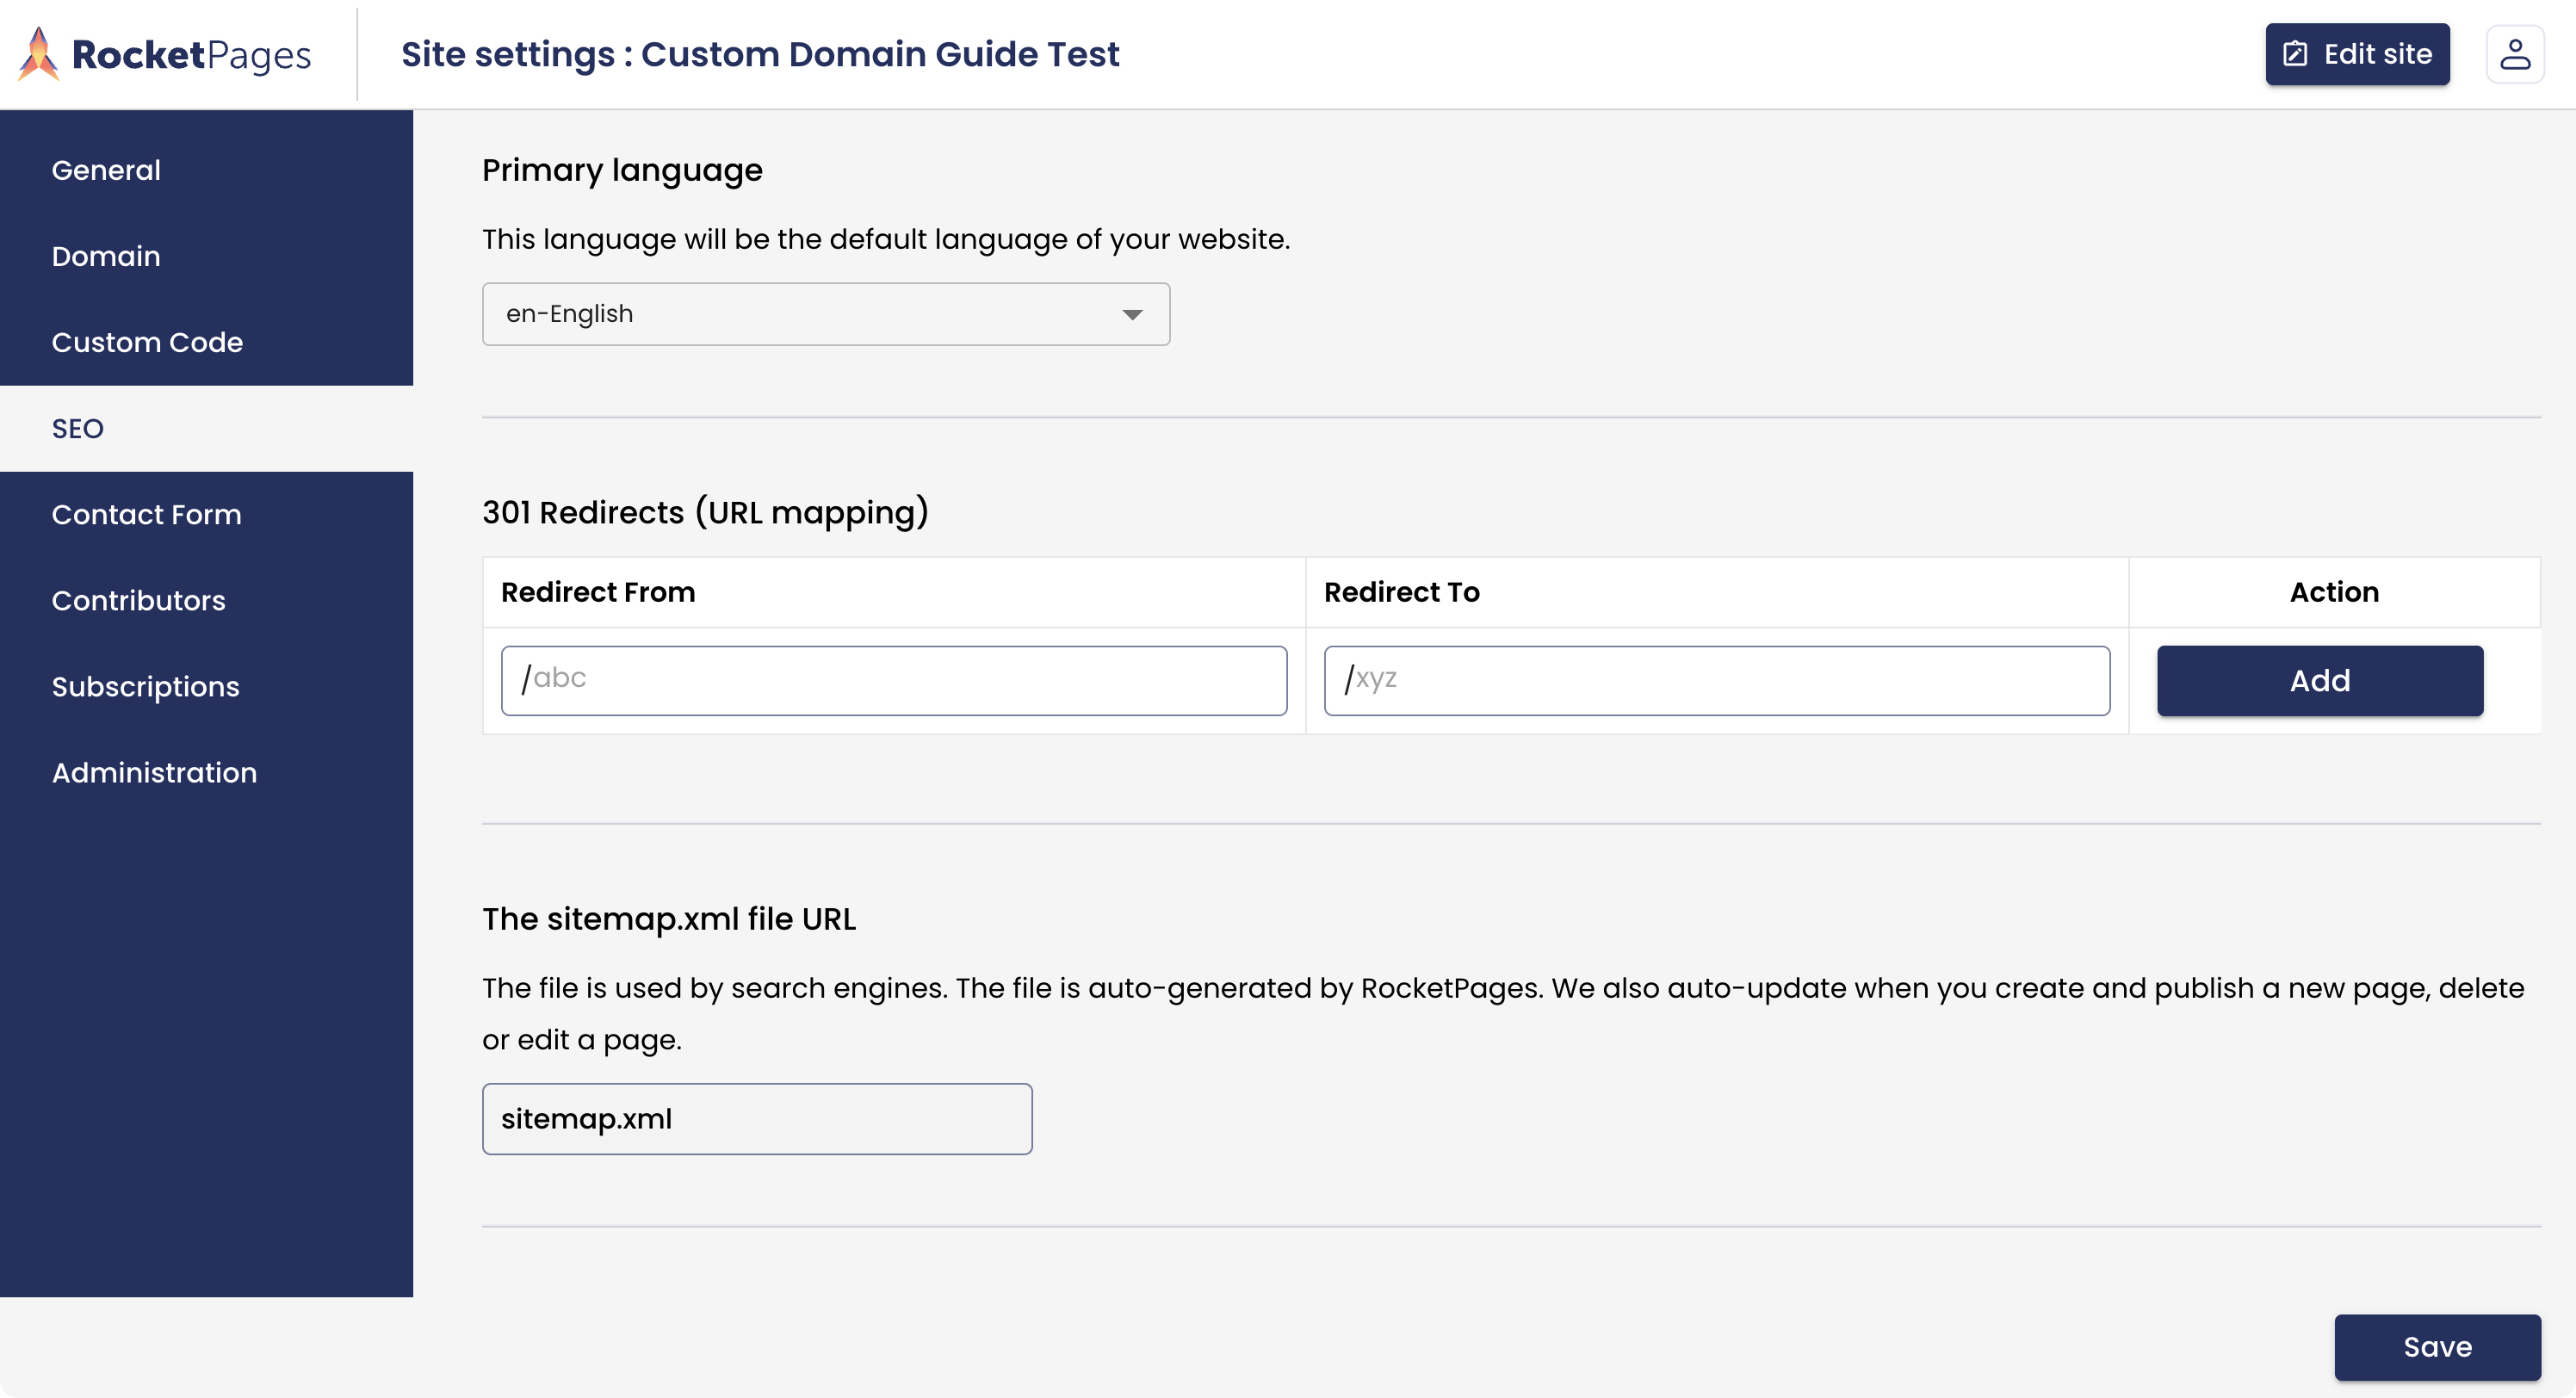
To prepare a RocketPages website for search and AI discovery, give each page a clear name and description, publish useful content on your chosen domain, check the sitemap and crawl access, and monitor indexing. In the visual editor, start with Page Settings. For language, redirects, and sitemap information, open Site settings → SEO.
These steps make your content easier to find and understand. They do not guarantee a search ranking or an AI citation. Google says its AI search features use the same core SEO foundations as ordinary Search, without a separate required AI file or special schema. Read Google’s guidance on AI features and websites.
The screenshots below use the unpublished “Custom Domain Guide Test” site. ClearPath Studio is a sample business used to illustrate the fields. The screenshots demonstrate settings, not a verified ranking or indexed website.
Open your website in the RocketPages editor. Select the page, choose Page Settings, and open General. Review the Page name. For an ordinary inner page, also review its URL before publishing.
Use a name that describes the page’s purpose, such as Website Design Services, Restaurant Menu, or Contact ClearPath Studio. Replace generic names that do not help a reader understand the destination.
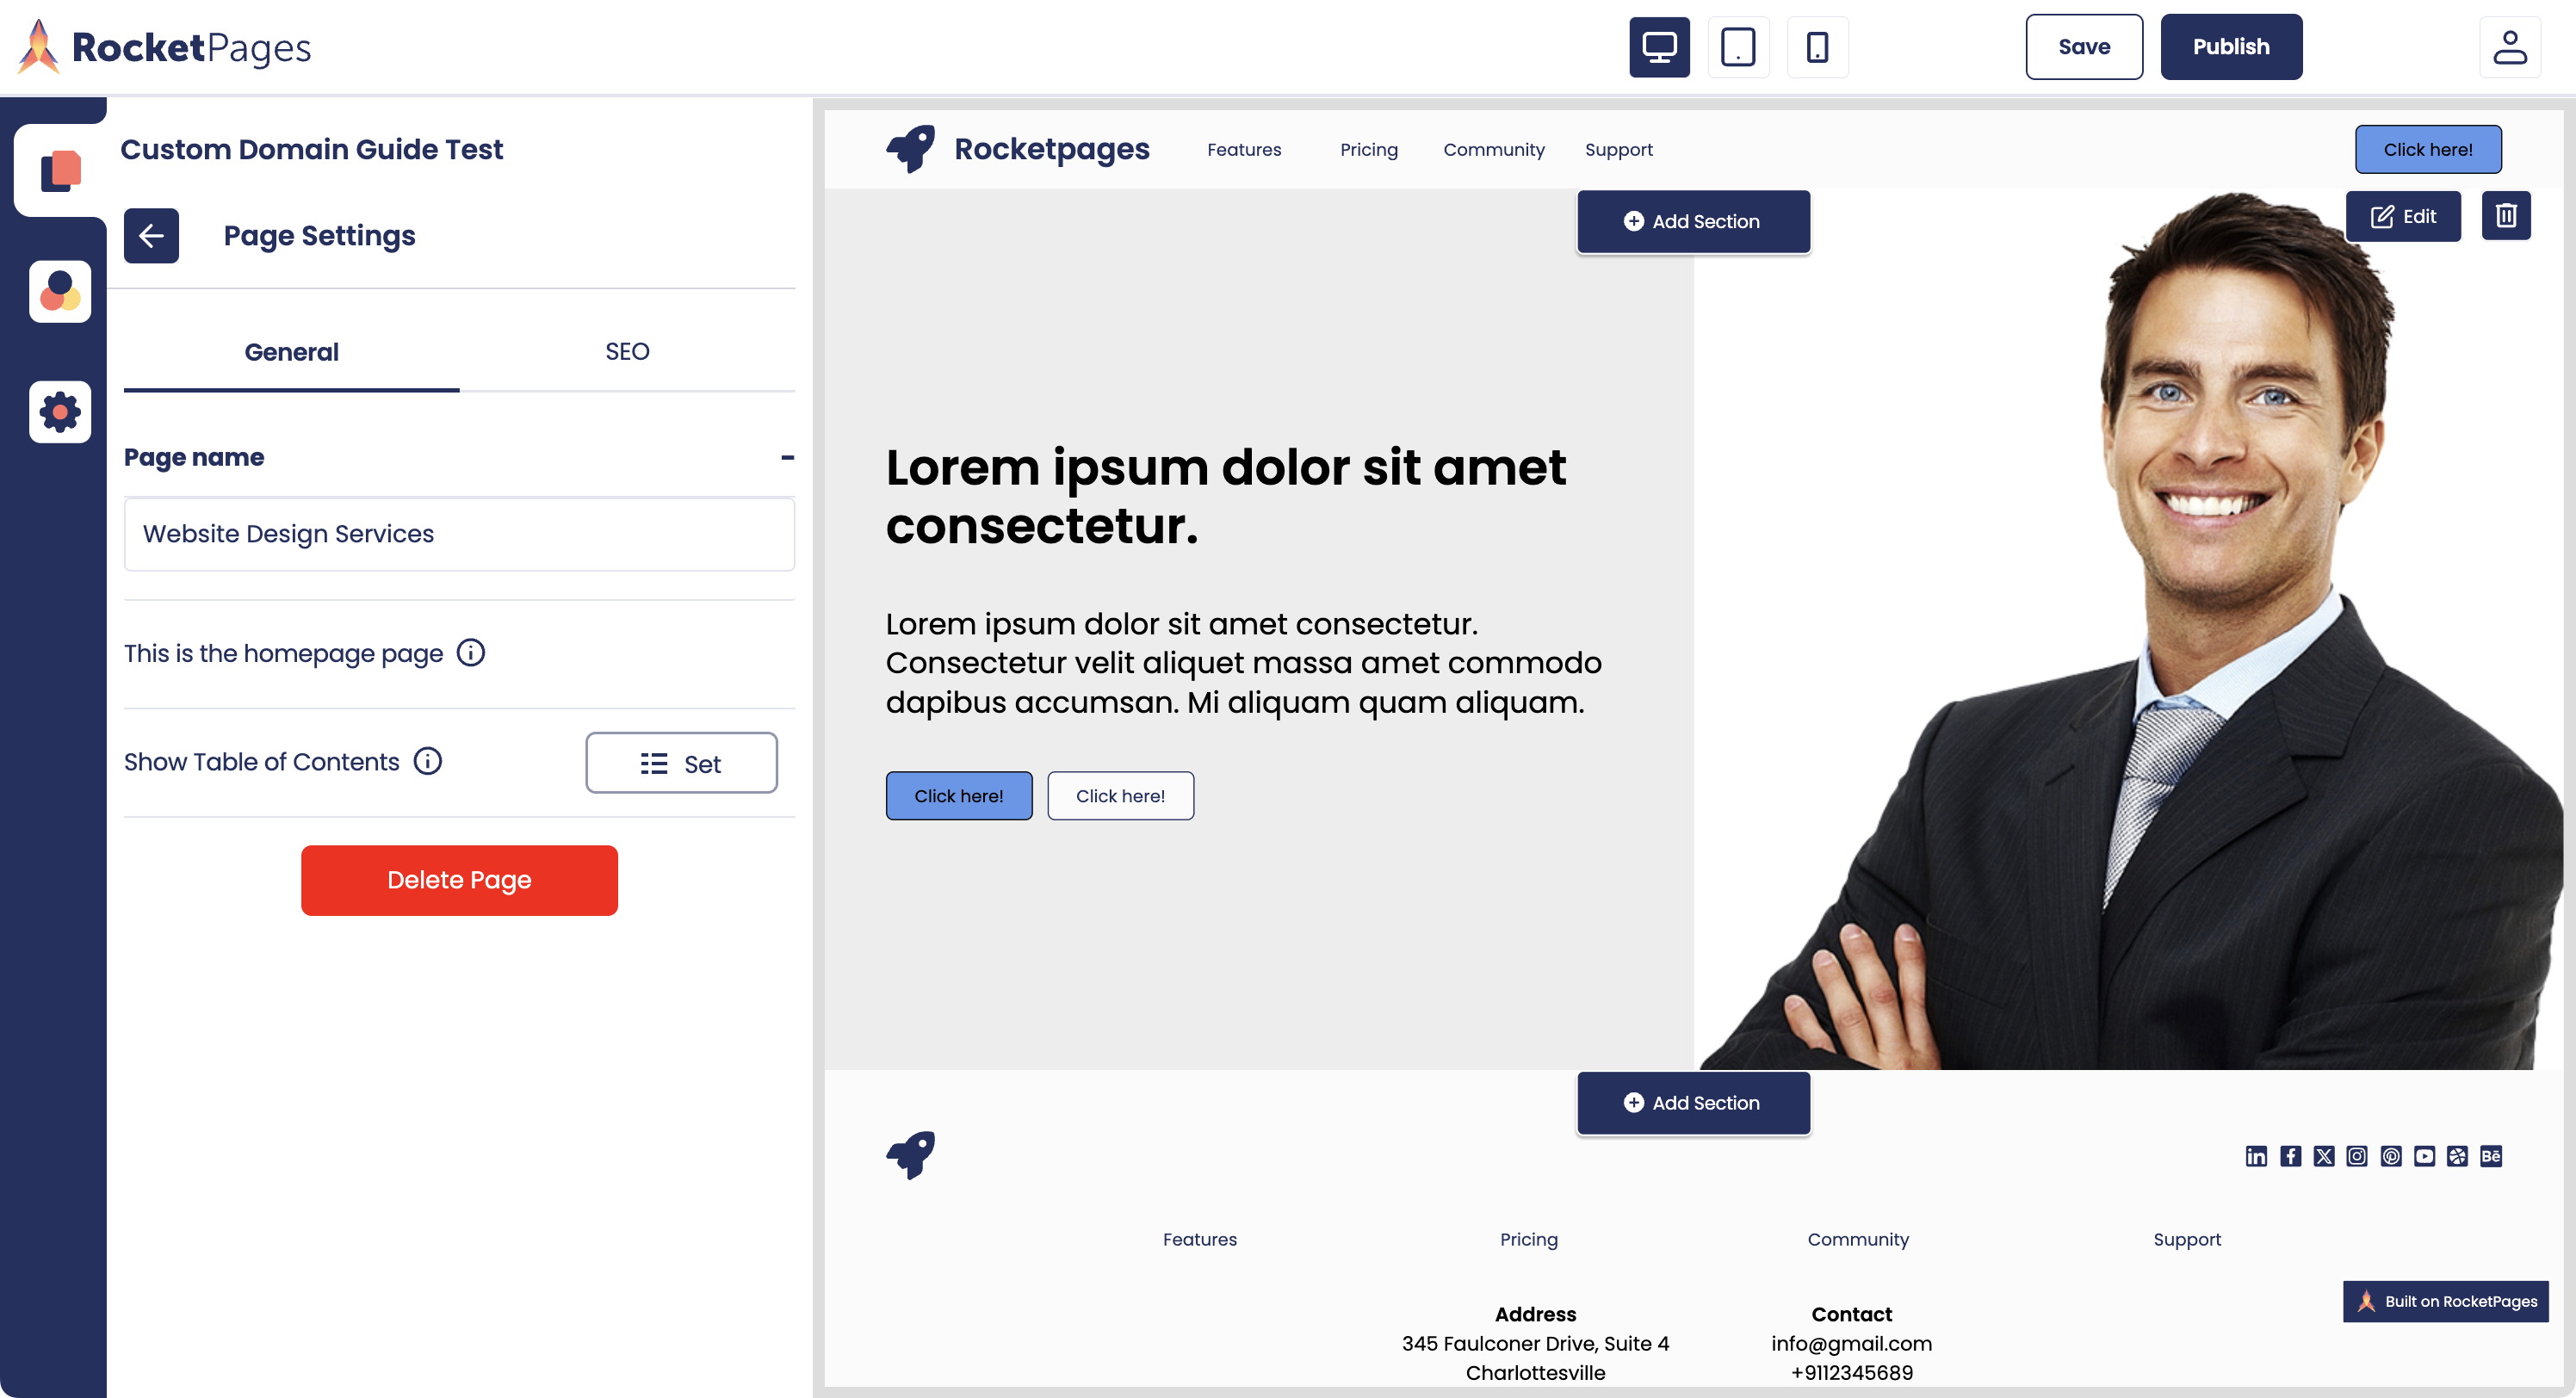
Page Settings → General: a descriptive page name helps identify the page. This example is on an unpublished test site.
Also edit the main heading and page content. A useful opening sentence might be: “ClearPath Studio designs websites for independent shops and service businesses.” Add the actual service area, process, examples, and contact options where relevant.
The current visual editor does not expose a separate Meta title field in this panel. RocketPages can use the page name when a custom SEO title is absent. If you need an independently managed SEO title, consult the supported SEO operations in the RocketPages developer documentation. Review the resulting browser title after publishing.
Google recommends descriptive, concise titles and may choose its own title link in search results. See Google’s title guidance.
Inside Page Settings, open SEO → Meta information. Fill in Meta description with a short summary of what visitors will find. The editor recommends up to 160 characters.
Example: “Explore ClearPath Studio services, recent work, and contact details. Learn how we help small businesses plan their next website.”
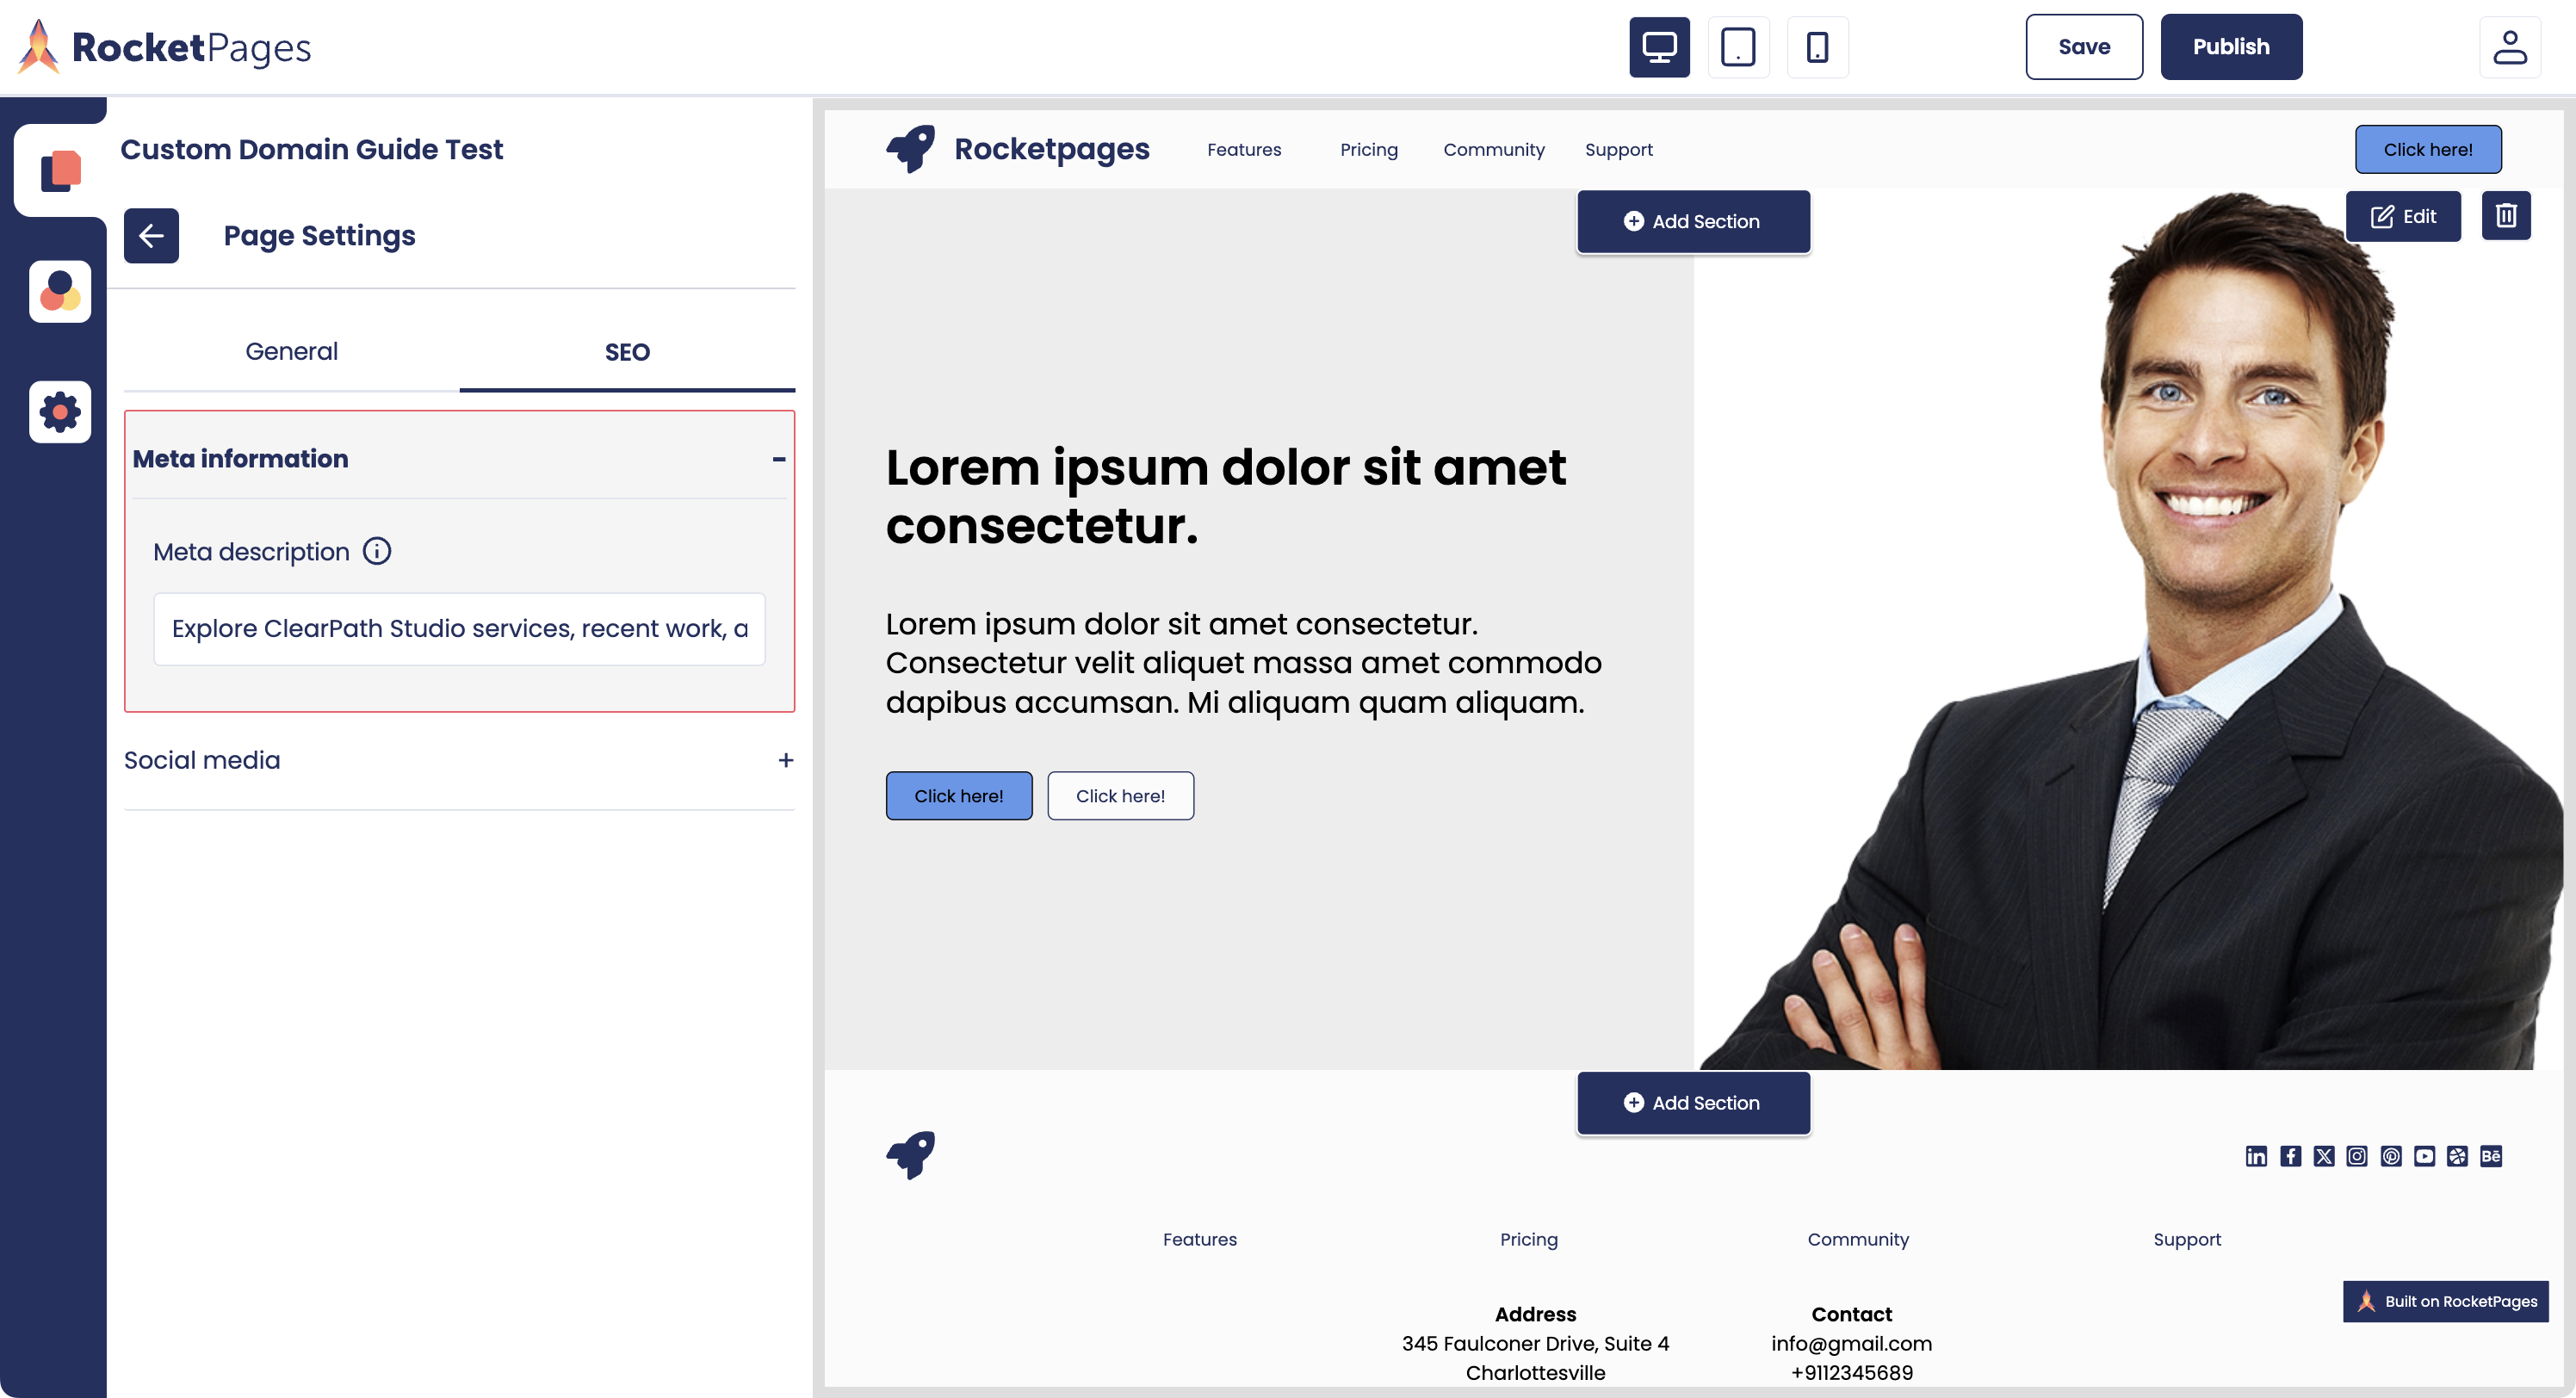
Page Settings → SEO → Meta information: write a description specific to the page rather than repeating the same text everywhere.
A service page, contact page, and article answer different questions, so give each its own description. Describe the actual content and avoid unsupported claims or repeated keyword lists.
The description is a suggested summary. Google can generate a different snippet from the page text for a particular query. Read Google’s explanation of snippets.
In the same SEO tab, expand Social media. Choose a Social media image that represents this page, then fill in Alt & title. The editor requests a 1200 × 630 JPG or PNG sharing image.
For site-wide defaults, open Site settings → General and review the default social media image, its alt text, and the default description. Use page-specific settings when the page needs a different summary or image.
Explain important information in the page text as well as in screenshots or graphics. For example, put your opening hours and service area in readable text instead of leaving them only inside an image.
Open Site settings → SEO. Confirm that Primary language matches the main language of your content. This is separate from writing a page description in the editor.
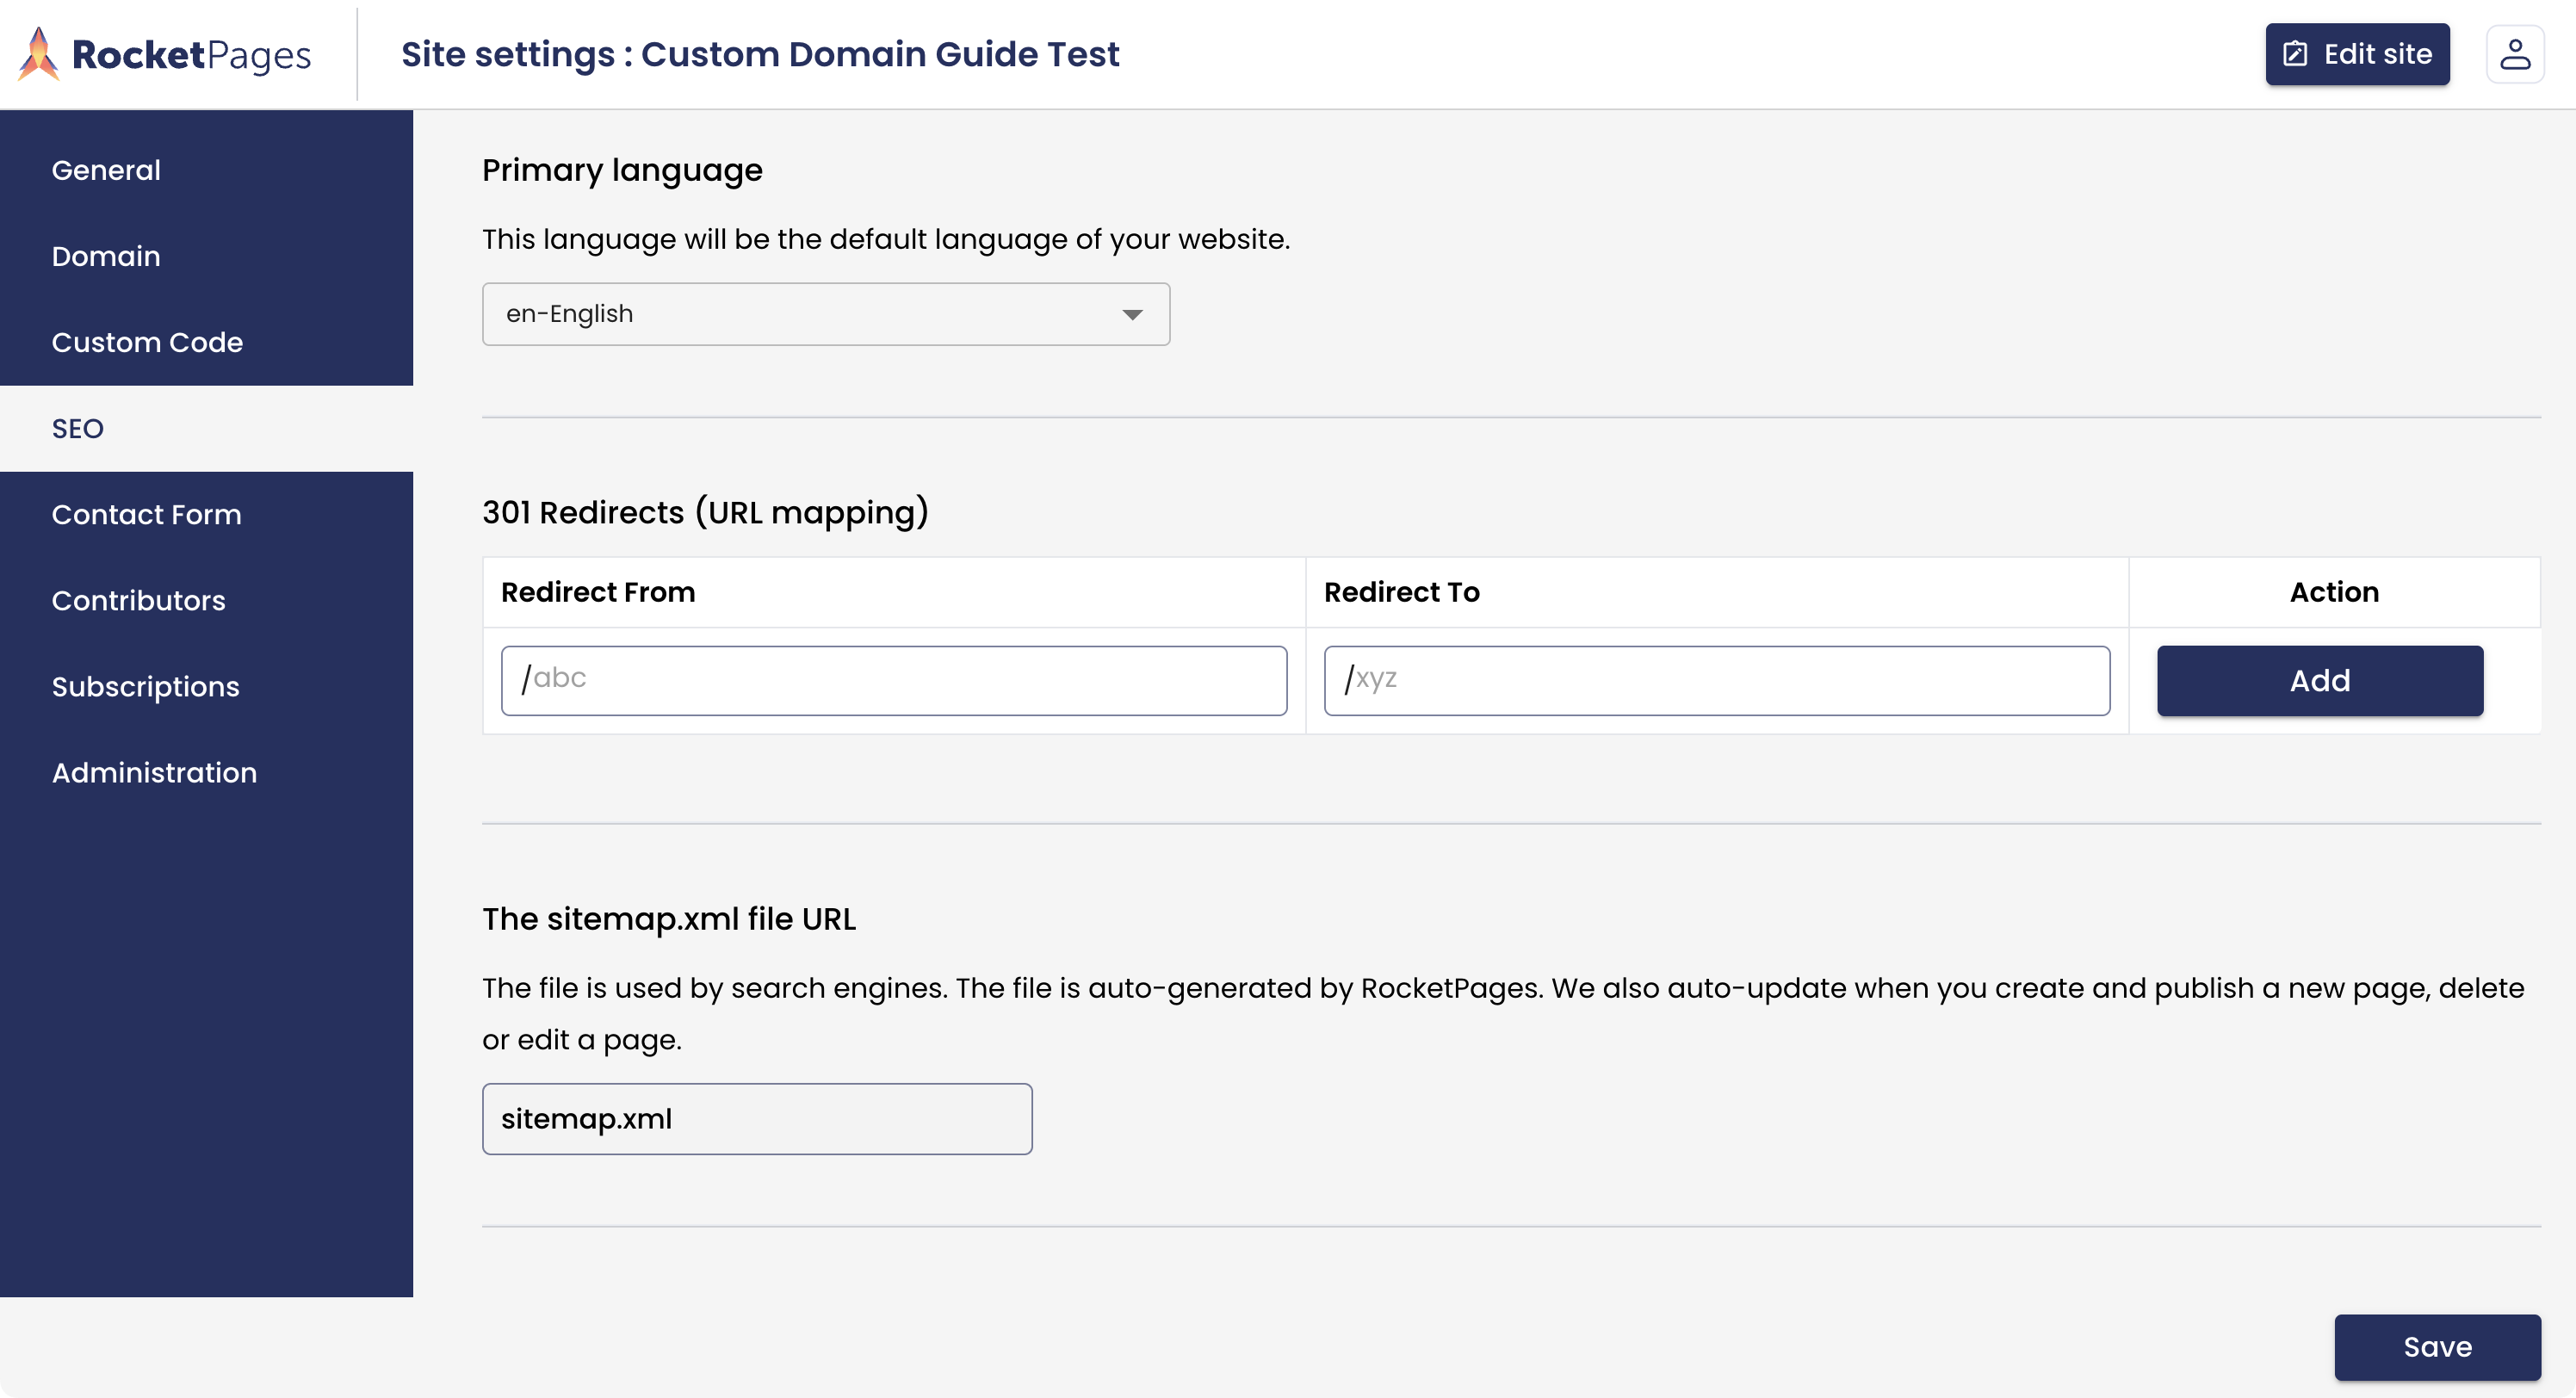
Site settings → SEO contains the primary language, 301 redirects, and sitemap information. Page descriptions are edited separately in Page Settings.
If you replace an already published page URL, review 301 Redirects (URL mapping). Point the old path to the relevant replacement, update your internal links, and test the old address after publishing. Avoid changing URLs simply to add more keywords.
Keep the business name, services, contact information, and location consistent across your main pages. Link to useful pages with descriptive labels such as “View our website design services.”
Save your edits, then publish the page or website when the content is ready. A saved editor draft is not the same as a publicly accessible page.
Open the final address in a private browser window. Check the browser title, main heading, text, images, internal links, and mobile layout. Make sure visitors can read the content without signing in to the editor. If you changed the domain, confirm the intended primary domain is in use.
For the domain steps, use the custom-domain guide. For current plan allowances, use RocketPages pricing or the free-plan and custom-domain guide.
In Site settings → SEO, review the sitemap.xml and robots.txt file information. RocketPages generates these files. The visual settings do not provide an editor for robots.txt.
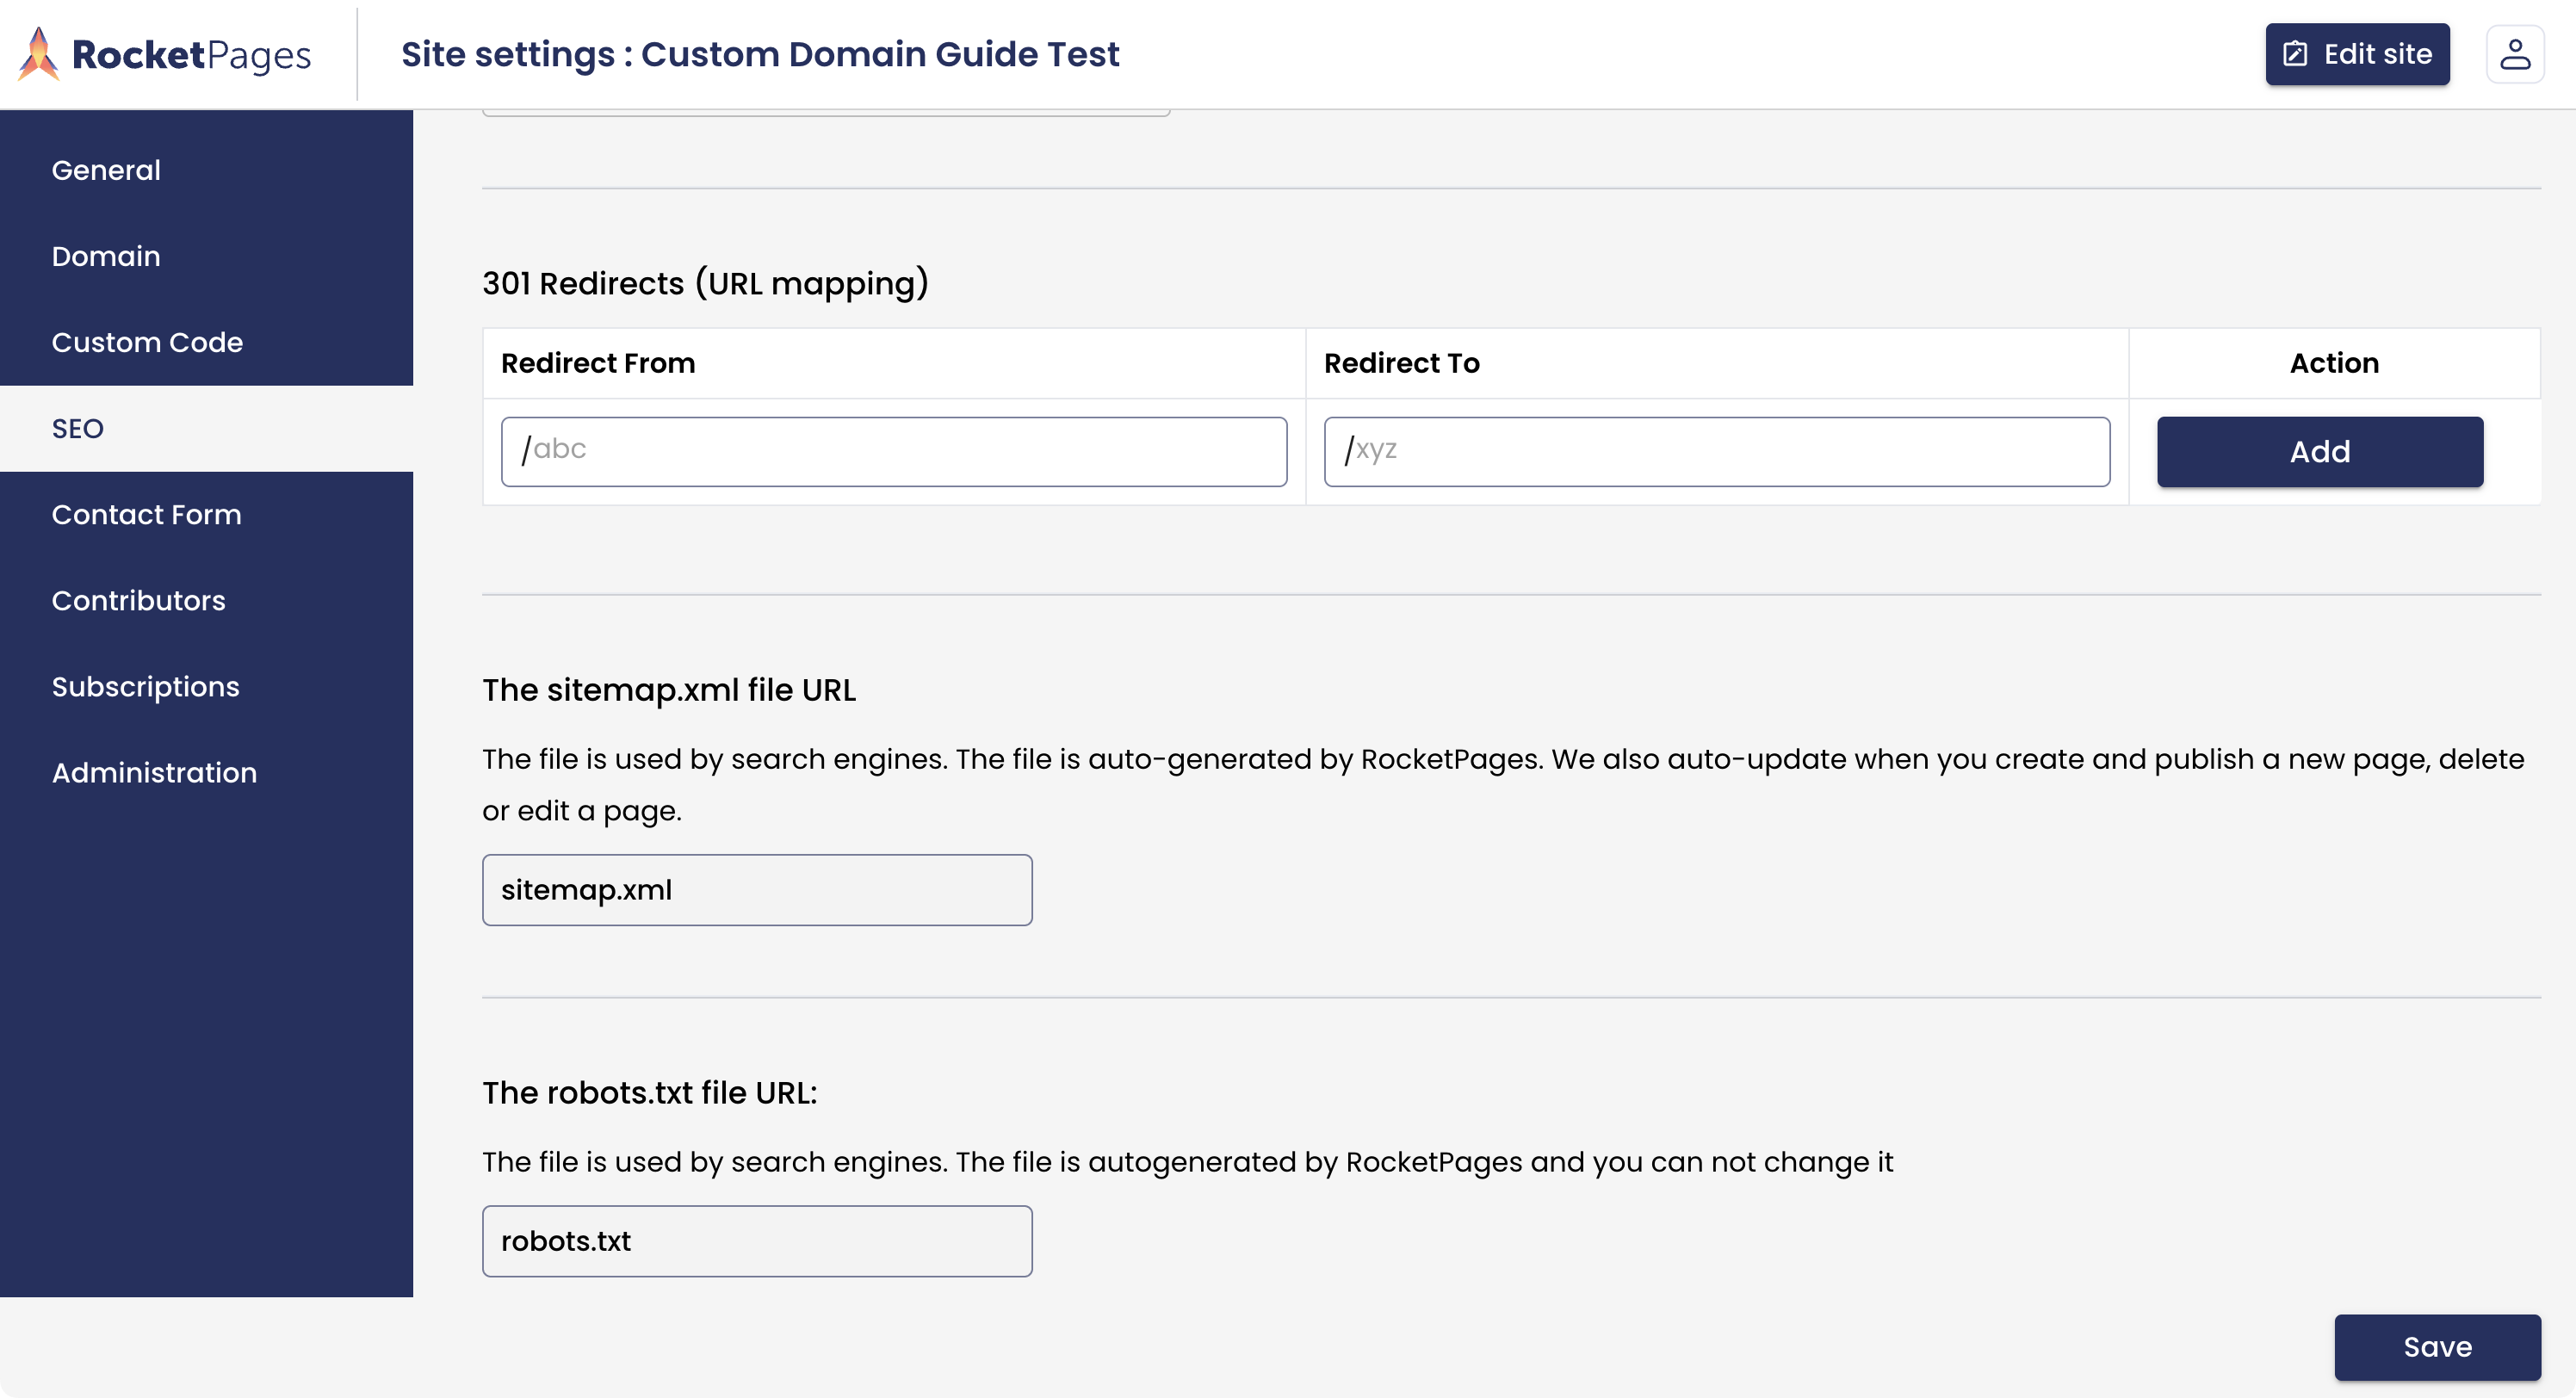
The sitemap.xml and robots.txt fields are generated by RocketPages. Check their public URLs after publishing your site.
On your published primary domain, open https://your-domain.example/sitemap.xml and https://your-domain.example/robots.txt, replacing the sample hostname with your real domain. Confirm that the sitemap loads and includes the important published pages you want discovered.
If a page is missing, confirm it is published, check that you are viewing the correct domain, and republish the website if needed. If it stays missing, contact RocketPages support with the exact public URL.
Allowing a crawler is only one part of indexing. A page can still be excluded by a page-level noindex directive or an access restriction. If indexing is unexpectedly blocked, use the search engine’s inspection report and share its specific findings with support.
Verify ownership of the live website in Google Search Console, then submit the sitemap URL in its Sitemaps report. Inspect your homepage and your most useful service or guide pages with URL Inspection. Follow any reported access or indexing issues.
A sitemap helps search engines discover URLs; submission does not guarantee that every URL will be indexed. Follow Google’s sitemap instructions. Use the available webmaster tools for other search engines if those audiences matter to your business.
Recheck after significant content or domain changes. Record whether a page is indexed, which queries bring visitors, and whether those visits lead to inquiries or other useful actions. Avoid promising a fixed indexing deadline.
Create pages that answer specific customer questions with your own evidence. A website-design business might explain what a project includes, what the client needs to prepare, how revisions work, and how to request a quote. A restaurant might publish readable menus, dietary information, hours, and reservation instructions.
Start each guide with a direct answer, then add steps, examples, screenshots, and a short FAQ where helpful. Put supporting links beside the statements they explain. Keep dates, prices, availability, and contact details current. Add an author or business identity so readers know who is responsible for the information.
For Google’s AI search features, discoverable text and useful internal links remain relevant. Meeting the requirements still does not guarantee inclusion. Review Google’s AI search guidance. Other AI services have their own discovery and selection systems; this checklist does not promise placement in them.
For help with a RocketPages setting, contact RocketPages with the public page URL, the setting you changed, and the exact issue shown in your inspection report.
Use Page Settings → SEO in the editor for a page description and sharing image. Use Site settings → SEO for the primary language, redirects, and generated sitemap and robots.txt information.
The panel inspected for this guide displays Meta description but does not display a separate Meta title field. Use a clear page name and verify the published title. Supported RocketPages SEO tools can manage a separate title when needed.
No. It helps with URL discovery. Indexing and selection for a search result or AI answer are separate decisions made by the service.
Google says no special AI text file is required for its AI search features. Focus on the public page, crawl access, useful content, and links. This does not establish requirements for every other AI service.
Check that it is published, accessible at the right URL, included in the sitemap where appropriate, and not blocked from indexing. Then inspect it in the search engine’s webmaster tools. Saving metadata or submitting a sitemap is not an indexing guarantee.