Custom domain questions
Answers about connecting your domain, validation, and HTTPS.


You can connect a domain you own to RocketPages by adding it in your site settings, updating its DNS records, validating the connection, and choosing a primary domain. Custom-domain connection is available on the free plan; domain registration and renewal are separate.
Screenshot note: this walkthrough uses an unpublished test site with example.com and www.example.com. No external DNS was changed, so the sample domains remain unvalidated. The primary-domain menu is a separately labelled reference from an existing validated site.
example.com.
For free-plan allowances and the difference between buying a domain and connecting one, read the RocketPages free plan and custom domain guide.
Sign in to RocketPages and open your website’s settings. Choose Domain, then select the Custom Domain tab.
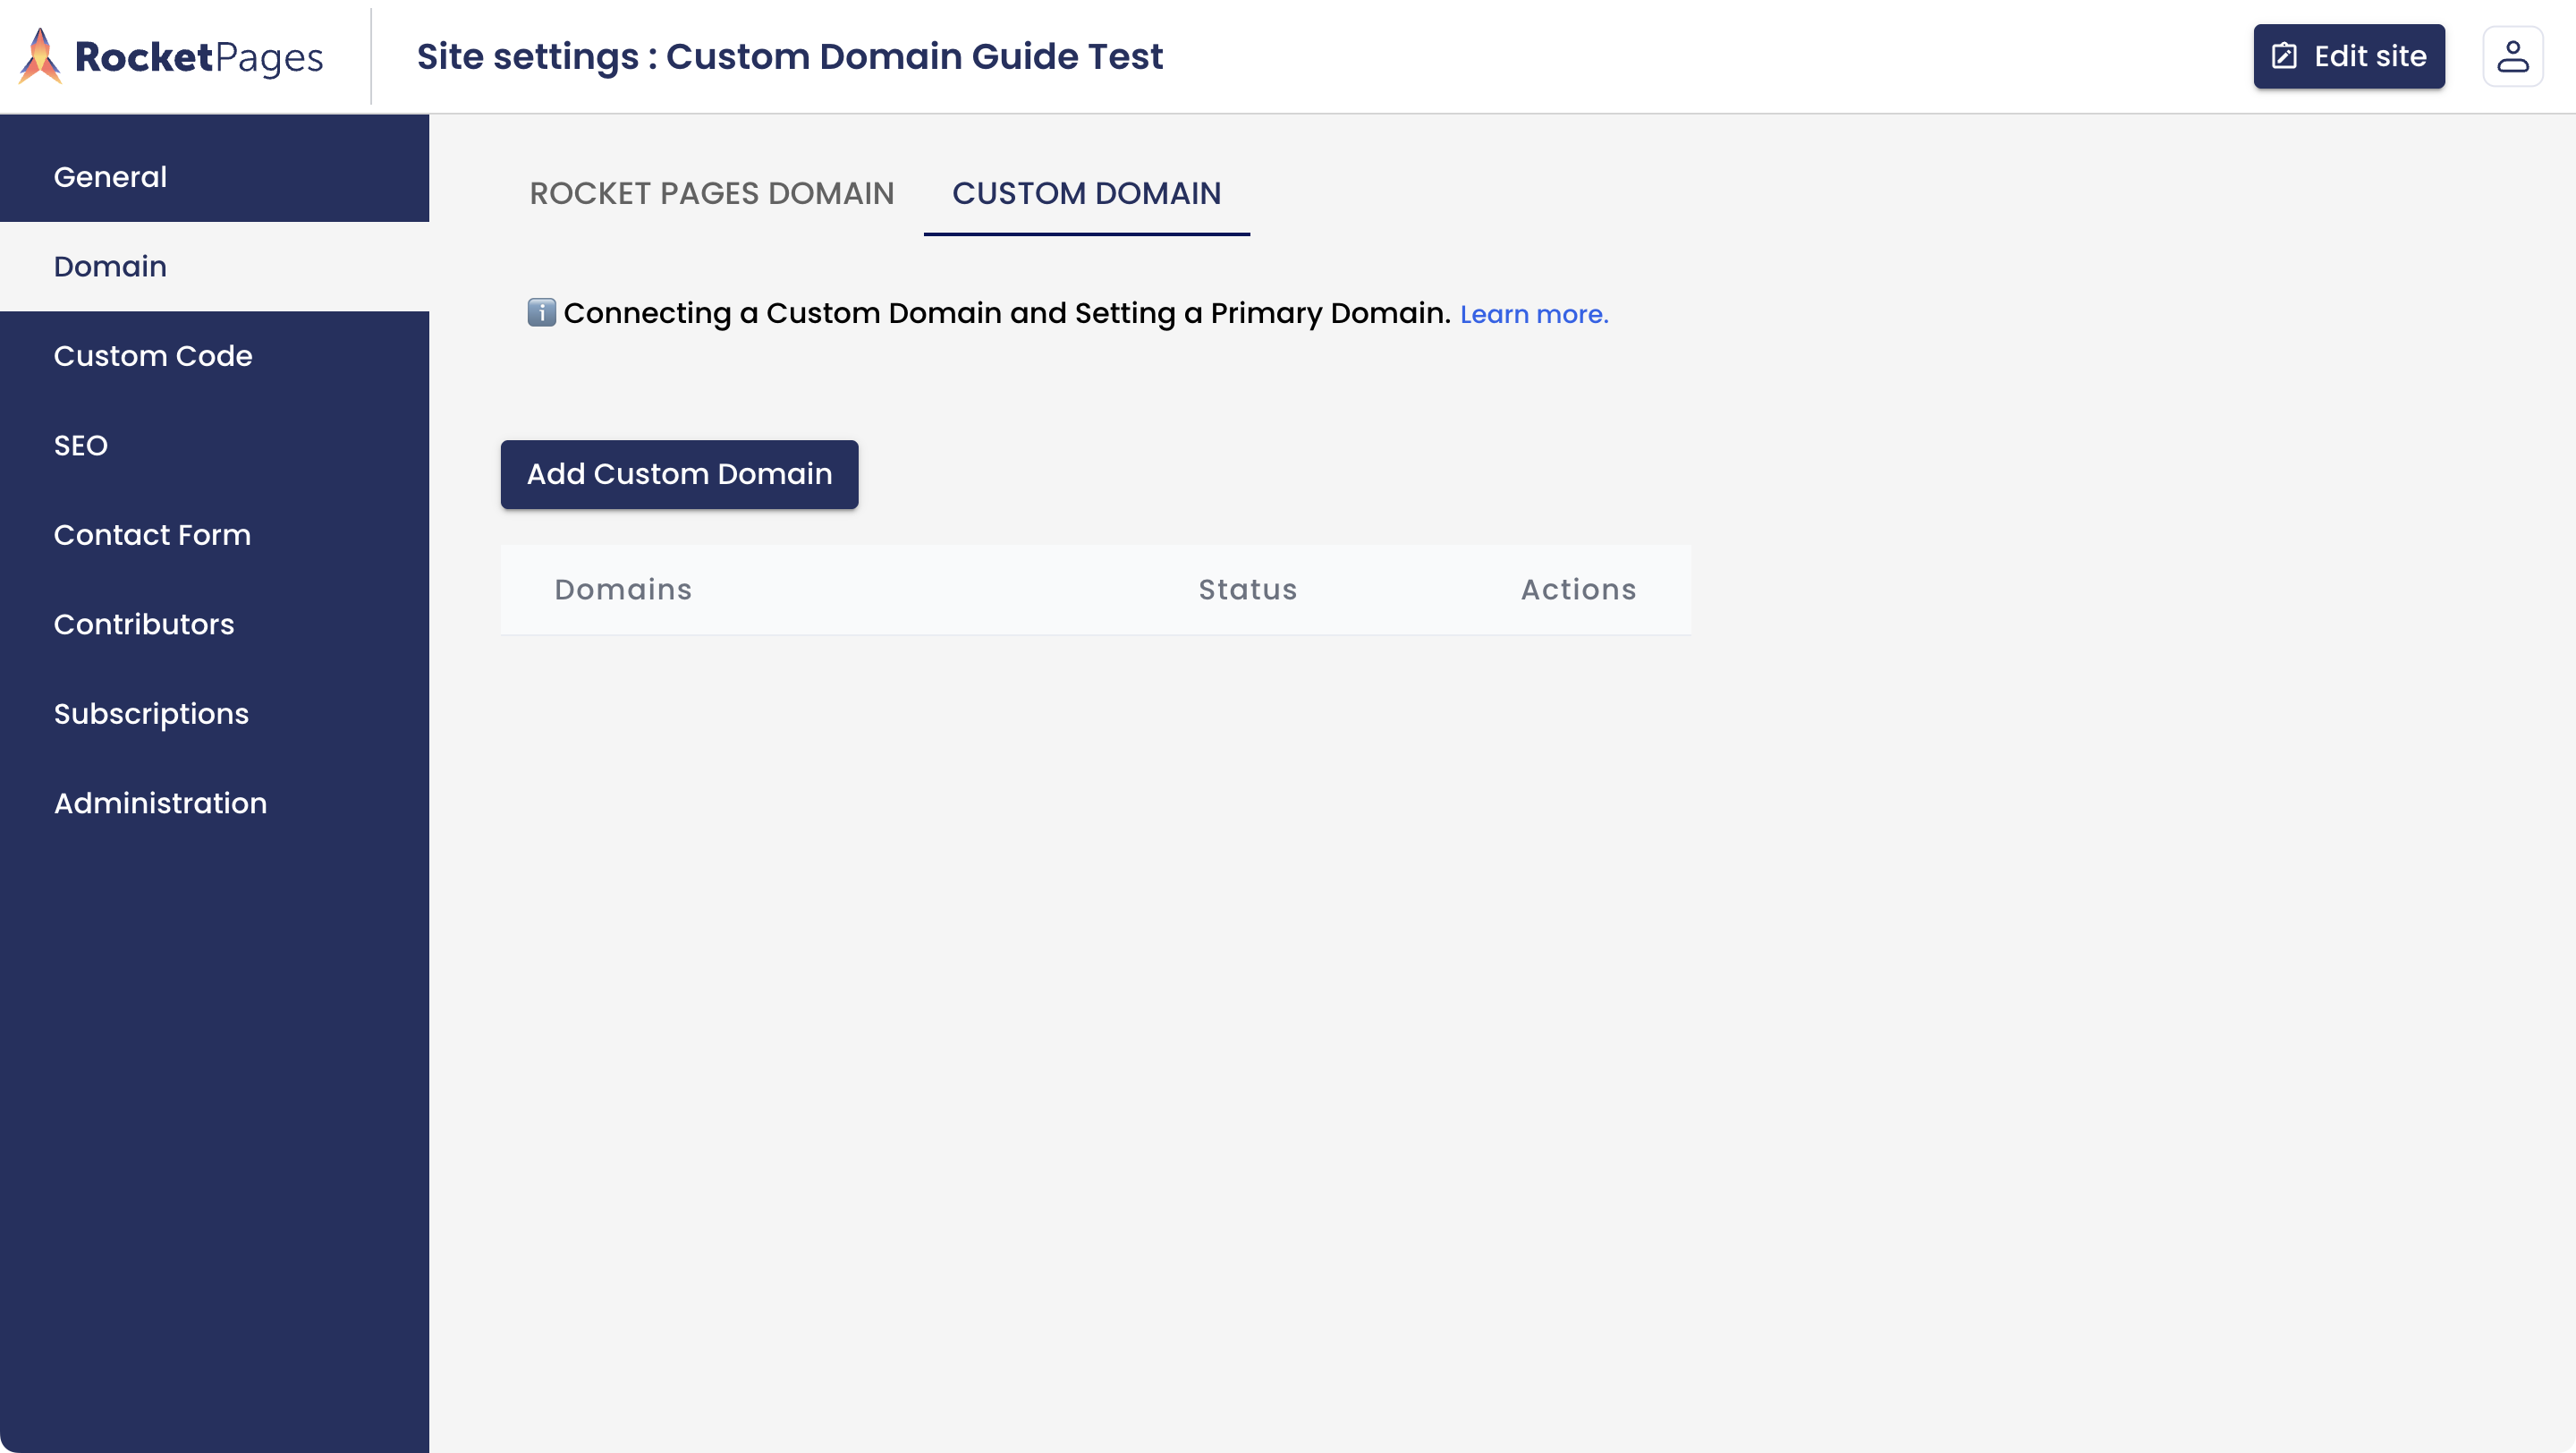
Open Domain in site settings, then choose Custom Domain. Screenshots use an unpublished test site with sample domains.
Choose Add Custom Domain. Enter the hostname you want to connect, such as example.com, without https://, a page path, or a trailing slash. Follow the dialog to add the domain, then select Point DNS to view the connection instructions.
If you want both example.com and www.example.com to reach your site, include both hostnames in RocketPages. Adding one does not mean the other is automatically configured.
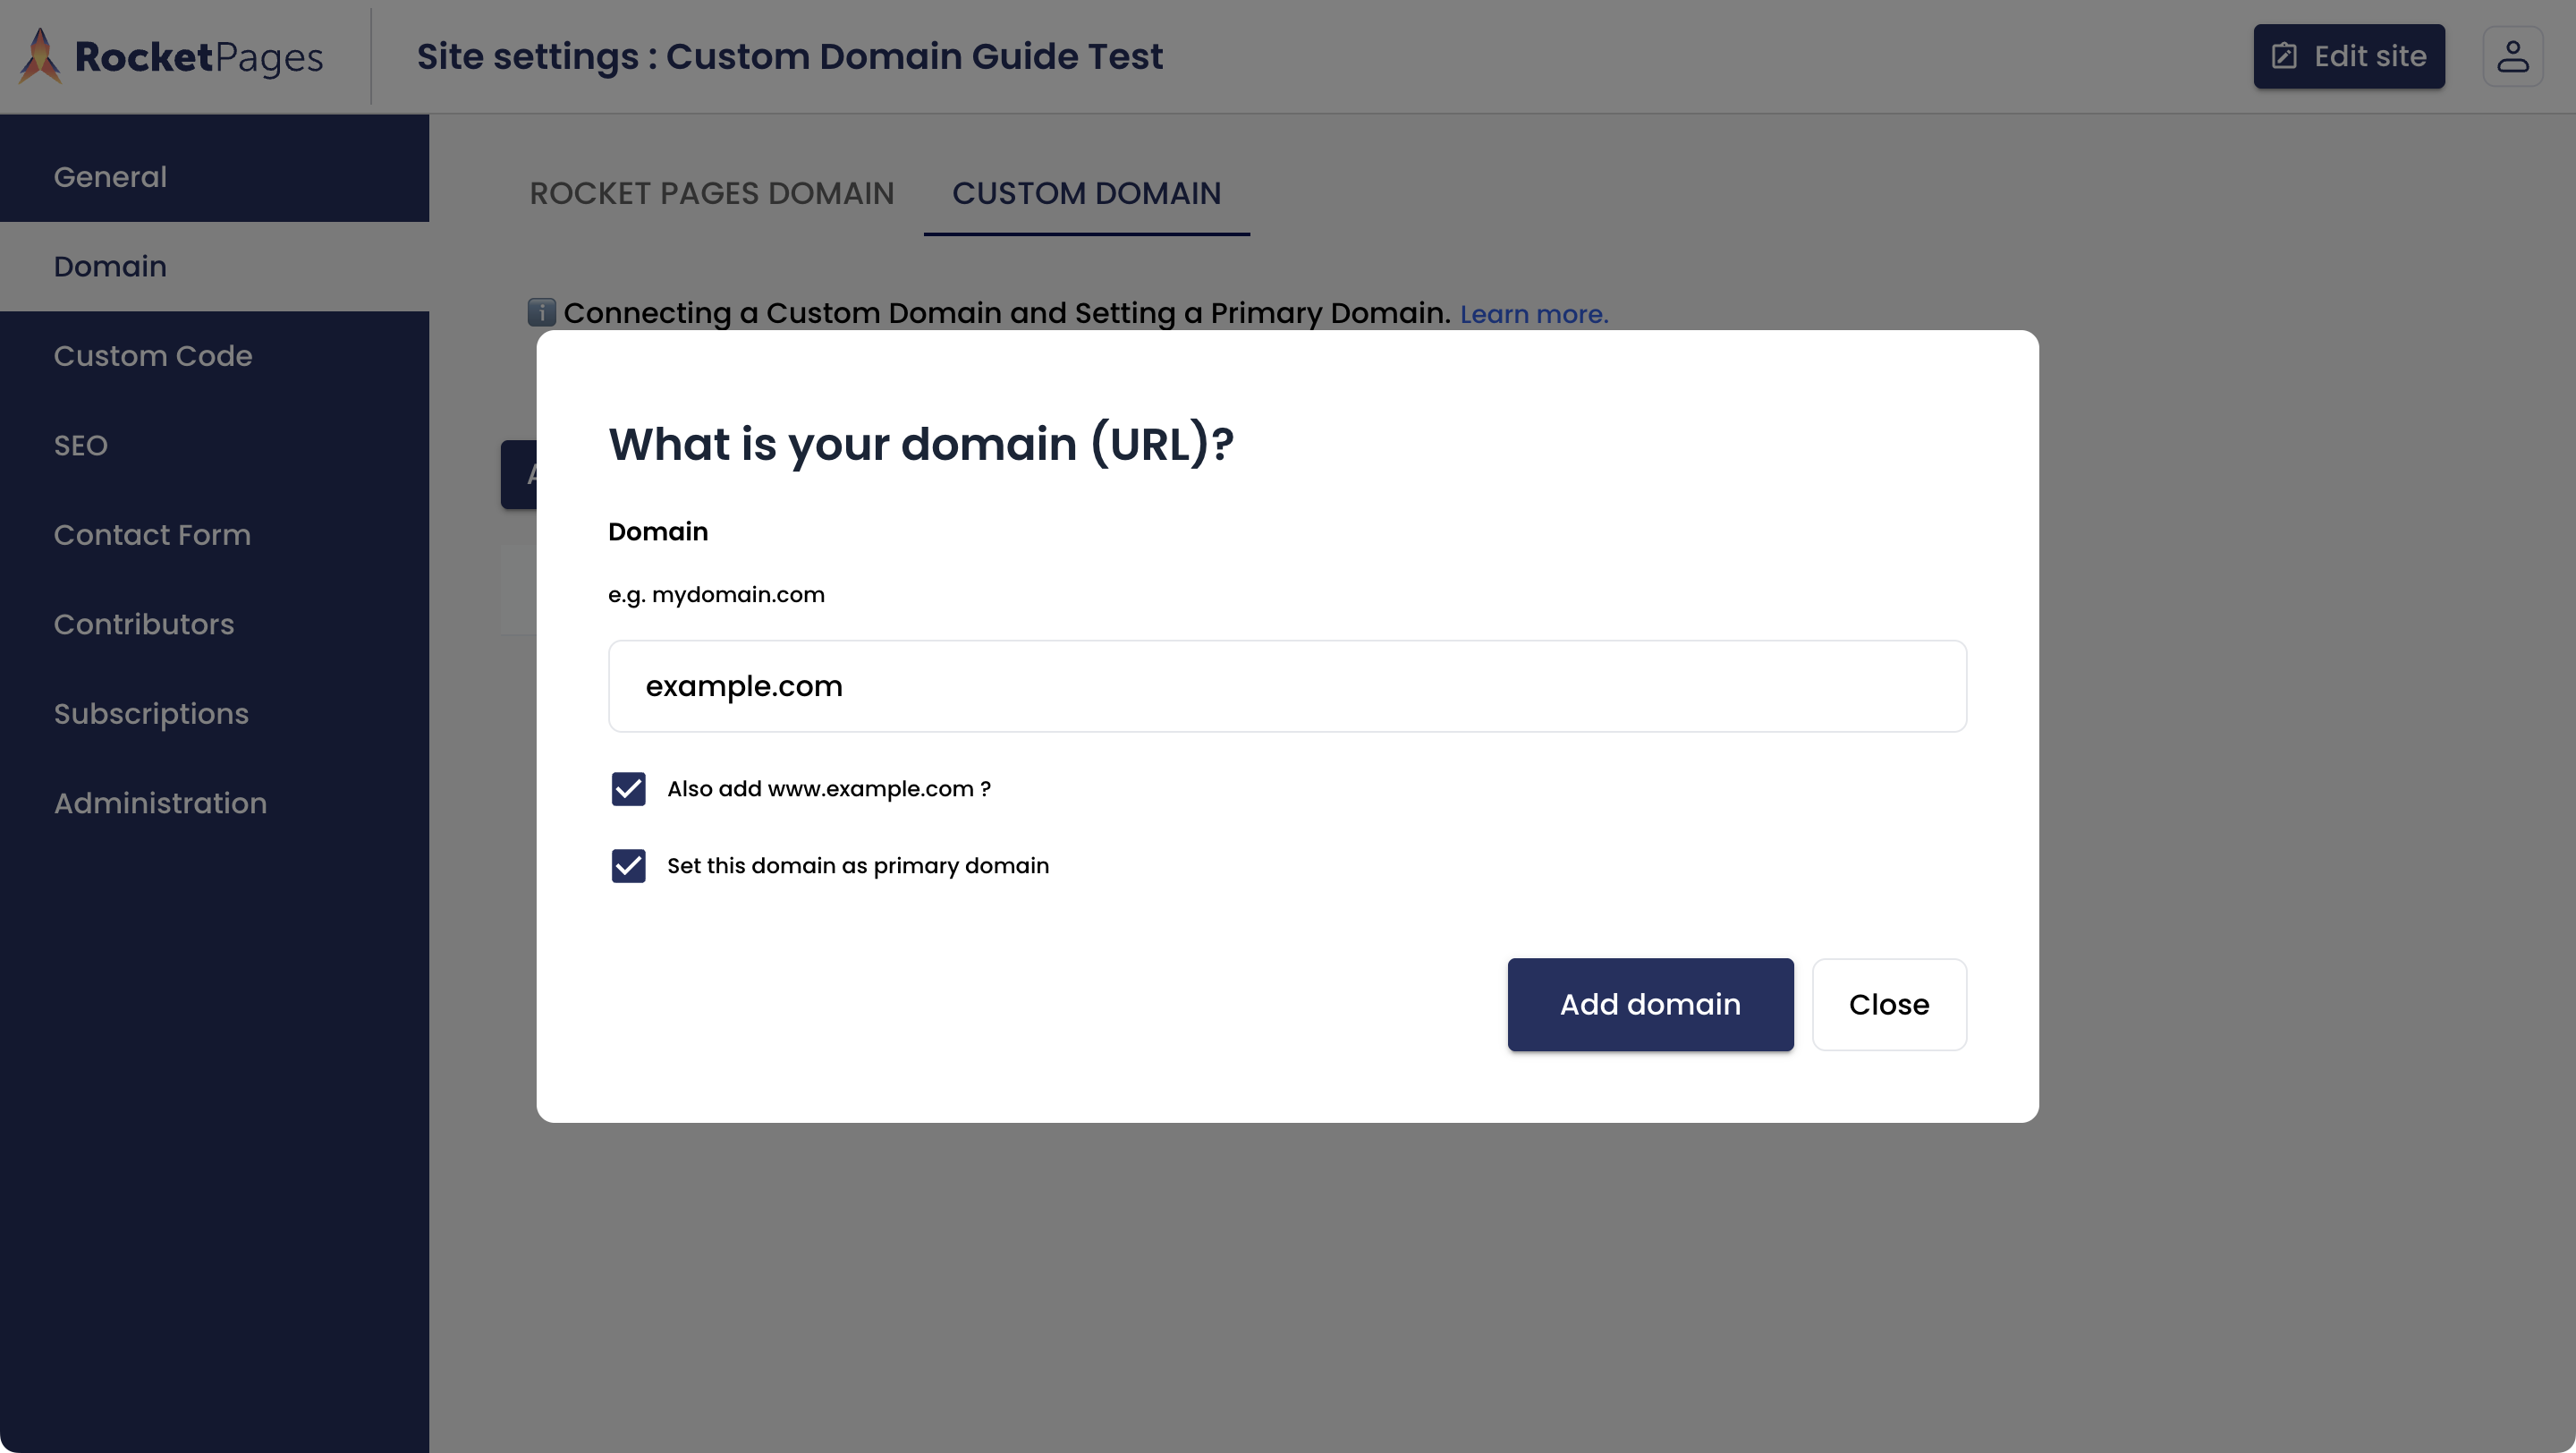
Enter your hostname without https://. Select the www option if needed; the dialog also offers a primary-domain option.
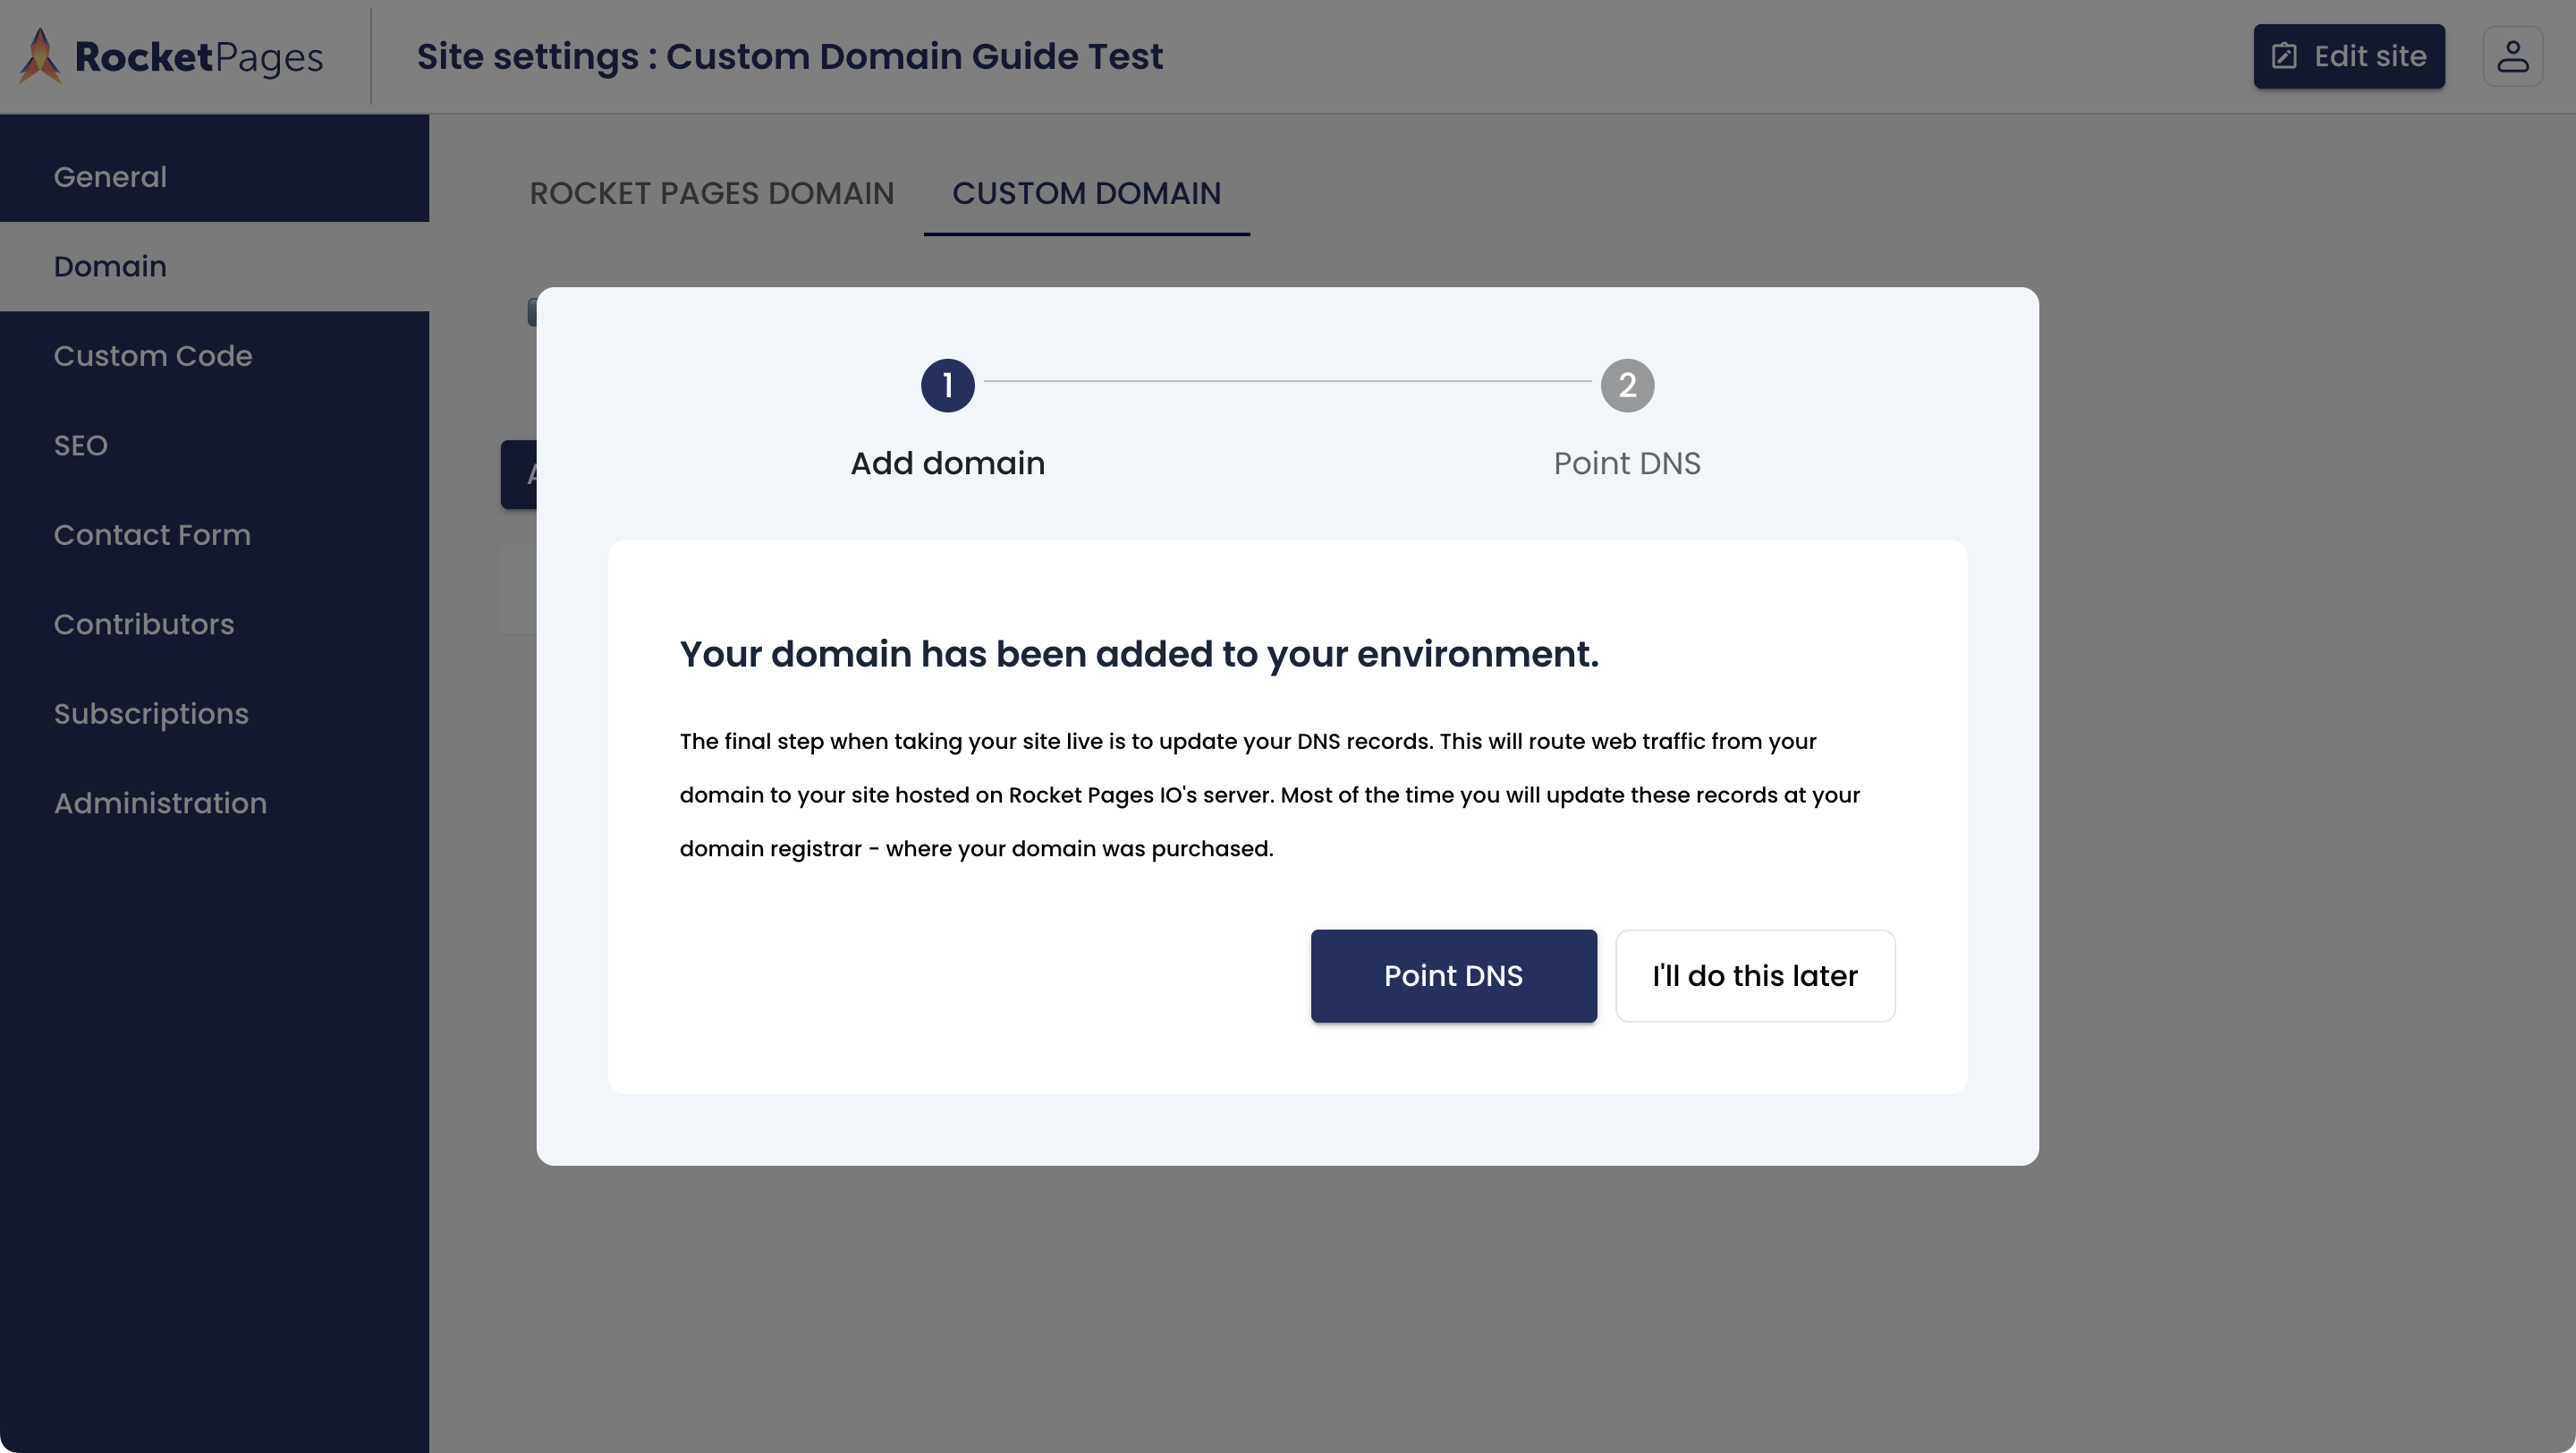
After adding the domain, choose Point DNS to view the connection instructions.
Open the DNS management screen for your domain. Use the records and destination shown in your RocketPages connection dialog. Copy the current server IP from that dialog instead of using an IP address from an old article or screenshot.
For a root domain such as example.com, the setup uses an A record pointing to the RocketPages server IP. Providers commonly use @ or an empty Name field for the root domain.
For www.example.com, the provider instructions can use a CNAME record with Name www pointing to example.com, once that root domain points to RocketPages. Follow the exact records displayed for your setup.
The DNS examples at the end of this guide explain the fields; the server IP must come from your RocketPages dialog.
Review any existing website records for the same hostname before saving. Replace conflicting website records where needed. Keep unrelated email records, including MX and email-related TXT records, in place. Changing website DNS alone does not transfer domain registration or email hosting.
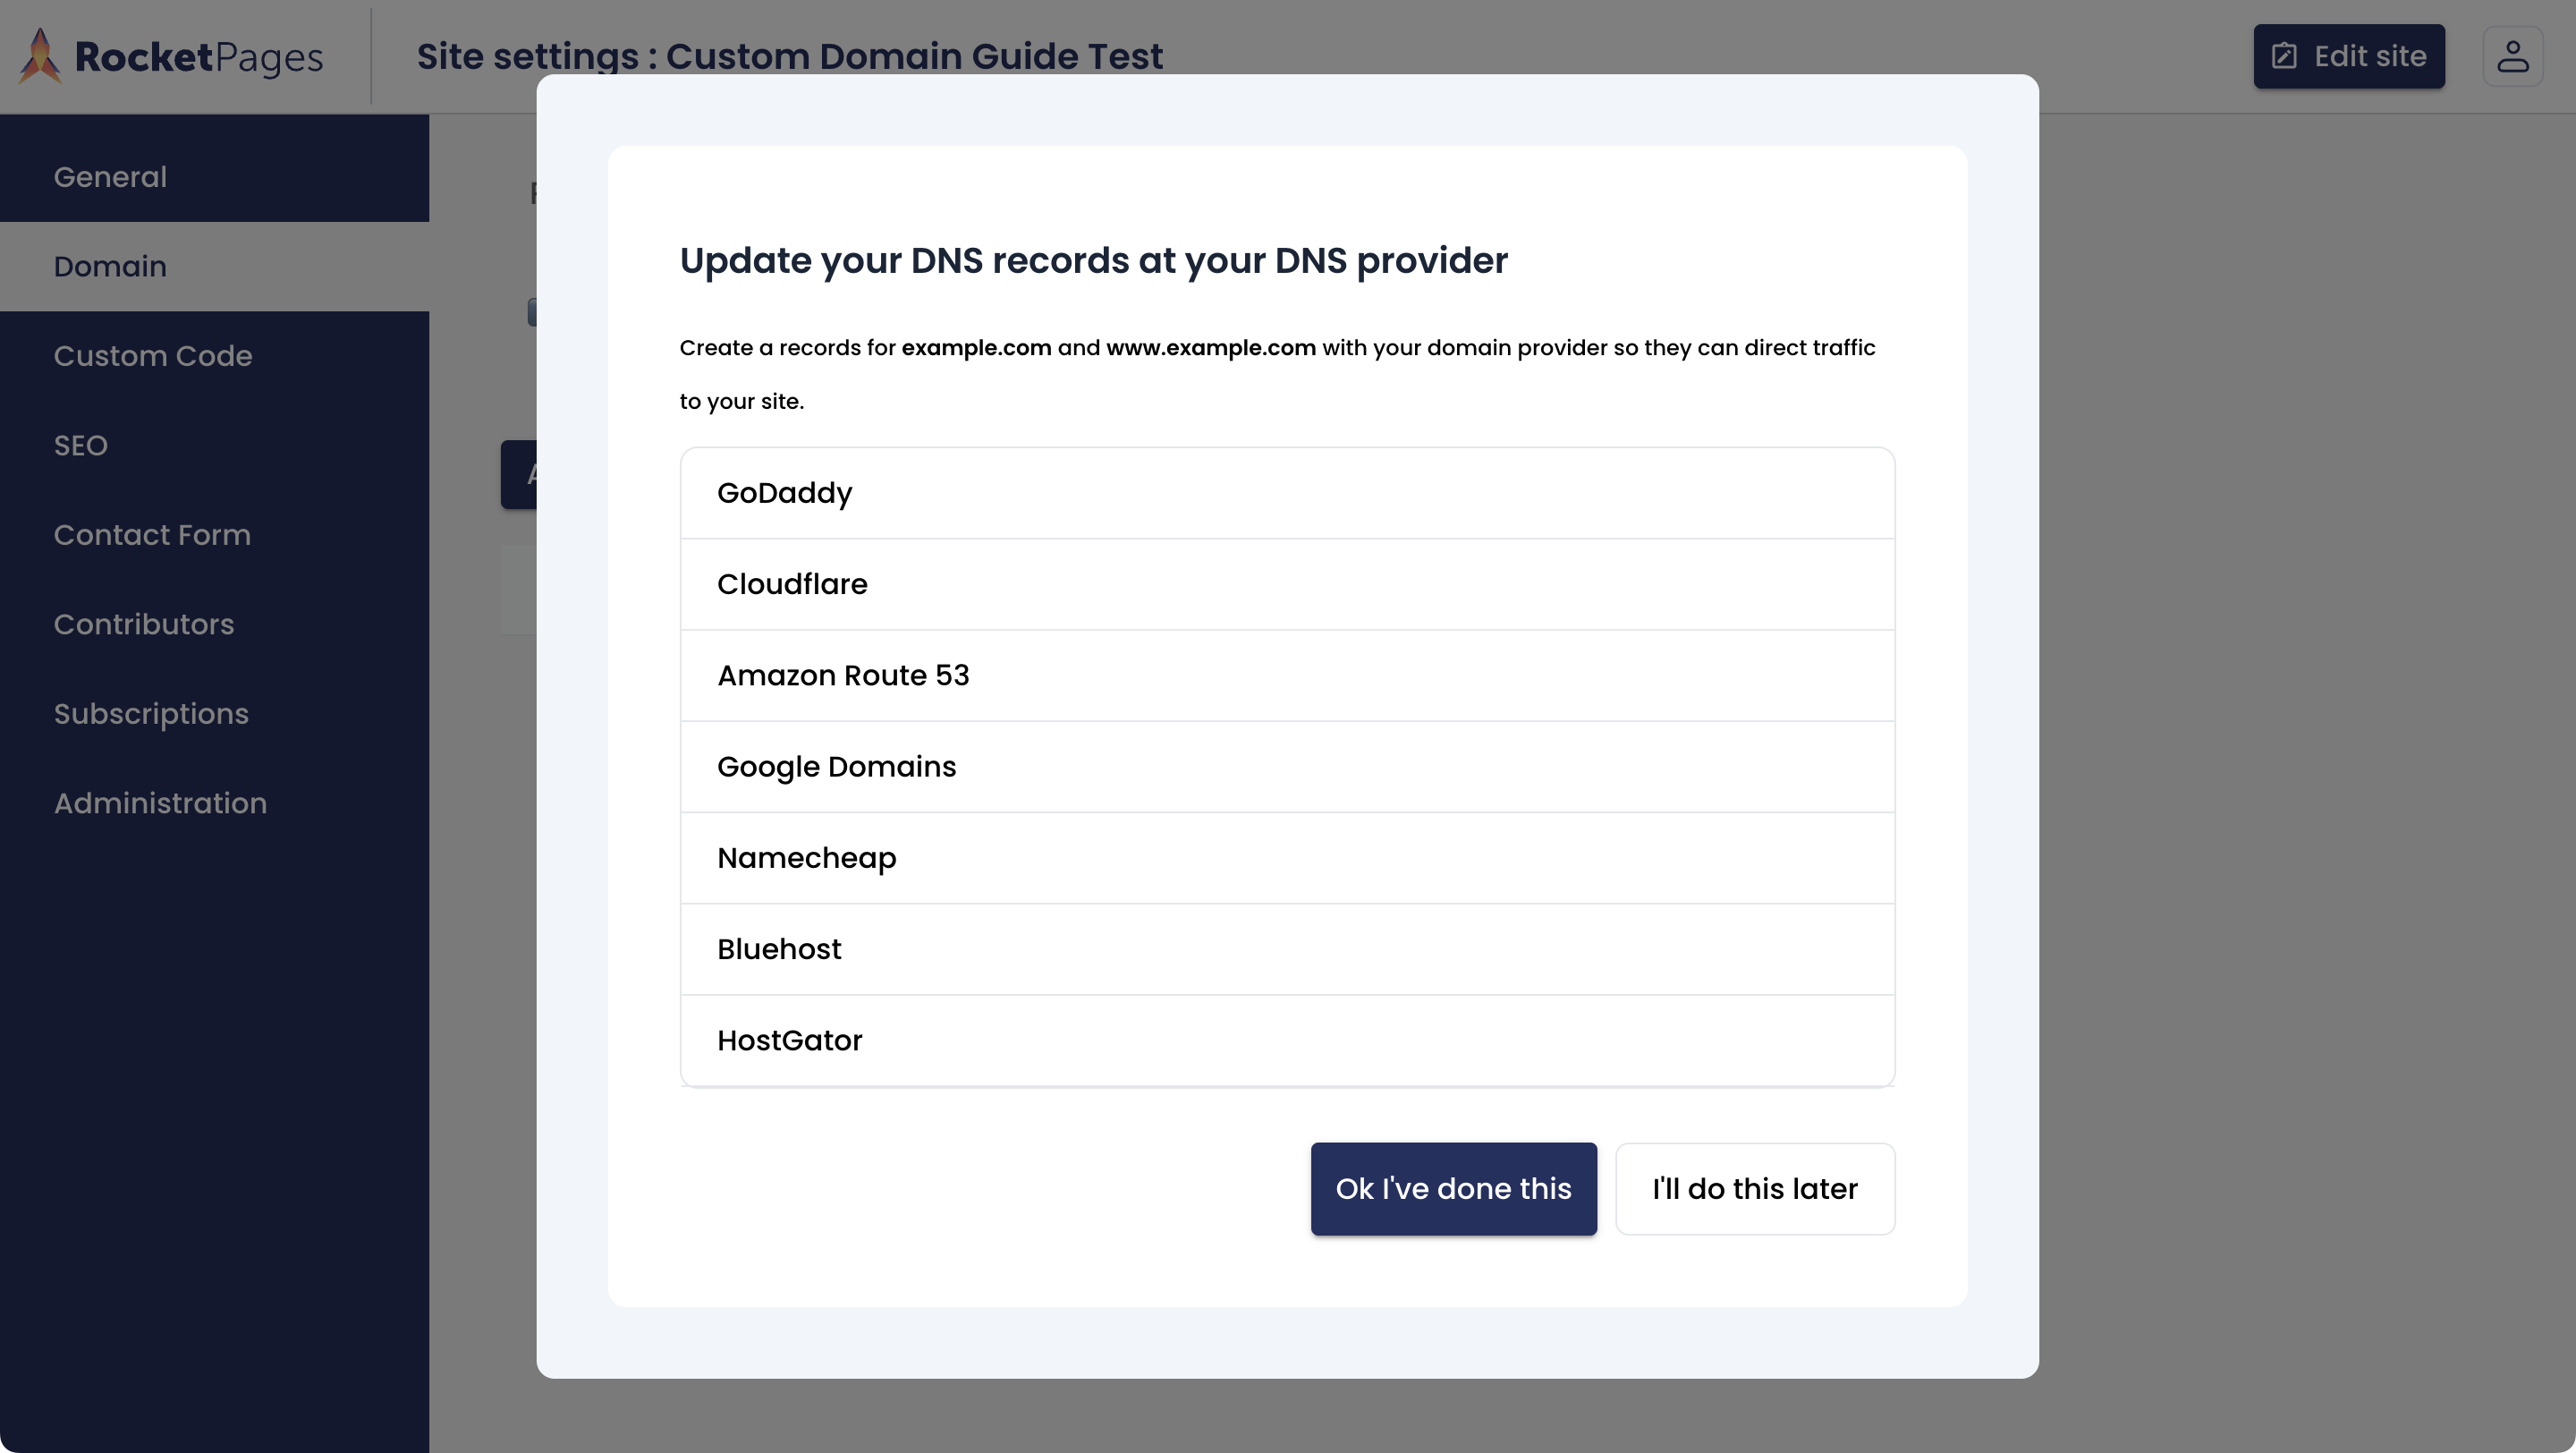
Choose your DNS provider to see its setup instructions.
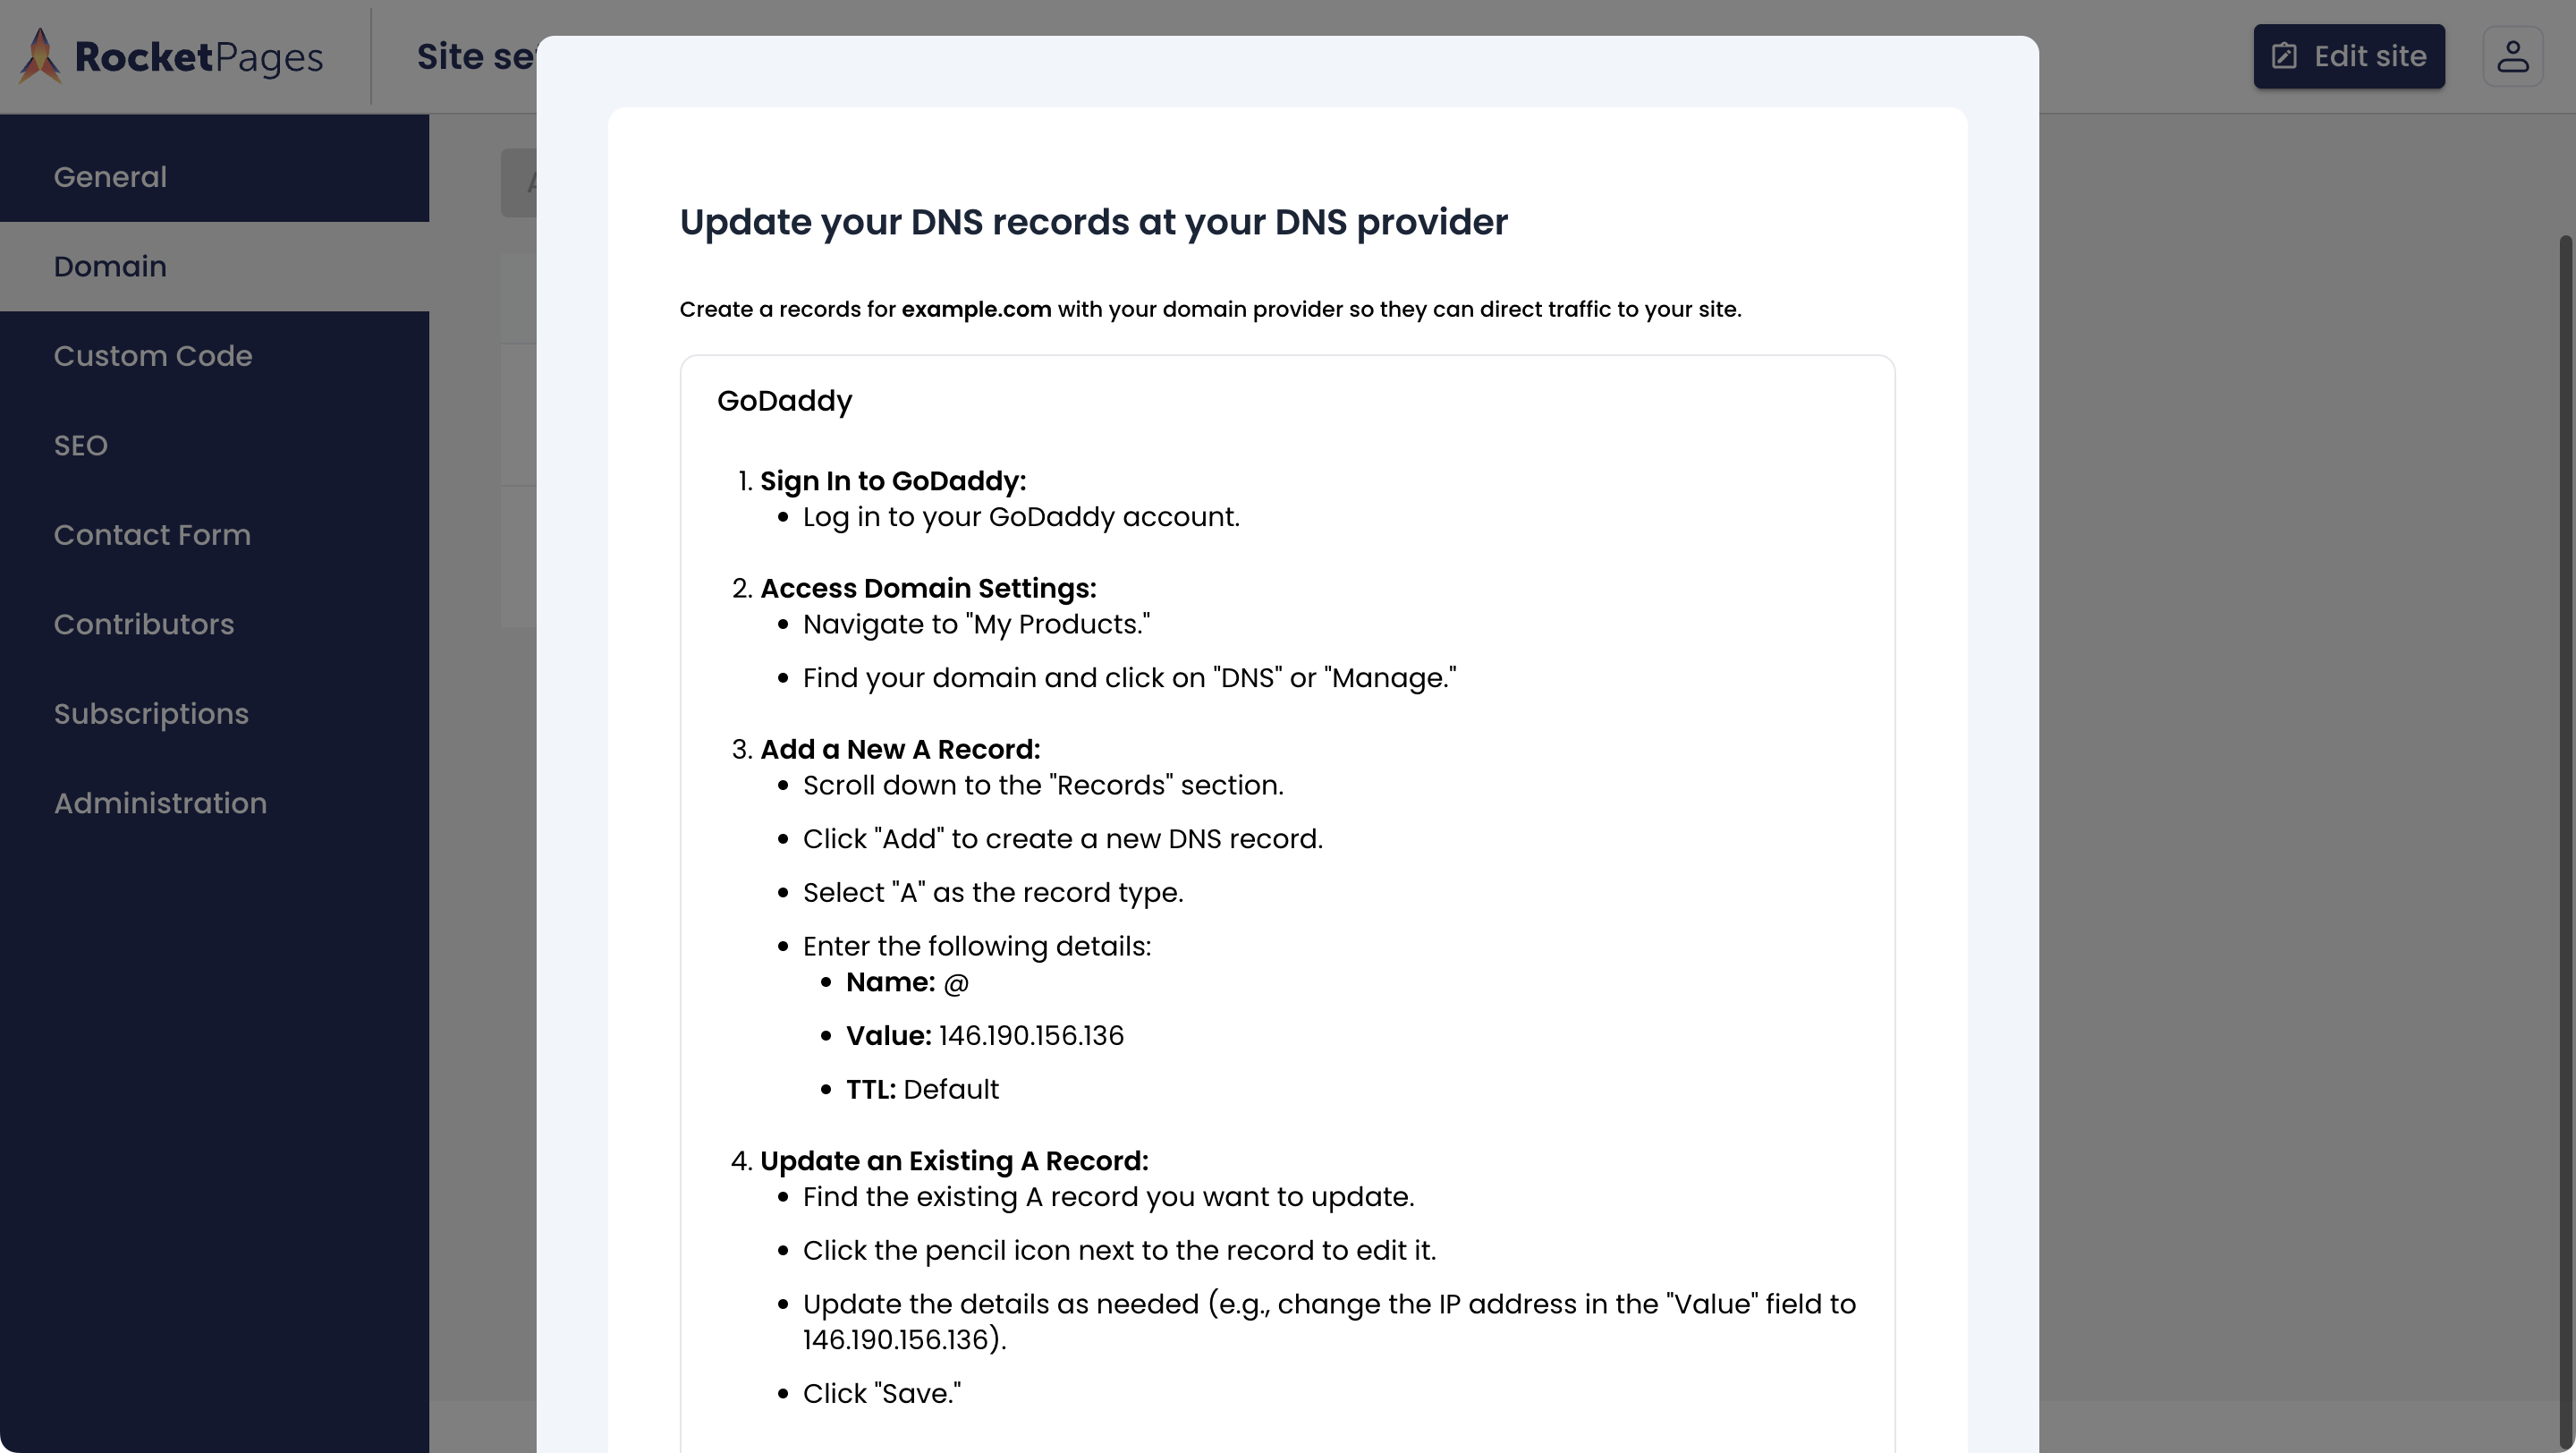
Root-domain example: add an A record with Name @. Always copy the current IP from your own RocketPages dialog.
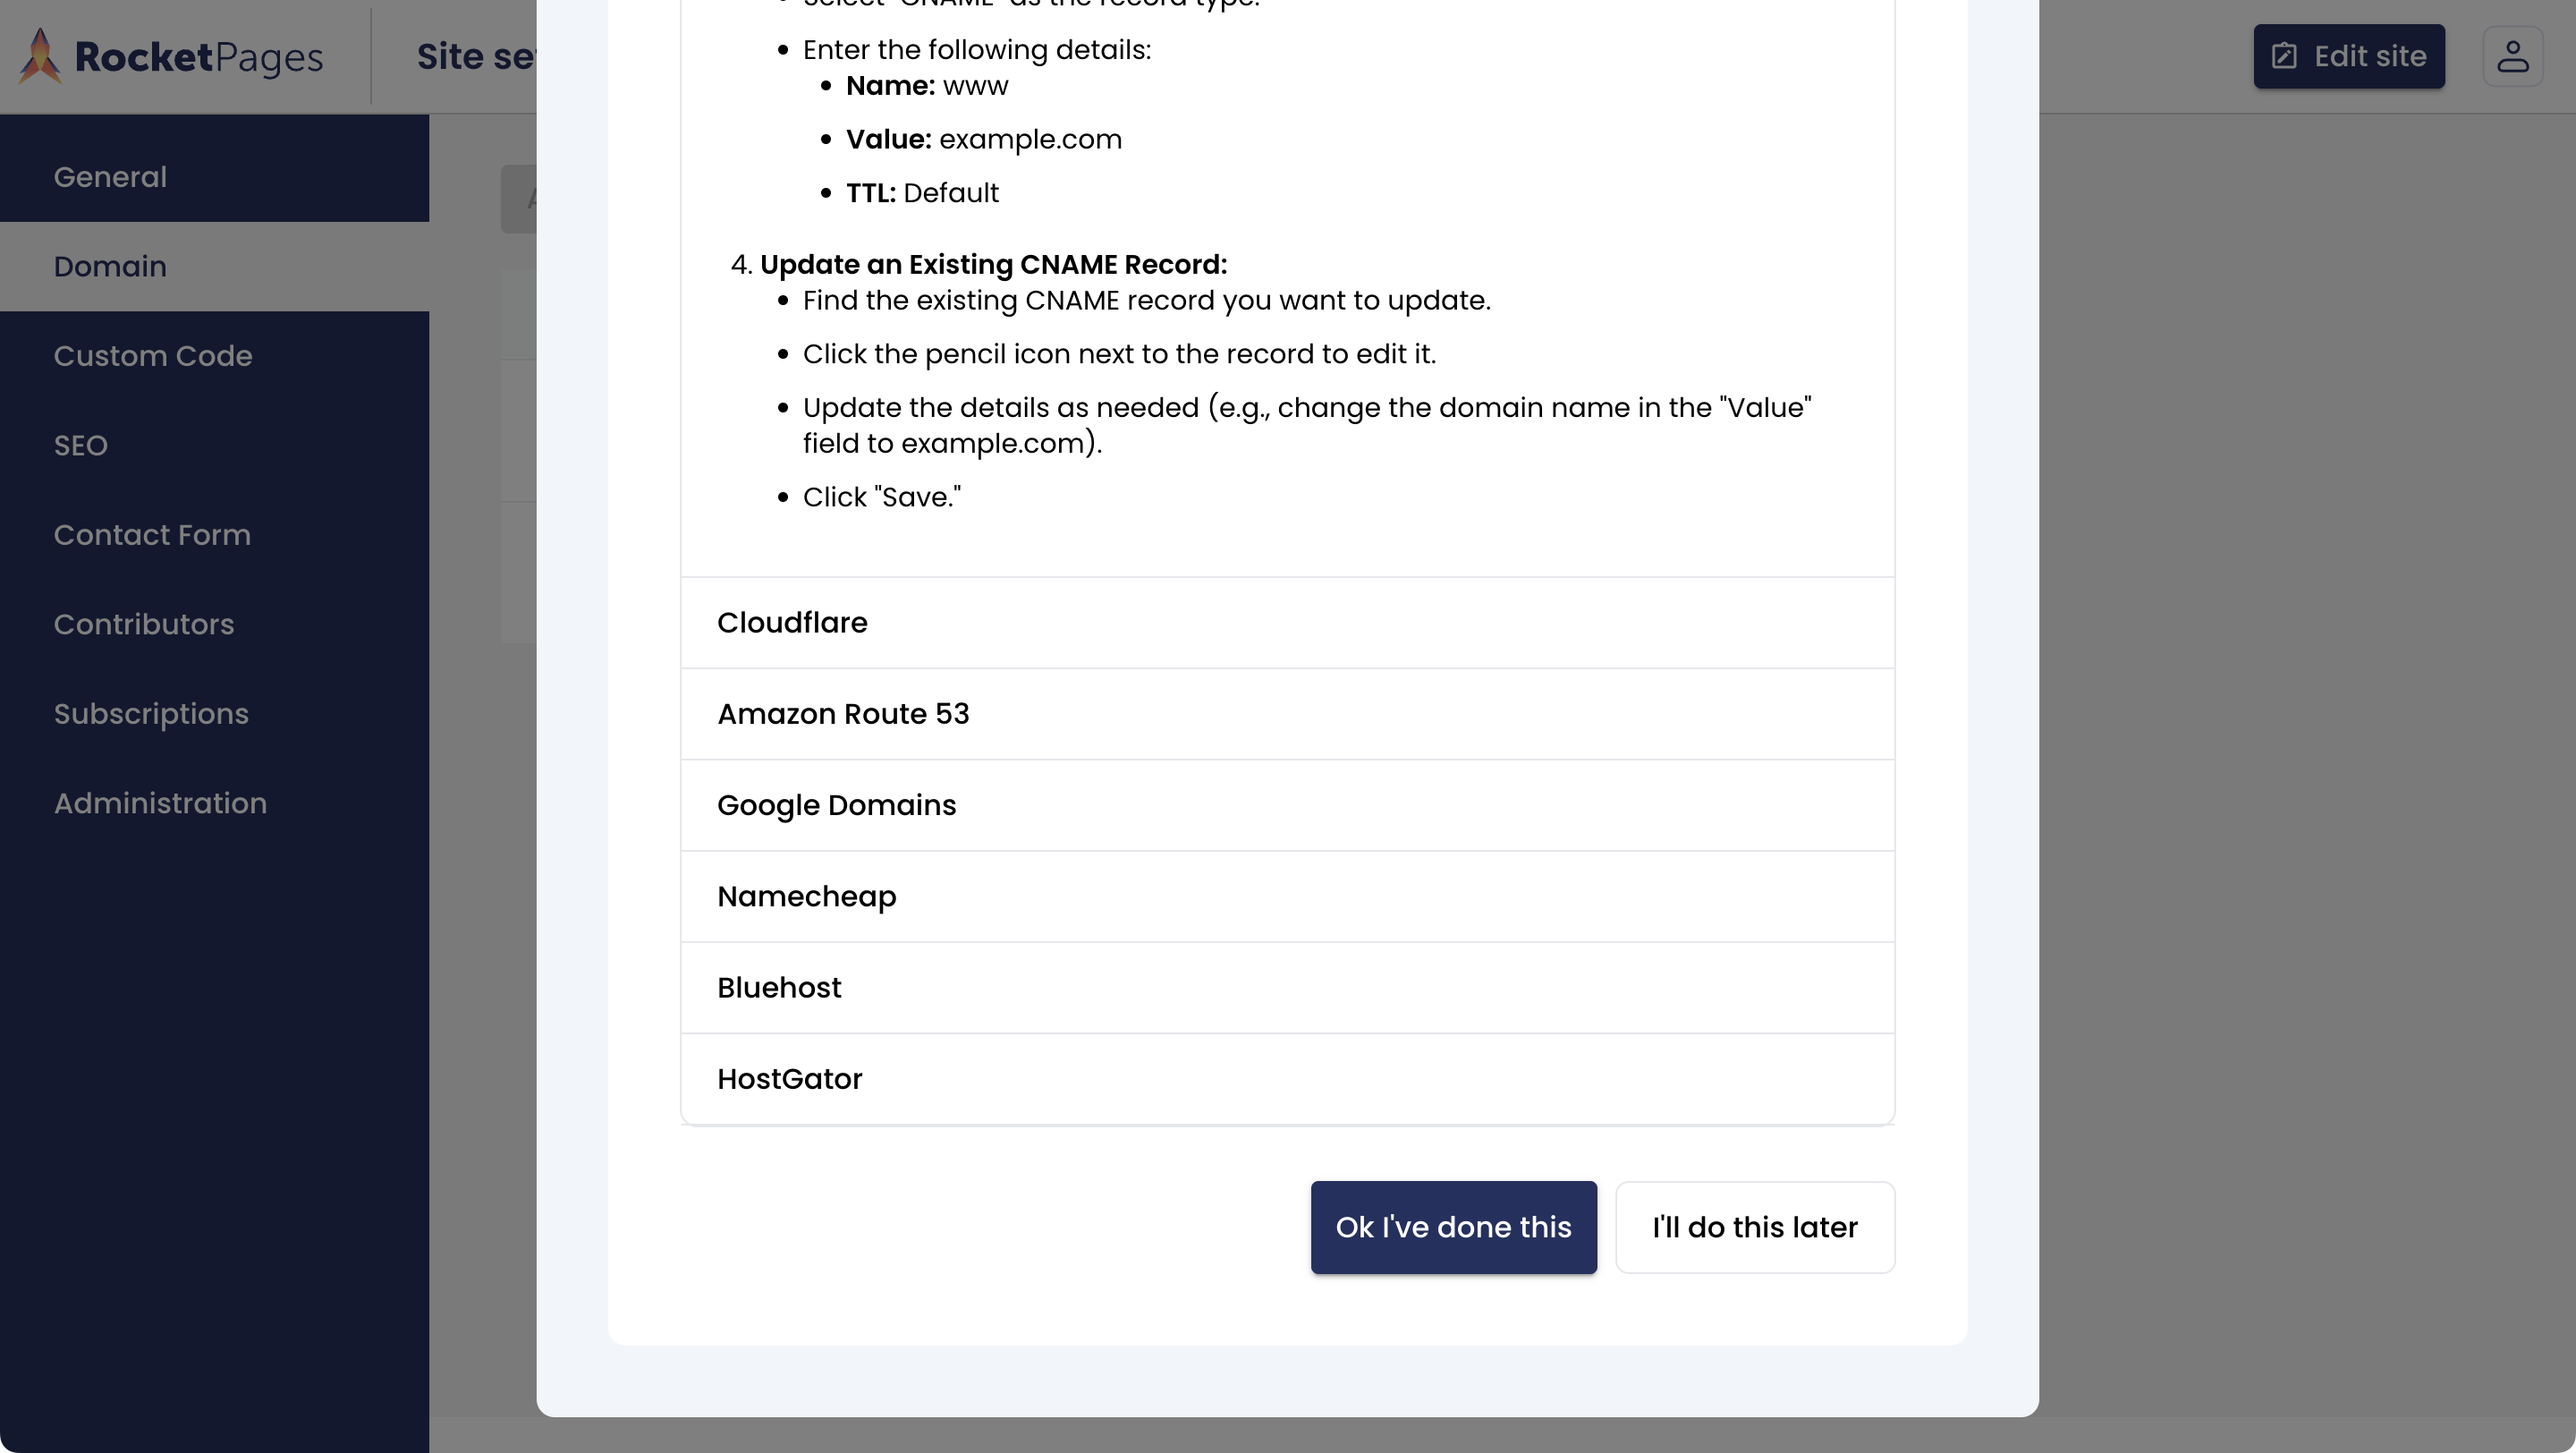
www example: a CNAME record named www points to the root domain. This screen shows RocketPages instructions for your DNS provider.
Save your DNS changes, return to Custom Domain, and choose Validate for the hostname. RocketPages checks whether the domain resolves to an accepted server IP. DNS changes may take time to become visible, so a failed first check does not necessarily mean the records are wrong.
If validation fails, confirm that you edited the active DNS provider, entered the correct hostname, and copied the destination exactly. Allow the DNS change to become visible before retrying.
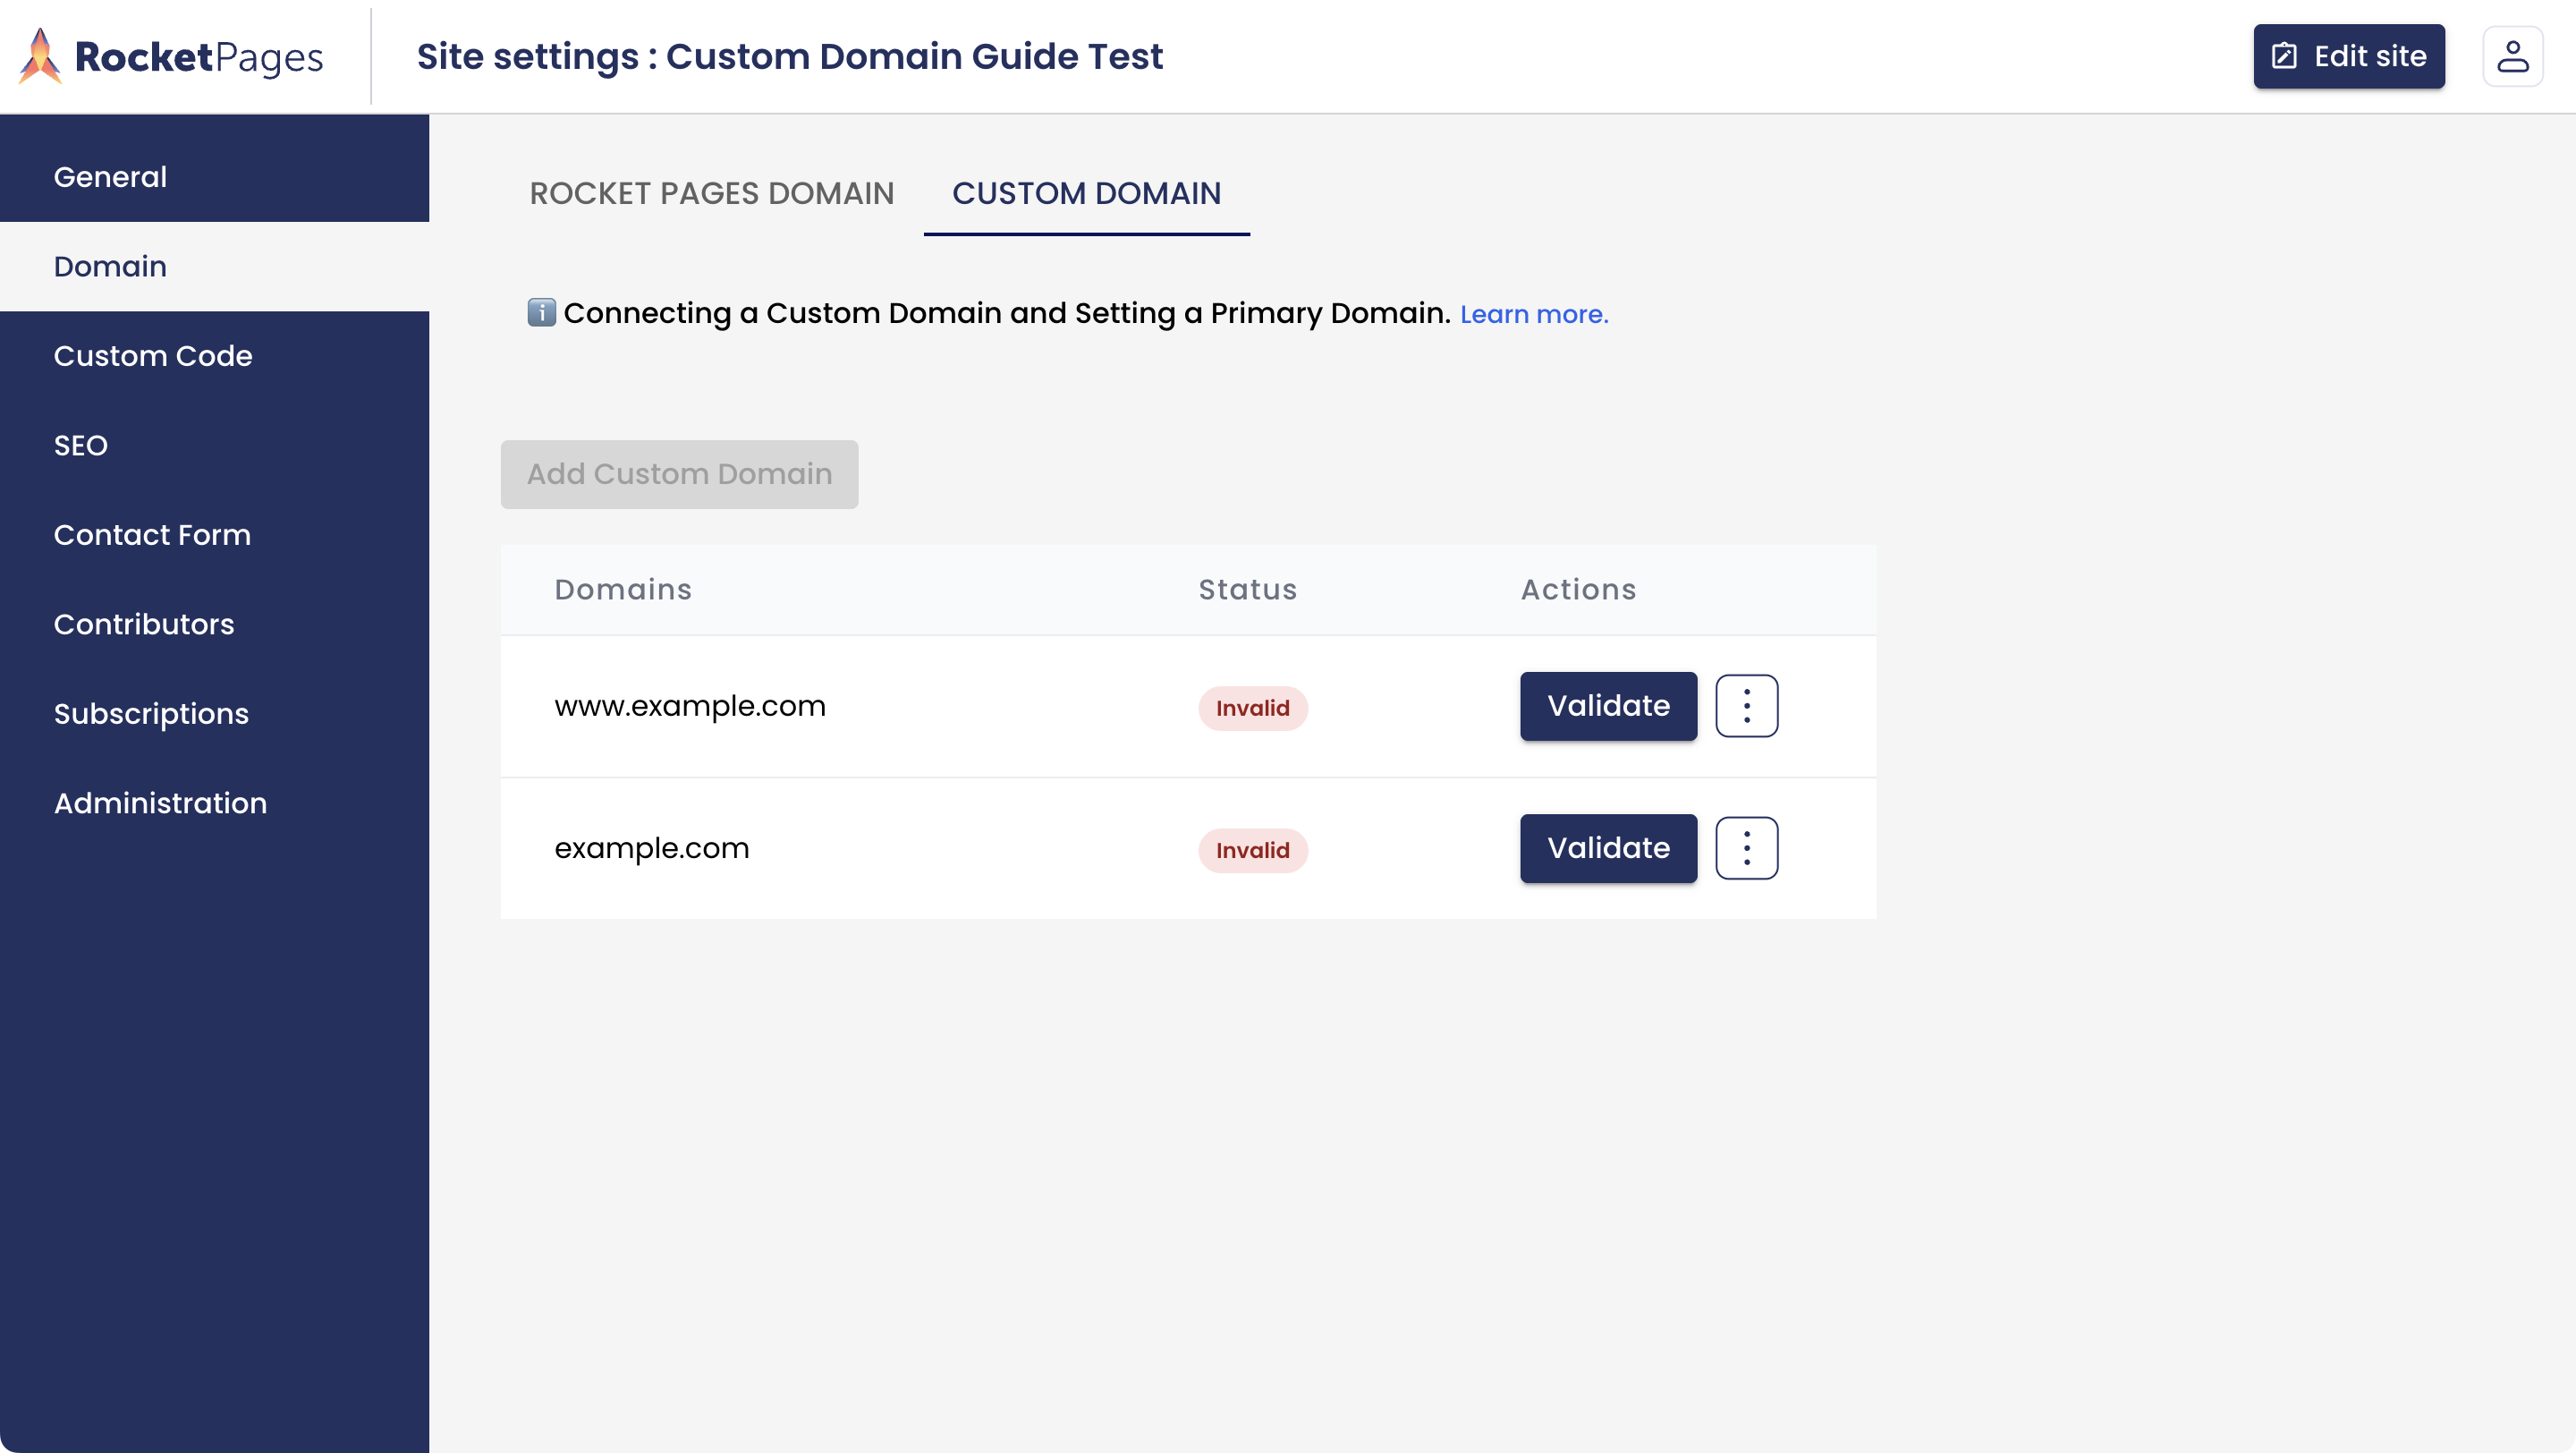
Choose Validate after updating DNS. These sample domains remain Invalid because their DNS has not been connected to the test site.
After validation succeeds, open the domain’s actions menu and choose Set as primary domain. The primary domain is the main address for your website. If you added multiple domains, choose one as primary.
Adding and validating a domain are separate from making it primary. If you skip this choice, your default RocketPages subdomain may remain the main address. For a site that is already published, setting a primary domain triggers republishing; wait for that process to finish.
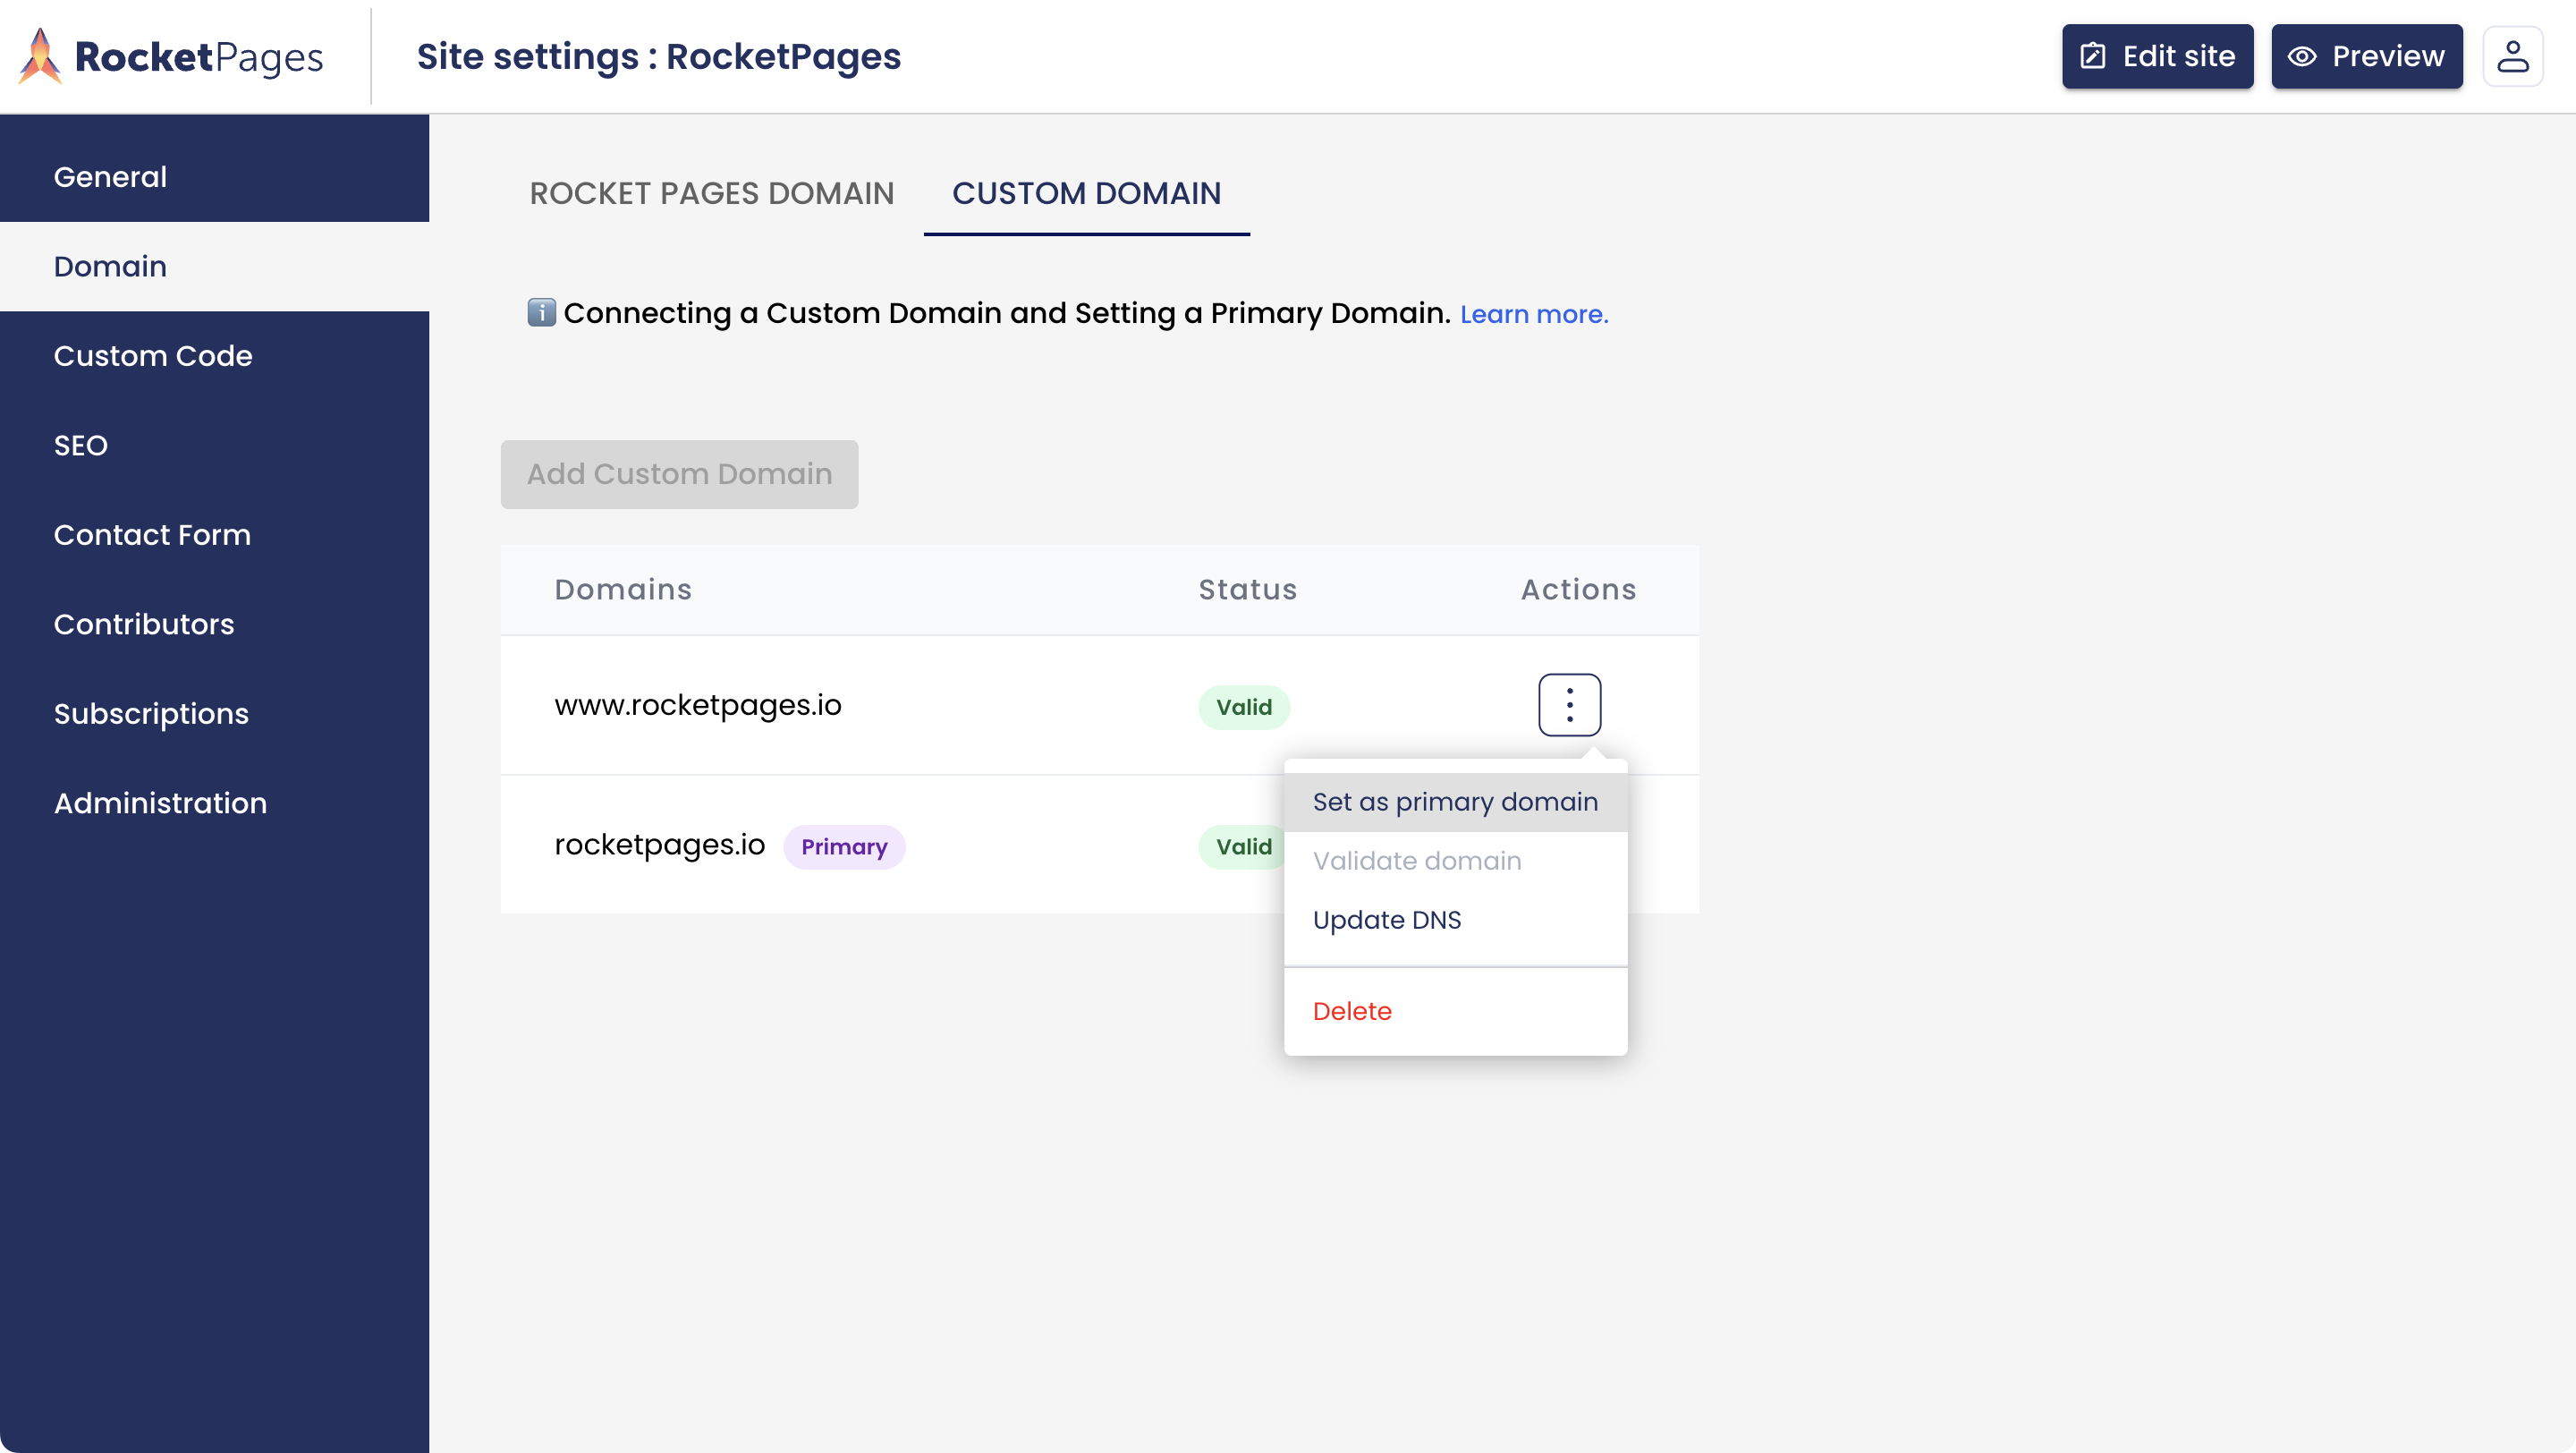
Reference from an existing validated RocketPages site: choose Set as primary domain from the domain actions menu. This screenshot is not from the test site.
If the website has not been published yet, publish it when the content is ready. Open your chosen domain with https:// and confirm that it shows the correct website. SSL certificate issuance can take a few minutes after DNS is correct.
Check the root and www versions you configured, a link to another page, and your contact links or form. Check in a private browser window as well if your regular browser still shows the old website.
For help, use the RocketPages contact page. Share the hostname, the record types and destinations you configured, and the exact error message. Never send account passwords.
Examples for example.com. Use the current IP and exact instructions displayed in your RocketPages domain dialog.
Hostname | Type | Name / Host | Value / Target |
|---|---|---|---|
example.com | A | @ (or blank, per provider) | Current RocketPages server IP shown in the domain dialog |
www.example.com | CNAME | www | example.com (after its A record points to RocketPages) |
Answers about connecting your domain, validation, and HTTPS.
Yes. Custom-domain connection is included. Buying and renewing the domain remain separate costs. Check the current pricing page for plan terms.
Add both hostnames to RocketPages if you want both to reach your site, configure their DNS records, and validate them. Choose one validated hostname as the primary domain.
The resolved address may not yet match the RocketPages server IP. Check the hostname, the current destination shown in RocketPages, the active DNS provider, conflicting records, and any DNS proxy setting. Retry after the change becomes visible.
No. This website connection does not migrate email hosting. Preserve your existing MX and email-related TXT records when changing website DNS.
DNS validation and SSL certificate issuance are separate steps. Certificate issuance can take a few minutes after DNS is correct. If HTTPS continues to fail, contact RocketPages support with the domain and error message.