Capturing the moon may look simple, but getting a sharp, well-exposed lunar shot requires proper technique. Whether it’s a full moon, crescent, or lunar eclipse, this in-depth guide walks you through everything—from gear and settings to composition and editing.
Why Moon Photography Is Special
The moon is one of the most compelling and accessible subjects in astrophotography. It appears in different phases, colors, and contexts, offering endless creative opportunities. Its surface has intricate textures—craters, ridges, and shadows—that can be highlighted beautifully with the right approach.
However, many beginners make the mistake of treating the moon like a night scene. The truth? The moon is very bright—as bright as a daylight scene—so it needs different exposure settings.
Related: The Best Camera Settings for Astrophotography
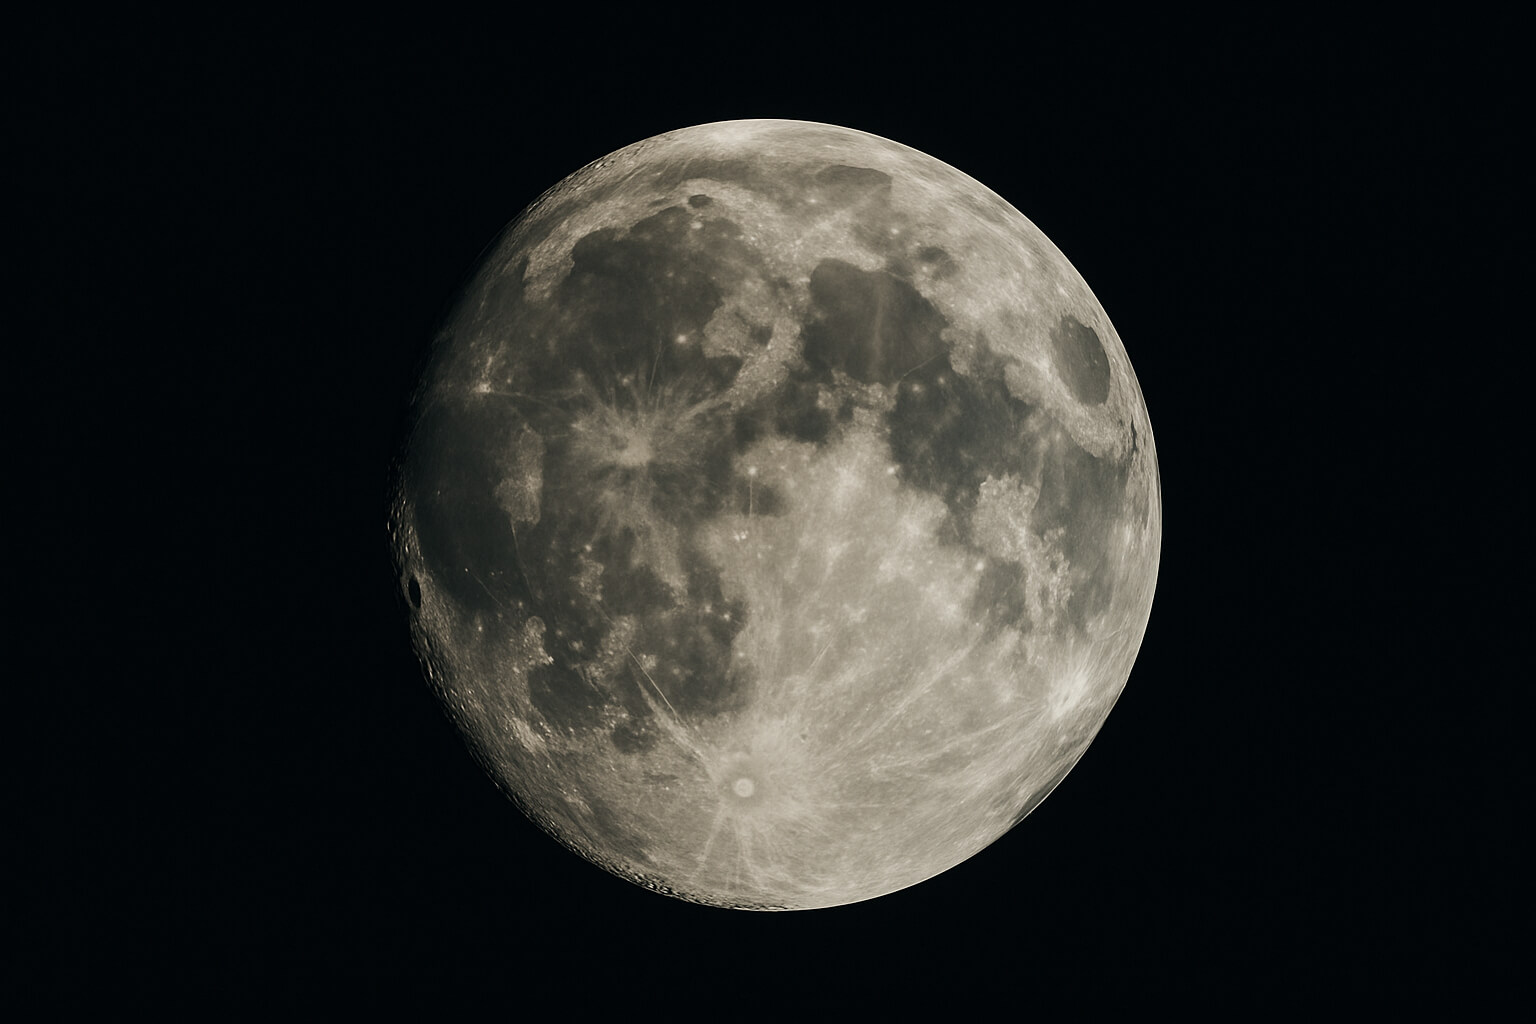
Understanding the Moon's Characteristics
The moon's brightness and surface details can vary depending on its phase and position in the sky. Understanding these characteristics is crucial for capturing compelling images.
- Full Moon: Appears bright and round, but lacks surface shadows, making details less prominent.
- Gibbous Moon: Occurs just before or after a full moon, offering a balance between brightness and shadow, highlighting surface features.
- Crescent Moon: Provides dramatic lighting and shadows, emphasizing the moon's texture.
- Lunar Eclipse: The moon takes on a reddish hue, offering unique photographic opportunities.
Equipment You'll Need
While you can technically capture the moon with a smartphone, for high-quality shots, especially close-ups, the following gear is recommended:
1. Camera
- Use a DSLR or mirrorless camera with full manual control. These allow you to adjust ISO, aperture, and shutter speed independently—essential for lunar photography.
2. Lens
- A telephoto lens (200mm minimum) lets you zoom in on the moon’s surface and fill more of the frame. For ultra-close detail, 400–600mm lenses are ideal.
- Some excellent options include:
- Canon EF 100–400mm f/4.5–5.6L IS II
- Nikon 200–500mm f/5.6E ED VR
- Sigma 150–600mm f/5–6.3 DG OS HSM
- Tamron SP 150–600mm f/5–6.3 G2
- Sony FE 200–600mm f/5.6–6.3 G OSS
3. Tripod
- A sturdy tripod is critical to avoid camera shake, especially with long lenses.
- Recommended models:
- Manfrotto 055 Carbon Fiber Tripod
- Peak Design Travel Tripod
- Gitzo Mountaineer Series
4. Remote Shutter Release
- This reduces vibration during exposure. You can also use your camera’s 2-second timer if you don’t have a remote.
5. Optional Tools
- Star trackers (like the Sky-Watcher Star Adventurer) allow longer exposures if you're including stars.
- Moon phase apps such as Photopills or Sky Guide help you plan your shot based on phase, rise/set times, and position.
- Related: The Best Professional Portrait Photography Equipment
Recommended Camera Settings
Basic Settings to Start With:
- Mode: Manual (M)
- ISO: 100–400
- Use low ISO to reduce grain while ensuring your image isn’t underexposed.
- Aperture: f/8 – f/11
- These values offer a sweet spot between depth of field and sharpness.
- Shutter Speed: 1/125 – 1/250 sec
- Even though it’s nighttime, the moon is very bright. A fast shutter ensures crispness and avoids motion blur caused by the moon’s orbit.
- Focus: Switch to manual focus and zoom in on the moon in Live View to fine-tune sharpness.
- White Balance: Set to daylight or manually adjust around 5200–5500K for neutral tones.
Related: What Is White Balance in Photography?
Pro Tip: Try the “Looney 11 Rule” — set aperture to f/11, and shutter speed to the inverse of your ISO. Example: ISO 100 = 1/100 sec.
Composition Tips
Once you’ve nailed the technical settings, it’s time to get creative with your composition:
- Foreground Elements: Trees, city skylines, mountain ridges, and even people can create scale and storytelling in your image.
- Rule of Thirds: Avoid placing the moon dead center unless you’re doing a symmetrical composition. Position it in the top left or right third for more balance.
- Time It Right: Shoot during moonrise or moonset to add golden hour tones and capture the moon closer to the horizon, where it looks larger.
Related: How to Use Foreground Elements in Photography
Advanced Techniques
Ready to level up? Try these techniques for more dynamic moon shots:
1. Multiple Exposures
- Use exposure blending to combine a well-exposed moon with a darker foreground. You’ll need to shoot two exposures—one for the sky and one for the landscape—and merge them in post.
2. Lunar Eclipse Photography
- A lunar eclipse involves capturing different phases over time. As the moon darkens, increase ISO and use slower shutter speeds (1–5 seconds). A sturdy tripod and remote shutter release are crucial.
3. Moon Time-Lapses
Post-Processing Tips
Editing can dramatically enhance the detail and mood of your moon images. Here’s what to focus on:
- Sharpening: Carefully sharpen the image to bring out craters and textures. Avoid overdoing it.
- Contrast: Increase contrast and clarity to deepen shadows and highlights.
- Noise Reduction: Use tools like Lightroom or Topaz DeNoise to smooth the sky or dark areas.
- Color Correction: Neutralize or enhance tones using white balance adjustments.
Related: The Best Photo Editing Techniques for Vibrant Colors
Recommended Software:
- Adobe Lightroom Classic
- Photoshop (especially for exposure blends)
- Capture One
- Topaz Labs (for sharpening and noise reduction)
Build Your Lunar Photography Portfolio
Once you’ve captured your best moon images, share your work professionally online:
External Resources for Further Learning
Conclusion
Taking a moon picture is more than just pointing your camera at the sky—it’s about preparation, precision, and creativity. Whether you're going for sharp lunar details or a moonlit scene with storytelling elements, this guide gives you everything you need to start capturing stunning lunar images tonight.