Best settings for landscape photography

June 14, 2025

By RocketPages

A DSLR camera mounted on a tripod capturing a vibrant mountain landscape at sunset, with overlaid camera settings showing ISO 100, aperture f/11, and shutter speed 1/4 second.

In landscape photography, aperture isn’t just a technical setting — it’s a creative decision that affects every part of your image. From sharp mountain peaks to dreamy forest paths, how you control aperture shapes the depth, clarity, and mood of your photo. This guide walks you through everything you need to know, from basic principles to advanced techniques.


What Exactly Is Aperture in Photography?


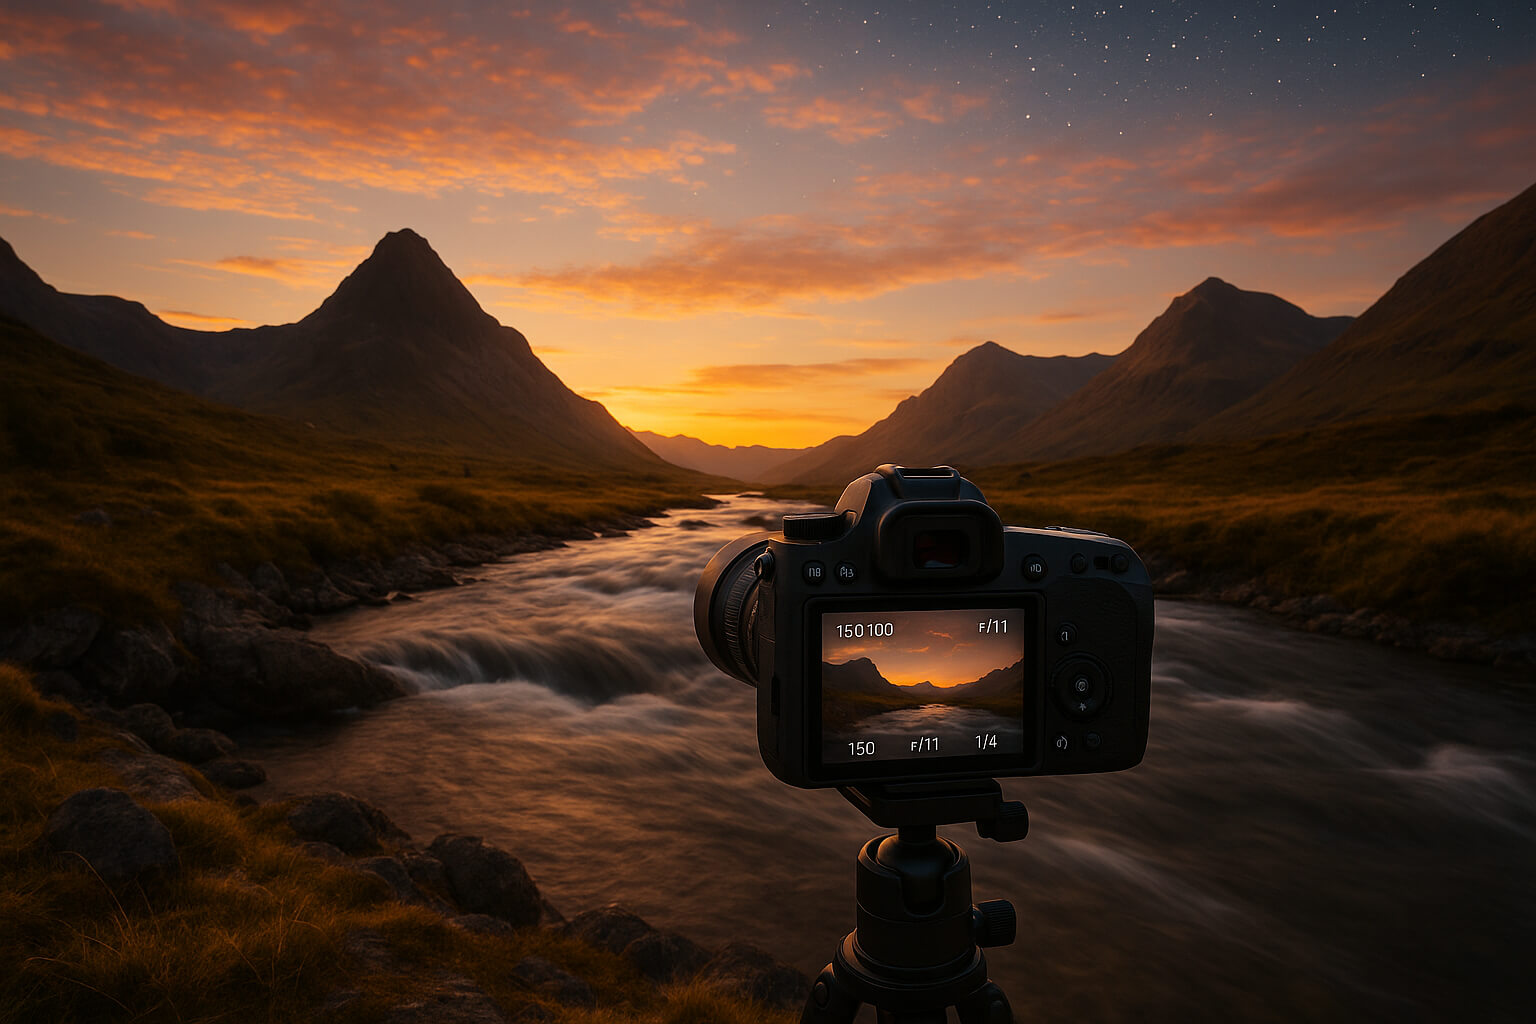
Aperture refers to the circular opening in your lens that controls how much light enters your camera’s sensor. This opening can be wide or narrow, and it's measured using something called “f-stops.” You’ve probably seen them written like f/2.8, f/5.6, f/8, or f/16.


The lower the f-stop number, the wider the aperture. That means:


  • More light enters the camera.
  • The depth of field becomes shallower, meaning less of the scene is in focus.
  • This is often used in low-light or creative photography (like isolating a flower in a field).


On the other hand, a higher f-stop number means the aperture is smaller:


  • Less light enters the camera.
  • More of the scene remains in focus, from foreground to background.
  • This is ideal for landscape photography, where you often want maximum sharpness throughout the image.


Related: What is White Balance in Photography?


Why Aperture Is Crucial in Landscape Photography


When you’re photographing landscapes, you’re not just capturing a subject — you’re capturing an entire scene, often stretching from a few inches in front of your feet to mountains miles away. The right aperture ensures everything stays in crisp focus, helping your viewer feel immersed in the scene.


There are three main reasons why aperture is so important in this genre:


  • Depth of Field Control:
  • Landscapes demand depth — not just visually, but also in terms of focus. A narrow aperture like f/11 allows you to keep a sharp image from the front of your frame all the way to the distant background.
  • Exposure Management:
  • Aperture is one of the three pillars of exposure (alongside shutter speed and ISO). By adjusting your aperture, you can balance the amount of light hitting your sensor. On bright days, a smaller aperture helps prevent overexposure.
  • Image Clarity and Lens Performance:
  • Most lenses perform at their best — with the least distortion and best edge-to-edge sharpness — within a certain range. This sweet spot is usually around f/8 to f/11. Knowing this helps you get the most out of your gear.


What Is the Best Aperture Range for Landscape Photography?


While every scene is unique, the majority of professional landscape photos are taken using apertures between f/8 and f/11. This range strikes a perfect balance between sharpness, depth of field, and light control.


Using f/8 or f/11 ensures that your foreground, middle ground, and background all stay acceptably sharp. It also minimizes the risk of diffraction (a problem we’ll cover later). Whether you're capturing a vast desert or a waterfall in a jungle, this range gives you clarity and flexibility.


Related: Best Camera Settings for Astrophotography


In some situations, you might want to go beyond that range:

  • If you're shooting with strong foreground interest — like wildflowers close to your lens or a log stretching into the frame — you might use f/16 or even f/22 to keep everything in focus. Be mindful, though, that image sharpness may drop slightly at those smaller apertures.


Creative Ways to Use Aperture in Landscapes


Although landscape photography usually calls for deep focus, there are times when breaking the rule leads to a more powerful image. Aperture can be a storytelling tool, not just a technical necessity.


Here are three creative ways you can use aperture in landscapes:


  • Shooting Wide Open (f/2.8 – f/5.6):
  • While not typical for traditional landscapes, this is useful for minimalist or moody scenes. For example, you might isolate a single tree in fog or create soft bokeh in a field of flowers. The shallow depth of field creates an emotional tone and artistic effect.
  • Shooting Narrow (f/11 – f/16):
  • This is your bread and butter for deep focus landscapes. Perfect for mountain ranges, seascapes, or cityscapes where everything needs to be sharp.
  • Creating Starbursts (f/16 – f/22):
  • If the sun is partially visible in your frame — say, peeking behind a tree or mountain — setting your aperture to f/16 or higher will create that iconic “starburst” effect. Just make sure your lens is clean, and your light source is sharp and defined.


Related: How to Create Beautiful Sun Flare Effects


Understanding Diffraction (And Why It Matters)


Diffraction is a natural limitation that occurs when light passes through a very small opening, like f/22. Instead of moving straight onto the sensor, light waves spread out and interfere with each other, causing the image to look slightly soft.


This is why shooting at extremely narrow apertures (like f/22 or f/32) can reduce sharpness — even though you’re increasing depth of field.


So, while you can use f/22 for maximum focus, it’s often better to stay around f/11 or use focus stacking instead. Focus stacking involves taking multiple photos at different focus points and blending them in software to get full sharpness without relying on small apertures.


Related: Common Mistakes in Photography and How to Avoid Them


How Aperture Affects — and Interacts With — Other Settings


Aperture doesn’t exist in a vacuum. When you adjust it, you need to consider shutter speed, ISO, and filters to maintain proper exposure and image quality.


  • Shutter Speed:
  • If you reduce the aperture to f/11 or f/16, your camera will need a longer exposure to compensate for the decreased light. This could lead to motion blur or camera shake unless you’re using a tripod.
  • That’s why a stable support system like the Peak Design Travel Tripod or the Manfrotto Befree GT XPRO is essential for landscape photographers.
  • Best Tripods for Travel and Studio Photography


  • ISO:
  • A lower ISO (100–200) gives you the cleanest image with the most detail and dynamic range. Try to keep your ISO low and let your shutter speed adapt, especially when using a tripod.


  • Filters:
  • Filters are often necessary when using small apertures in bright daylight. They give you more flexibility with shutter speed and help control reflections and contrast.
  • ND Filters (Neutral Density): Reduce light so you can take longer exposures, even in daylight. Perfect for smoothing waterfalls or clouds.
  • Polarizing Filters: Eliminate glare on water and deepen blue skies. Excellent for coastal and forest shots.
  • The Best Filters for Dramatic Landscape Photography


Want to Go Deeper Into Landscape Photography?


If you want to push your skills beyond aperture and explore other essential techniques, check out these in-depth guides:


Final Thoughts


Choosing the right aperture is one of the most important decisions you'll make when shooting landscapes. It affects how sharp your image is, how much of the scene is in focus, and how the final photo feels to the viewer.

For most situations, sticking to f/8 or f/11 will give you reliable results — balancing sharpness, clarity, and depth. But don’t be afraid to experiment with wider or narrower apertures when the scene calls for it. Landscape photography is as much about artistic intention as it is about technical precision.


With a solid understanding of aperture, you're no longer guessing — you’re composing with control, clarity, and creativity.

Recent Articles

Stay up to date with the newest tips, gear reviews, and step-by-step guides to elevate your photography journey from home and beyond.