Blue hour—often considered the golden hour’s cooler cousin—occurs during the brief moments just before sunrise and after sunset. During this magical time, the natural world is bathed in soft, cool light with tones ranging from deep blues to vibrant purples. This diffused, low-angle light offers photographers an opportunity to capture stunning, ethereal images that convey calmness, mystery, and drama.
Blue hour is perfect for all kinds of photography, including landscapes, cityscapes, portraits, and even abstract work, but it requires a bit of finesse to capture the unique qualities of the light and atmosphere.
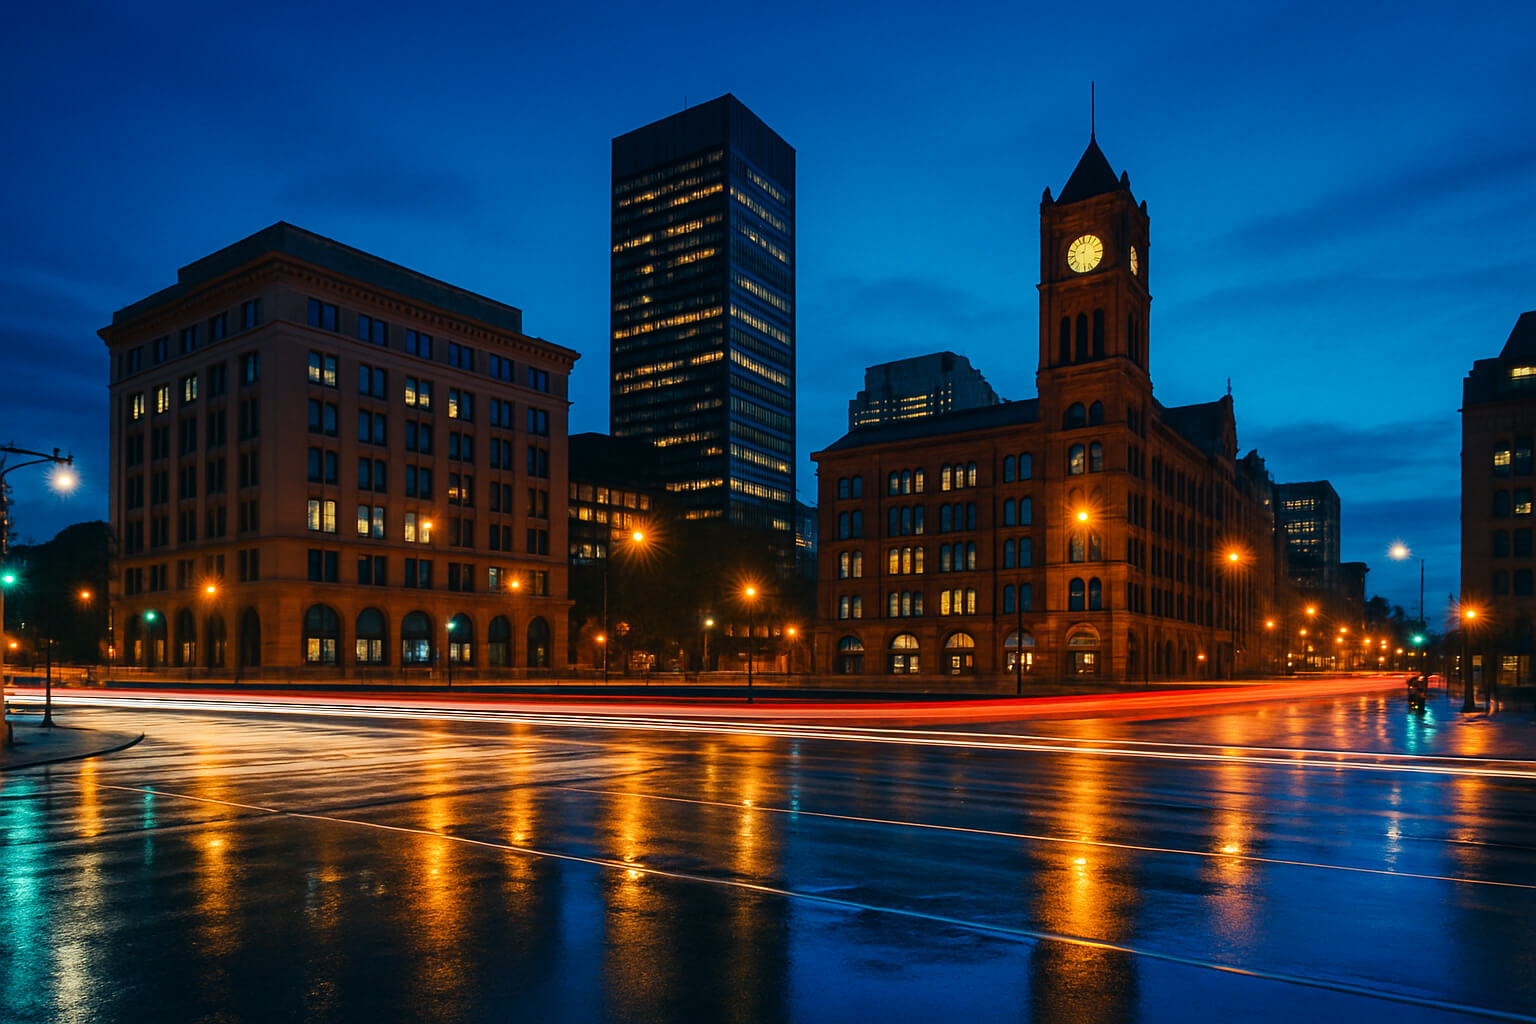
Why Blue Hour Is Special
Blue hour is a distinct and highly sought-after time for photographers because of its soft, even light and the unique color palette it produces. Unlike midday light, which can be harsh and full of contrast, blue hour light allows for:
- Soft, diffused lighting: This creates a flattering glow on subjects and reduces harsh shadows.
- Balanced light: Natural sunlight begins to blend with artificial light, especially in urban environments, which allows for more balanced exposure in cityscapes.
- Vivid blues and purples: The cooler hues of blue hour photography evoke a dreamlike, peaceful atmosphere.
This time frame can last only 20-40 minutes, depending on where you are in the world, so knowing how to use your camera settings effectively is crucial to capturing the full range of beauty during this fleeting time.
Related: How to Take Aesthetic Photos
Essential Camera Settings for Blue Hour
1. Use Manual Mode
- Manual mode allows for the most control over your exposure settings. The low-light conditions during blue hour can easily overwhelm your camera’s automatic settings, leading to underexposed or overexposed images. By shooting in manual mode, you can adjust settings to capture the essence of blue hour properly.
- Key settings to adjust:
- Shutter Speed: The best shutter speed for blue hour depends on your subject. For long exposure shots of landscapes, water, or cityscapes, you might need a shutter speed of 1–30 seconds. Use slower shutter speeds for dramatic light trails or water reflections. When capturing portraits or quick-moving subjects, aim for a shutter speed between 1/125 to 1/250 seconds.
- How to Shoot Breathtaking Long-Exposure Landscapes
- Aperture: The aperture affects the depth of field and how much light enters the camera. For landscapes, use an aperture between f/8 and f/16 to get sharp details across the entire scene. For portraits, use a larger aperture like f/2.8 to f/5.6 to create a shallow depth of field and isolate your subject.
- ISO: Blue hour photography typically requires low ISO settings (ISO 100–400) to avoid noise and preserve the natural softness of the light. Raise the ISO slightly if you need to achieve a faster shutter speed, but try to keep it as low as possible to maintain image quality.
- What Is ISO in Photography?
- White Balance: To retain the natural blue tones of the scene, set your white balance to ‘Daylight’ or manually adjust it between 5000–6000K. This helps capture the cool, ambient light while avoiding a too-warm or yellowish tint.
- What Is White Balance in Photography?
2. Essential Equipment for Blue Hour Photography
- Tripod
- A sturdy tripod is essential for long exposure shots, which are often needed for blue hour photography. Longer exposures allow you to capture the soft light and smooth water or city light trails, which is part of what makes blue hour images so captivating. A tripod ensures sharpness and stability, especially in low-light conditions.
- Best Tripods for Travel and Studio Photography
- Remote Shutter Release
- For long exposures, even the smallest camera shake can result in blurry images. A remote shutter release allows you to trigger the camera without physically touching it, ensuring that your camera remains perfectly still during the exposure.
- Wide-Angle Lens
- A wide-angle lens (14mm to 35mm) is ideal for capturing expansive cityscapes, landscapes, and the vast sky during blue hour. It lets you capture large scenes with more depth, helping you draw attention to foreground elements, leading lines, and the colors of the sky.
- Best Lenses for Portrait Photography
- ND Filters
- A neutral density (ND) filter is particularly useful for long exposure shots during blue hour, especially if you want to achieve silky-smooth water or cloud effects. ND filters reduce the amount of light entering the camera, allowing you to slow down your shutter speed without overexposing the image.
- The Best Filters for Dramatic Landscape Photography
3. Focusing Tips for Blue Hour
- Manual focus is often the best option for blue hour photography because autofocus can struggle in low-light conditions. Here's how to get the sharpest focus:
- Use live view and magnify the image on your camera's LCD screen to ensure the focus is perfect.
- Focus peaking can be helpful in live view mode—this feature highlights the areas in focus with a colored overlay, making it easier to achieve sharp focus.
- Focus on a well-lit area, such as city lights, or use a nearby object to focus on before recomposing your shot.
- If your camera has focus assist features, use them to fine-tune your focus.
4. Composition Ideas for Blue Hour
The magic of blue hour isn’t just in the colors—it’s also in how you compose your shots. Here are some ideas to make your blue hour photos stand out:
- Incorporate reflections: Water reflections or reflections from wet pavement are perfect for capturing blue hour’s glow. Look for bodies of water, puddles, or shiny surfaces that can double the light and add a dreamy dimension to your images.
- Include city lights: City lights look particularly stunning during blue hour because they balance the fading natural light with artificial light. Experiment with light trails, streetlights, and neon signs to create a dynamic mix of colors and light sources.
- Use leading lines: Leading lines guide the viewer's eye through the composition. Look for roads, rivers, or architectural lines to create a sense of depth and direction in your photos.
- What Are Leading Lines in Photography?
- Utilize foreground elements: Adding foreground elements such as trees, flowers, or architectural features can enhance the sense of depth in your image. These elements help frame the shot and give context to the scene.
- How to Use Foreground Elements in Photography
Post-Processing Tips for Blue Hour Photos
While blue hour shots are beautiful right out of the camera, you can enhance their impact with post-processing. Here are some tips for refining your photos:
- Boost vibrance and contrast: Blue hour images often have a subtle, soft glow, but you can bring out the rich blues and purples by adjusting the vibrance and contrast.
- Adjust white balance: If your blue hour images feel too cool, slightly warm them up to enhance the mood, but keep the cool undertones intact to preserve the blue hour aesthetic.
- Reduce noise: Low-light shots can often introduce noise, especially at higher ISOs. Use noise reduction tools in Lightroom or Photoshop to smooth out the image without losing details.
- Best Photo Editing Apps in 2025
How to Edit Travel Photography for Maximum Impact
Pro Tips for Blue Hour Mastery
- Scout locations in advance: It’s best to plan your shoot locations during daylight so you know exactly where to go when blue hour arrives.
- Arrive early and stay late: Blue hour is short—arriving early and staying late ensures you don’t miss the most beautiful light. You can also experiment with both before and after sunset or before sunrise to capture different moods.
- Use apps: Apps like PhotoPills or **Golden Hour Calculator** can help you track the timing of blue hour and other important lighting events during the day.
- Shoot in RAW: Shooting in RAW format ensures you have maximum flexibility when editing, allowing you to pull out more detail from the shadows and highlights.
Build Your Blue Hour Portfolio
Once you’ve mastered blue hour photography, it’s time to showcase your work. Whether you're looking to build a portfolio or sell prints, here are some tips to take your blue hour images to the next level:
- Showcase your blue hour masterpieces: A well-curated portfolio is essential for attracting potential clients and collectors. You can easily build a professional website using platforms like Wix, Squarespace, or WordPress.
- How to Build a Photography Website for Clients 2025
- Sell your blue hour prints: Platforms like Etsy, Saatchi Art, and Fine Art America offer great marketplaces to sell your blue hour photography prints. These platforms provide print-on-demand services, meaning you don’t have to worry about inventory.
- Best Photo Selling Websites 2025
- Promote your work on the right platforms: Use platforms like Instagram, Pinterest, and 500px to display your blue hour photos and attract a broader audience.
- Best Social Media Platforms for Photographers in 2025
Final Thoughts on Blue Hour Photography
Blue hour photography offers a unique opportunity to capture the world in a beautiful, tranquil light. By understanding the best camera settings, focusing techniques, equipment, and post-processing tips, you can master this magical time of day. Remember that blue hour is fleeting, so the more prepared you are, the more likely you are to capture stunning images that stand out in your portfolio or social media feeds.