What Are the Best Settings for Flash Photography

June 02, 2025

By RocketPages

Photographer using a flash setup indoors at a wedding, with light bouncing off the ceiling.

Flash photography is an essential technique that can drastically improve your photos, whether you're shooting in low-light environments or trying to add an extra dimension to well-lit scenes. It allows you to control lighting in a way that enhances the mood, highlights details, and creates beautiful contrasts. However, understanding the right flash settings is crucial to avoid common issues like harsh shadows, overexposure, or flat-looking photos. In this guide, we’ll cover the best flash settings for a variety of photography scenarios, from portraits to events, as well as some helpful tips and gear recommendations.


Understanding Flash Photography Basics


Before diving into the specific settings, it's important to grasp the core components that influence flash photography. These elements play a role in how your image will look once the flash is used:


  • Shutter Speed: Controls how much ambient light is captured in the frame. A slower shutter speed results in more exposure to surrounding light.
  • Aperture: Affects both ambient light and flash exposure, controlling how much light enters the lens and how much depth of field is present.
  • ISO: Determines how sensitive the camera is to light. A higher ISO makes the camera more sensitive to light, but can also introduce noise.
  • Flash Power: Refers to the intensity of the flash burst. It can usually be adjusted manually or automatically (TTL mode) to suit your needs.


Tip: To take your flash skills further, explore different artificial lighting setups that complement flash use and improve the overall quality of your photos.


Best Settings for Common Flash Scenarios


Different photography scenarios require different settings. Below are the best configurations for flash photography in various common situations:


1. Indoor Portraits : For indoor portrait photography, you want a flash that is soft and flattering while still filling in shadows.


  • Mode: Manual or Aperture Priority
  • Shutter Speed: 1/125s (fast enough to avoid motion blur)
  • Aperture: f/4 to f/5.6 (provides a nice balance between depth of field and light)
  • ISO: 100–400 (keeps noise levels low)
  • Flash Power: 1/8 to 1/4 (use a lower setting to avoid overpowering the scene)


Tip: Use bounce flash (off walls or ceiling) to soften the light and reduce harsh shadows. This also avoids the direct flash look, which can create an unflattering, flat light.


2. Outdoor Fill Flash (Daylight) : When shooting outdoors in bright sunlight, a flash can help fill in shadows on your subject’s face.


  • Mode: Aperture Priority or Manual
  • Shutter Speed: 1/200s to 1/250s (Max Sync Speed)
  • Aperture: f/5.6 to f/8 (to balance ambient and flash exposure)
  • ISO: 100 (reduces noise and ensures the flash will be the main source of light)
  • Flash Power: TTL (auto) or 1/8 (manual setting)


Tip: Use fill flash to eliminate harsh shadows on the subject’s face, especially during midday or when the sun is directly overhead.


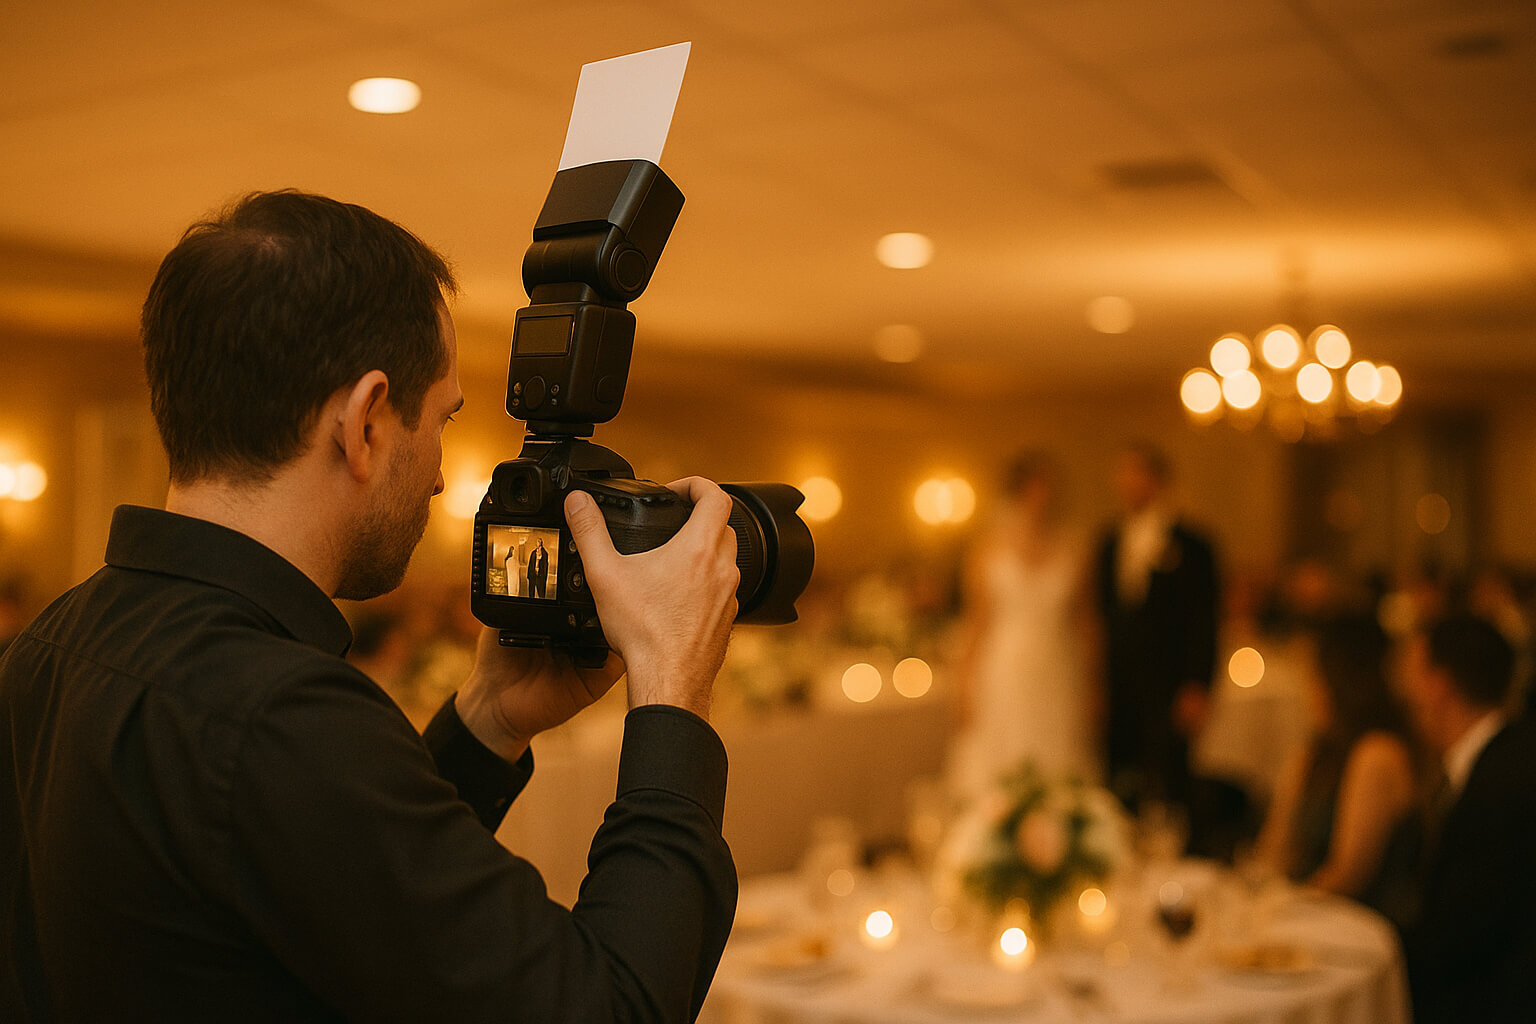
3. Event or Party Photography : For events or parties, you often need quick adjustments to capture the moment, especially in dimly lit environments.


  • Mode: Manual
  • Shutter Speed: 1/60s to 1/125s (helps capture movement while avoiding motion blur)
  • Aperture: f/2.8 to f/4 (ensures a shallow depth of field and lets in enough light)
  • ISO: 400–800 (boosts sensitivity without introducing excessive noise)
  • Flash Power: TTL or 1/4 to 1/2 (use TTL for auto adjustments, or manual for control)


Tip: Use a diffuser or bounce to soften the light and avoid harsh shadows. You can also add a wireless trigger system to sync multiple flashes if needed.


4. Creative Slow Sync Flash (Night Portraits) : Slow sync flash combines ambient light with the flash to produce dramatic effects, like motion trails or glowing backgrounds.


  • Mode: Manual
  • Shutter Speed: 1/10s to 1/30s (longer shutter speeds allow ambient light to contribute)
  • Aperture: f/2.8 (lets in more light, making the background glow)
  • ISO: 400 (a moderate ISO to balance the exposure without introducing too much noise)
  • Flash Power: TTL or 1/16 (adjust flash power to complement the ambient exposure)


Tip: Use this setting for creative night portraits, where you want to capture the subject in motion or add a sense of drama with blurred background lights.


Recommended Gear and Tools


To maximize the potential of your flash photography, it’s crucial to have the right equipment. Here’s a list of recommended gear that can elevate your results:


  • Speedlight with Manual & TTL Modes: Choose a reliable speedlight such as Godox, Yongnuo, or Nikon SB-700 for flexibility.
  • Flash Diffuser or Softbox: Softens the harshness of direct flash and helps create more flattering light on your subject.
  • Reflector: Bounces light back onto the subject for softer, more natural-looking illumination.
  • Wireless Trigger System: Allows you to trigger off-camera flashes, giving you more creative control over lighting.
  • Light Stand & Umbrella Kit: For creating professional studio lighting setups in your own home or on location.


Want to master portrait lighting? Check out our guide on split lighting for portraits.


Pro Tips for Better Flash Photos


To make the most of your flash photography, try implementing these pro tips:


  • Use TTL for Moving Subjects : TTL (Through-the-Lens) flash settings are ideal for capturing moving subjects, as the flash will automatically adjust based on the exposure readings of the scene. However, for more consistent results, switch to manual mode when the subject is stationary.
  • Avoid Direct Flash : Direct flash can be harsh and unflattering. Bounce the flash off a ceiling or wall, or use a diffuser to soften the light. This helps avoid the typical flat look and harsh shadows.
  • Use the Lowest ISO Possible : To minimize noise, always try to use the lowest ISO setting that gives you the right exposure. Higher ISOs can introduce unwanted grain or noise, especially when using a flash.
  • White Balance Matters : Always ensure your white balance is set to Flash or adjust it manually for accurate color temperature. This ensures that your photos don't have an unnatural, cool or warm cast caused by incorrect white balance settings.
  • Check Your Histogram : Don’t rely solely on the camera’s LCD preview to judge exposure—check your histogram to ensure you’re not clipping the highlights or shadows. This is especially important when using flash in tricky lighting situations.


Need editing tools to perfect your flash photos? Explore the best photo editing apps to fine-tune your images after the shoot.


Conclusion


Mastering flash photography is all about balance—between ambient and artificial light, subject and background, and sharpness and softness. By understanding the interplay between camera settings and flash power, you can use flash creatively, whether it’s for filling in shadows, creating dramatic effects, or adding warmth and depth to your images.


Experiment with different settings and modifiers, review your results, and refine your technique. Flash photography can become one of your most powerful tools when used with precision and creativity.


Want to turn your photography passion into a business? Learn how to scale your photography business or sell your photos online.

Recent Articles

Stay up to date with the newest tips, gear reviews, and step-by-step guides to elevate your photography journey from home and beyond.