
June 06, 2025
Contrast is one of the most powerful tools in photography. It can make your images pop, direct the viewer’s eye to important elements, and convey specific moods. Whether you’re working with light and dark areas (tonal contrast), complementary colors (color contrast), or textures, contrast plays a critical role in the impact of your photos.
In this guide, we’ll explore what contrast is, the different types of contrast, how to apply it in your photography, and why understanding contrast is essential for creating high-quality, engaging images.
In photography, contrast refers to the difference between elements, such as light and dark, color, or textures. It defines how the visual elements within an image stand out against each other. Using contrast correctly can draw attention to the subject, highlight shapes, add drama, and convey a particular mood or feeling in your photographs.
Contrast can be broken down into two primary types:
Effective use of contrast can transform a simple image into something compelling and dynamic. And if you're looking to build a photography business, understanding how to master contrast can help you create striking portfolio images to attract clients.
You can also explore some practical tips on How to Start a Photography Business from Scratch to build a successful photography career with strong images.
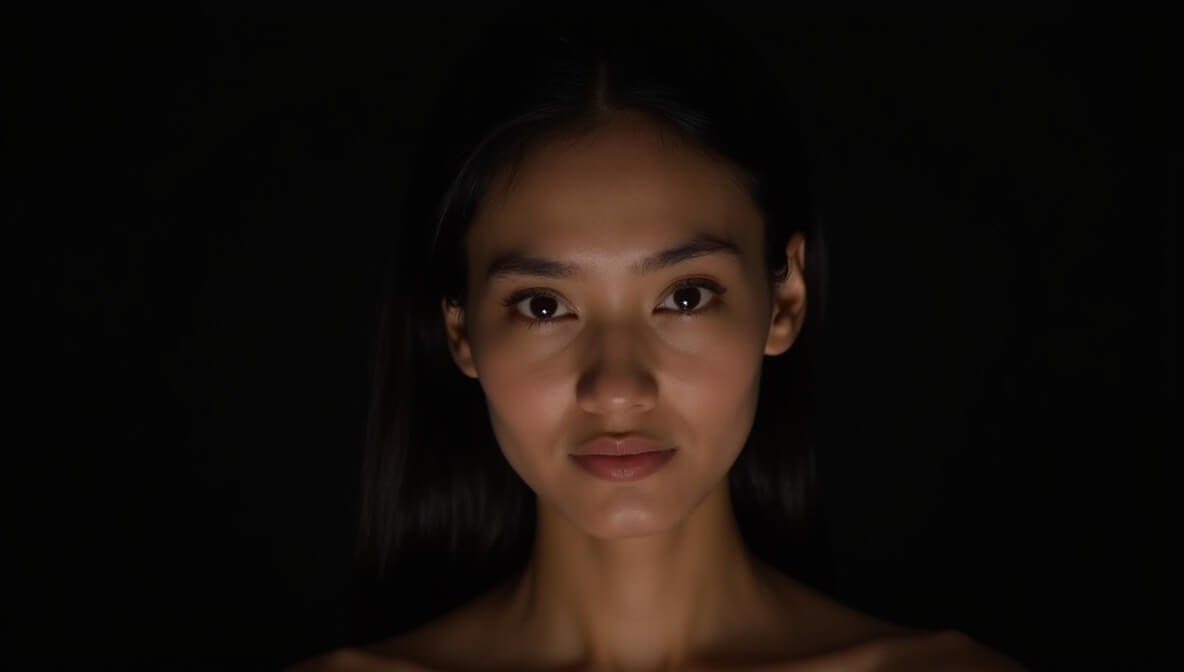
i. Tonal Contrast (Light vs. Dark) : Tonal contrast refers to the difference between light and dark areas in an image. A strong tonal contrast creates depth and emphasizes the shape and form of the subject. This is especially impactful in black-and-white photography, where light and shadow play a dominant role.
Understanding how to adjust tonal contrast is crucial when working with different lighting setups. A good place to start is by learning the Best Lighting Setup for Portrait Photography.
ii. Color Contrast : Color contrast involves using complementary or contrasting colors to create visual interest. This type of contrast is useful when you want to make certain parts of an image pop or create a harmonious color palette.
When it comes to using color contrast effectively, you can also learn about How to Optimize Your Photos for SEO and Social Media, ensuring your vibrant photos get seen by a larger audience.
iii. Textural Contrast : This type of contrast refers to the difference in texture between various elements in your photo. For example, the contrast between a smooth, shiny object and a rough, textured background creates visual intrigue. This is commonly used in still life photography or when you want to emphasize the details in your subject’s environment.
i. Use Strong Lighting : To create high tonal contrast, consider using strong lighting to illuminate one side of your subject while allowing the other side to fall into shadow. This creates striking visual effects and highlights the subject's features. You can experiment with harsh lighting, like midday sun, or use backlighting for a silhouette effect.
For more tips on working with light, check out How to Build a Photography Website for Clients in 2025, where you can discover how to present your lighting skills on your professional website.
ii. Use Backlighting : Positioning your light source behind your subject can create a powerful contrast between light and shadow. This technique is ideal for creating silhouettes and high-contrast images, especially in outdoor or sunset shots.
i. Complementary Colors : One of the most impactful ways to create color contrast is by using complementary colors. For example, a vibrant red flower against a green background makes both colors stand out more, creating a dynamic and eye-catching image.
ii. High Saturation vs. Low Saturation : Another way to play with color contrast is by pairing saturated colors with muted or desaturated colors. For instance, a bright, saturated subject against a soft, neutral background will make the subject pop.
Post-processing tools like Lightroom can help enhance or adjust the saturation of specific colors in your image. For more on editing and enhancing your photos, check out Photographer Editing and Protecting Copyrighted Photos.
i. High Contrast Photography
You can further explore strategies for growing your photography business and networking with clients through resources like Networking Tips for Photographers.
Contrast is a vital element of visual composition, and using it effectively can dramatically improve the quality and impact of your photos. By experimenting with tonal contrast, color contrast, and texture contrast, you can elevate your photography and create compelling, engaging images. Whether you’re aiming for dramatic portrait shots, serene landscapes, or high-energy action shots, mastering contrast will take your photography to the next level.
If you're interested in learning more about how to scale your photography business, check out How to Scale a Photography Business and Go Full-Time for additional insights on turning your passion into a full-time career.
Stay up to date with the newest tips, gear reviews, and step-by-step guides to elevate your photography journey from home and beyond.