
June 06, 2025
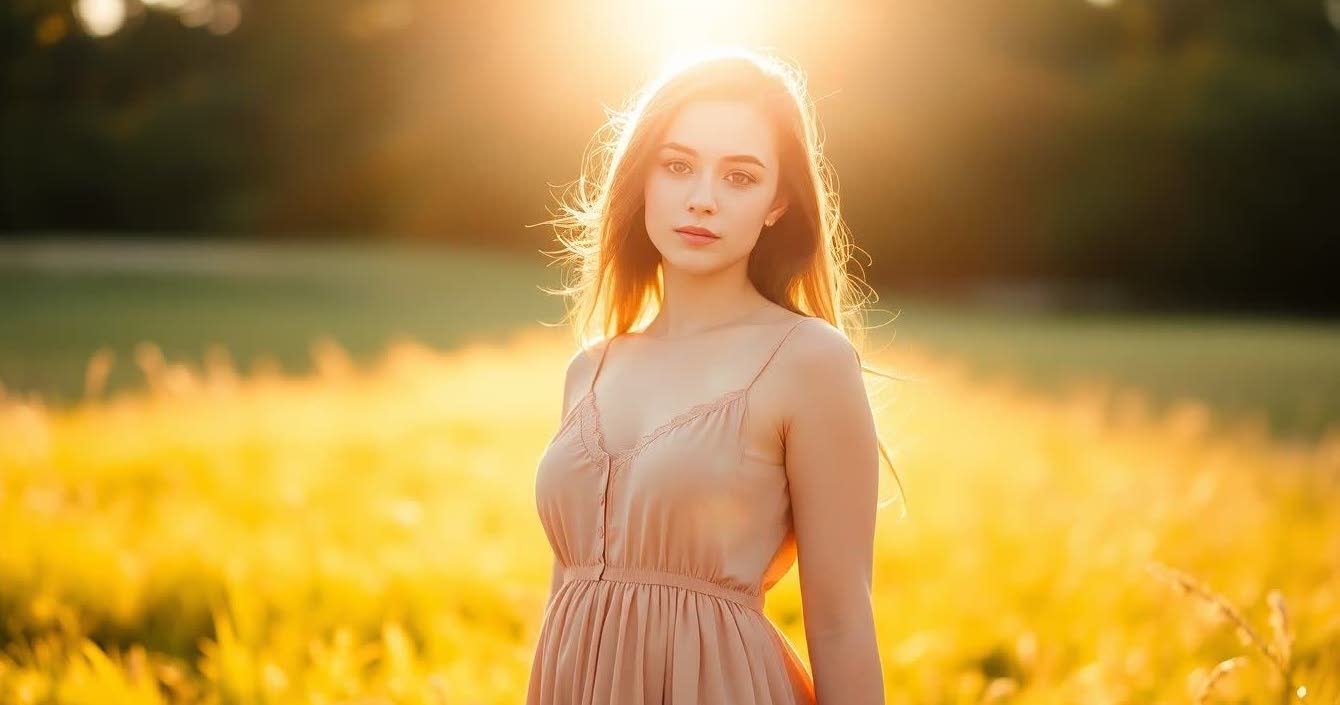
Backlit photography is both beautiful and technically demanding. Whether you’re shooting during golden hour or capturing indoor portraits near a window, working with light coming from behind your subject introduces exposure challenges, metering issues, and focus difficulties. But with the right camera settings and techniques, you can turn these challenges into creative advantages.
This 2025 expert guide walks you through ideal settings, compositional tips, and editing techniques—plus helpful links to elevate your skills and grow your photography business.
Backlighting occurs when the light source is directly behind your subject—often resulting in high-contrast scenes with blown-out skies or dark foregrounds. Most cameras default to exposing for the brightest area (the background), causing your subject to appear underexposed.
This is why switching to manual control is critical. When you know how to fine-tune your settings, you’ll be able to capture:
Still using Auto Mode? It’s time to take full control.
Let’s break down the camera settings that help you handle backlit conditions effectively. Whether you're a beginner or a seasoned photographer, these principles apply across the board.
1. Shooting Mode: Manual (M) or Aperture Priority (A/Av)
Learn which camera suits your control needs in Best Camera for Professional Photography Beginners in 2025.
2. ISO: 100–400
Pro Tip: Use ISO 100 in bright daylight, and bump it to 400 if you're shooting handheld in low light to maintain sharpness without blur.
3. Aperture: f/2.8 – f/5.6 : A wider aperture helps achieve two things:
4. Shutter Speed: 1/250 – 1/1000 : Backlit scenes can be bright, especially around sunset. Use a faster shutter speed to:
5. Focus Mode: Manual or Spot Focus : Backlighting can confuse autofocus. The solution?
6. Exposure Compensation: +1 to +2 EV : Cameras tend to underexpose backlit subjects, prioritizing the bright background. To fix this:
7. White Balance: Cloudy or Custom (Kelvin 6000–7000) : To capture the warmth of golden hour or the soft tones of backlight:
8. Metering Mode: Spot or Center-Weighted : Your metering mode affects how your camera calculates exposure.
Now that you’ve got your settings, here are tips to perfect your backlit shots:
Backlit shots—especially during golden hour—are crowd-pleasers. You can use them to:
Sell Online as Stock : Backlit lifestyle images sell well. Learn where to upload your work in How to Sell Photography Online in 2025.
Attract High-Paying Clients : Showcasing beautiful, naturally lit portraits and product shots can elevate your brand. Find strategies in How to Get High-Paying Clients.
Build a Personal Brand : Consistent style and mastery of light help define your brand aesthetic. Learn how in How to Build a Personal Brand as a Photographer.
Backlit photography, while technically challenging, allows for the creation of emotionally rich and visually captivating images. Once you understand how to control your camera settings—shutter speed, aperture, ISO, metering, and white balance—you’ll no longer fear bright skies or shadowy subjects.
Mastering backlight doesn’t just help you take better photos—it helps you stand out as an artist.
Stay up to date with the newest tips, gear reviews, and step-by-step guides to elevate your photography journey from home and beyond.