Lighting is the backbone of portrait photography. It has the power to shape the mood, highlight the subject’s features, and create a sense of depth. A good lighting setup can take an average portrait and elevate it to something extraordinary. Whether you're photographing models, clients, or friends, understanding how to use light effectively is key to capturing stunning, professional-quality portraits.
In this guide, we'll explore the best lighting setups for portrait photography, breaking down different types of lighting, the gear you need, and tips for making the most of your lighting to create striking portraits.
1. Natural Light: Soft and Flattering for Portraits
When it comes to portrait photography, natural light is often the most flattering and easiest to use, especially if you're working with natural settings or shooting indoors. Natural light is soft, especially during certain times of day, and can give portraits a beautiful, authentic feel.
Why Natural Light Works for Portraits:
- Softness: The light from a window or the sun, especially during the golden hour, is diffused and soft, minimizing harsh shadows.
- Flattering for Skin Tones: Natural light helps create even skin tones without the need for intense studio lights or complicated setups.
- Accessible and Free: Natural light is available almost everywhere, so it’s ideal if you’re starting out or shooting in various locations.
Tips for Using Natural Light in Portraits:
- Golden Hour: The period just after sunrise and just before sunset, known as the golden hour, provides warm, soft light. This is ideal for creating dreamy, flattering portraits.
- Avoid Direct Sunlight: While sunlight can be powerful, direct sunlight can create harsh shadows and overexposed spots. Instead, place your subject near a window with soft, diffused light or shoot in the shade to get a more even exposure.
- Reflectors: If one side of your subject is in shadow, use a reflector to bounce light back onto their face. This helps fill in shadows and creates a more balanced exposure.
If you’re looking to expand your photography business, How to Start a Photography Business from Scratch can offer insights into marketing your natural light portraits to clients.
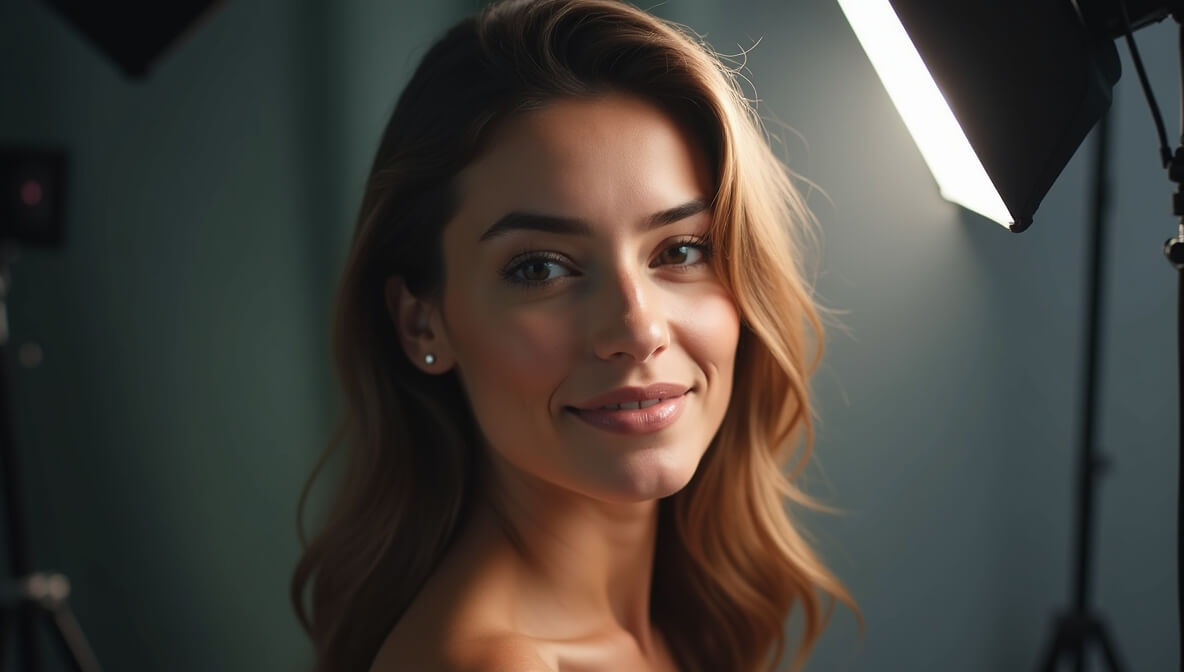
2. Rembrandt Lighting: Classic and Dramatic
Rembrandt lighting is one of the most classic setups in portrait photography. Named after the famous painter Rembrandt, this lighting technique involves creating a small triangle of light on the subject’s cheek, which adds a sense of depth and dimension to the face.
Why Rembrandt Lighting Works:
- Dramatic and Classic: It has a timeless quality that works well for both artistic and commercial portraiture.
- Shadows for Depth: The triangle of light on the cheek, coupled with shadows, creates a three-dimensional look, emphasizing the subject’s facial features and providing depth.
Tips for Rembrandt Lighting:
- Light Position: Position the key light at a 45-degree angle to your subject and slightly above their eye level. The light should be directed downwards, which helps create the triangle of light on the cheek.
- Adjust the Fill Light: Use a fill light or reflector to lighten the shadow areas, but avoid over-lighting the shadows, as it will lose the characteristic drama.
- Contrast: Rembrandt lighting works well with high contrast in portraits. The combination of shadow and light adds depth, so ensure you’re using a light setup that emphasizes these contrasts.
For more tips on creating professional images, check out How to Optimize Your Photos for SEO and Social Media to ensure your dramatic portraits get seen by a larger audience.
3. Butterfly Lighting: Flattering for Glamorous Portraits
Butterfly lighting, also known as Paramount Lighting, is widely used in beauty and fashion photography. It gets its name from the butterfly-shaped shadow that appears beneath the subject’s nose when the light is positioned correctly.
Why Butterfly Lighting Works:
- Flattering and Elegant: It creates a smooth, glamorous look, especially for women’s portraits, by emphasizing the cheekbones and jawline.
- Sculptural: The light creates soft shadows under the cheekbones and chin, adding a sculptural quality to the face, which is perfect for high-fashion or beauty portraits.
Tips for Butterfly Lighting:
- Light Placement: Place your key light directly above and in front of your subject at a 45-degree angle. This should create the butterfly-shaped shadow under the nose.
- Use a Fill Light: If you want to soften the shadows and bring out more detail in the face, use a reflector or a secondary light source to fill in those shadow areas.
- Softbox or Umbrella: To get that soft, glamorous look, use a softbox or umbrella as your light source to diffuse the light and reduce harsh shadows.
Networking Tips for Photographers can help you find potential clients who love the sophisticated look of butterfly lighting in their portraits.
4. Split Lighting: Bold and High-Contrast
Split lighting is one of the most dramatic lighting setups in portrait photography. It involves lighting only one half of your subject’s face, leaving the other half in shadow. This creates high contrast and a bold, intense look.
Why Split Lighting Works:
- High Drama: It’s perfect for creating a moody and intense portrait, especially for men’s portraits or any image where you want to convey strength and power.
- Simple Setup: Unlike other lighting setups, split lighting requires only one light source, making it simple to set up and execute.
Tips for Split Lighting:
- Light Placement: Position the key light at a 90-degree angle to your subject, ensuring that only one half of their face is illuminated while the other half remains in shadow.
- Adjust the Fill Light: You can use a very minimal fill light to slightly soften the shadow side if desired, but the bold contrast is what makes split lighting so effective.
- Ideal for Male Portraits: Split lighting tends to be used more in men’s portrait photography because it emphasizes the jawline and gives a more angular, sculpted appearance.
Check out Best Photo Restoration Software in 2025 if you’re looking to restore high-contrast, dramatic portraits after you’ve taken them!
5. Loop Lighting: Natural and Balanced
Loop lighting is one of the most commonly used lighting setups in portrait photography because of its natural look. It creates a small shadow on the subject’s cheek, which resembles a loop, giving it a flattering, balanced feel without looking overly dramatic.
Why Loop Lighting Works:
- Natural and Balanced: This setup produces a natural-looking portrait with a small shadow, making it great for almost any subject, from professionals to casual portraits.
- Easy to Master: Loop lighting is relatively easy to set up and can be used with both natural light or artificial lights.
Tips for Loop Lighting:
- Light Position: Place your key light at a 45-degree angle from your subject and slightly above eye level. This will create the "loop" shadow under the nose.
- Fill Light: To fill in the shadows, use a soft fill light or reflector to lighten the shadowed side without overpowering the natural feel of the image.
- Versatile: Loop lighting works well in both outdoor and indoor settings, making it versatile for various portrait styles.
For further tips on building a business around portrait photography, explore How to Get High-Paying Clients for Your Photography Business.
Conclusion
Mastering the right lighting setup is essential for creating captivating, professional-quality portraits. Whether you prefer the soft and flattering glow of natural light or the dramatic shadows of split lighting, there’s a lighting technique that fits every type of portrait. Experimenting with different setups and finding what works best for your subjects is the key to improving your portrait photography skills.
With the right lighting setup, your portraits will look polished, refined, and ready for publication—whether it’s for your portfolio, social media, or client work.