Lighting is one of the most essential elements in video production, whether you're shooting for YouTube, creating vlogs, filming tutorials, or producing professional-grade content. In 2025, video lighting technology has evolved, making it easier than ever to achieve a polished, high-quality look. With the right setup, your videos will look more professional, engaging, and dynamic.
This guide will walk you through:
- The essential lights for creating the best video setup
- How to achieve professional-quality lighting
- Common mistakes to avoid
- The best lighting options for beginners and pros alike
Why Lighting is Crucial for Video Production
In video production, lighting determines everything from mood and tone to clarity and sharpness of your image. Whether you’re shooting indoors or outdoors, natural lighting can be unpredictable, and artificial lighting is often necessary to ensure consistency and control.
Here’s why lighting is so important:
- Professional Quality: Good lighting ensures your video looks high-quality and avoids graininess or shadows that can detract from the visuals.
- Creativity and Mood: Different lighting setups create different moods, from bright and welcoming to moody and dramatic.
- Focus on the Subject: Proper lighting highlights your subject, removes distractions, and keeps your audience's attention focused.
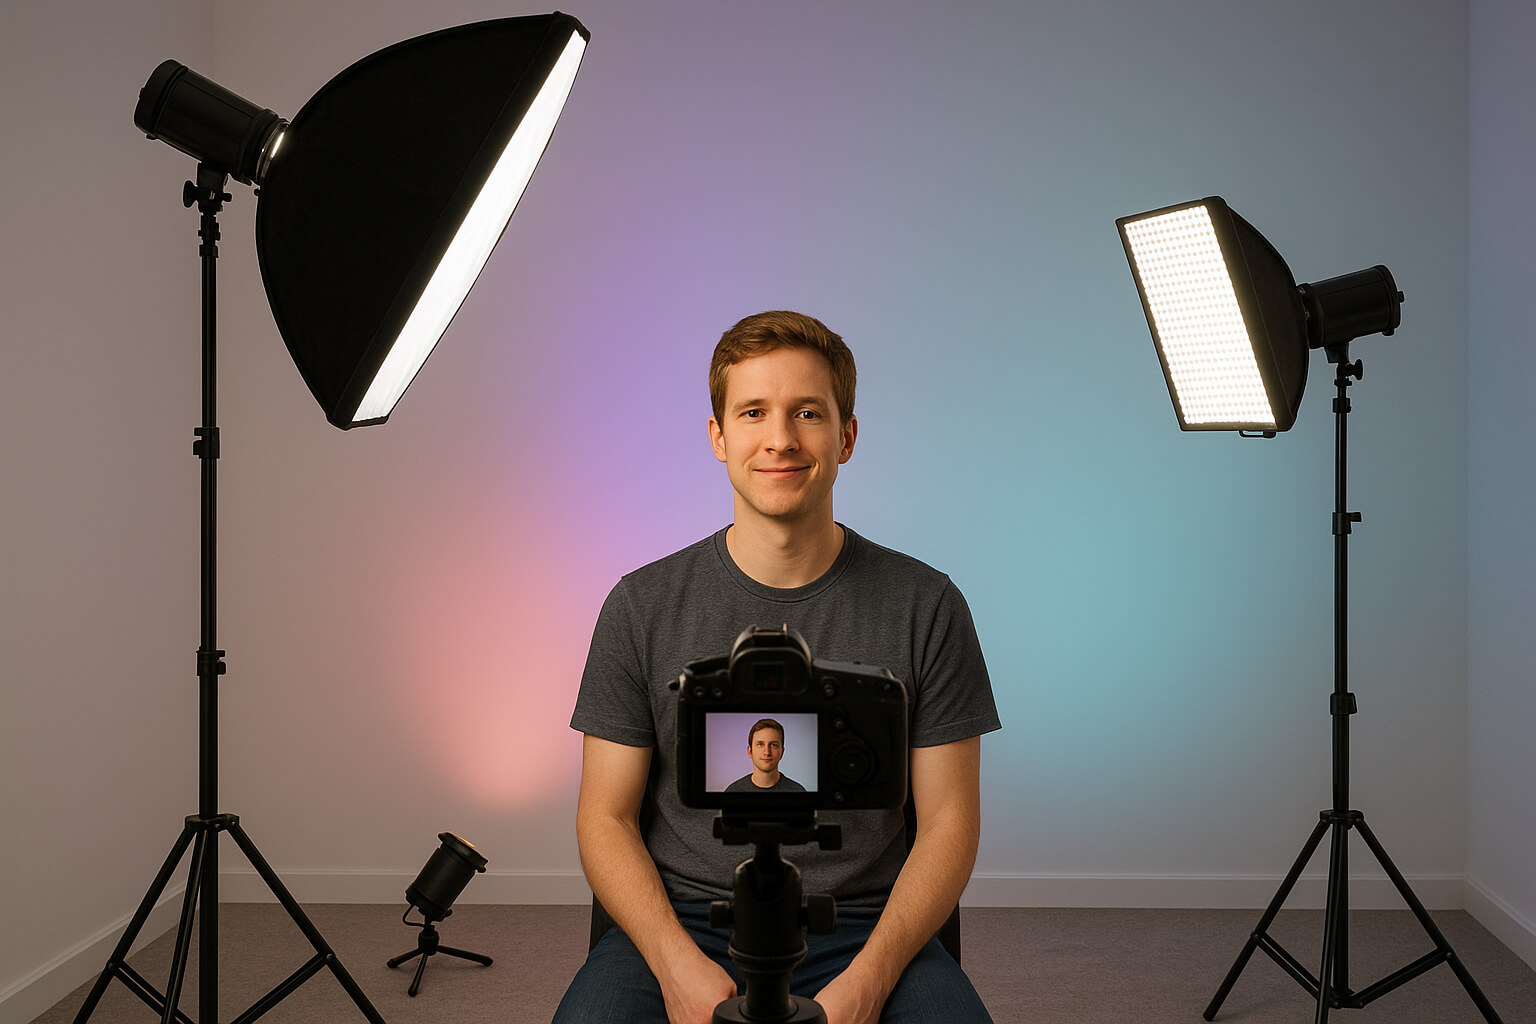
Best Video Lighting Setup: Key Components
The goal of any video lighting setup is to create balanced, flattering light that complements your subject and enhances the overall video production. Here’s a breakdown of the essential lighting equipment and how you can position it to get the best results.
1. Key Light : The key light is your primary light source, responsible for illuminating the subject. This light should be placed in front of you at a 45-degree angle and slightly above eye level for the most flattering lighting.
- Softboxes or LED panels are ideal for producing soft, diffused light.
- Best Budget Option: The Neewer 660 LED Panel is a great affordable option that provides soft, even lighting without harsh shadows.
2. Fill Light : The fill light is used to fill in the shadows created by the key light. It softens the contrast and ensures that you’re lit evenly from all sides. Place the fill light opposite the key light at a lower intensity to avoid over-lighting.
- Best Budget Option: A second Neewer LED or a reflector can serve as your fill light.
3. Backlight (Rim Light or Hair Light) : A backlight or hair light helps to separate the subject from the background, adding depth and dimension. It’s placed behind the subject and directed at the top or back of the head.
- Best Budget Option: Godox SL-60W LED Light is a versatile backlight that can create professional results on a budget.
4. Background Light : The background light ensures your backdrop doesn’t appear dark or dull. It creates a pleasant contrast between you and the background and enhances the overall scene.
- Best Budget Option: Aputure MC RGB Light is a small but powerful light that can illuminate your background with adjustable colors and brightness.
5. Ring Light (Optional) : A ring light provides even, soft lighting across the face, making it a popular choice for beauty tutorials, vlogs, and interviews. The light is placed around the camera lens, ensuring that you are perfectly lit without shadows.
- Best Budget Option: Neewer 18” Ring Light is widely used among YouTubers and influencers.
How to Position Your Video Lights for the Best Results
To get the best possible lighting results, positioning is key. Here's a quick guide:
- Key Light: Place it at a 45-degree angle to your left or right, about 3–6 feet away from your face. Angle the light slightly downwards for the most natural look.
- Fill Light: Position your fill light on the opposite side of the key light at a lower intensity. This softens the shadows.
- Backlight: Place the backlight behind you, aiming at your shoulders or the back of your head. This creates separation between you and the background.
- Background Light: Position your background light toward the backdrop, ensuring it doesn’t spill onto the subject.
Pro Tips for the Best Video Lighting Setup
- Use Soft Light: Diffuse the light using softboxes or umbrella lights to soften shadows and create a more flattering look.
- Control Light Temperature: Use daylight-balanced lights (around 5500K) to ensure consistency in your color temperature. Mixing warm and cool lights can lead to unflattering color tones.
- Avoid Overexposure: Keep an eye on your camera's exposure settings. Overexposure can ruin the quality of your footage.
- Experiment with Angles: Don’t hesitate to adjust light angles to create the desired mood. High angles can add drama, while low angles provide a more intimate feel.
Best Lighting Options for Different Video Types
Different types of content require different lighting setups. Here’s a breakdown:
- YouTube Videos / Tutorials : Use a three-point lighting setup (key, fill, and backlight). You can also experiment with ring lights for close-ups or beauty content.
- Vlogs: Natural light works well, but if filming indoors, use three-point lighting to keep your face well-lit and distinct from the background.
- Live Streaming: A key light, ring light, and background light will ensure you look polished. This setup makes you stand out against your background, even in live broadcasts.
- Product Photography / Commercials : For product videos, you’ll need two key lights (one for the front and one for the back of the product), along with a soft fill and background lighting for contrast.
Turning Your Lighting Setup into a Business
Now that you’ve mastered video lighting, you can monetize your skills. Here’s how:
- Offer Video Production Services: Use your expertise to help others create professional video content. Offer services to YouTubers, corporate clients, or individuals who need a lighting setup for high-quality video production.
- Create Tutorials and Courses: Share your knowledge by creating video tutorials or even an online course on lighting setups. You could teach beginners how to create their own professional videos from home.
- Lighting Packages and Consulting: As your business grows, consider offering lighting packages or consulting for clients who want professional setups tailored to their specific needs.
Protect Your Work and Scale Your Video Business
To protect your hard work and scale your business:
- Watermark Your Content: Add watermarks to sample videos or images to protect your intellectual property.
- Build an Online Portfolio: Showcase your lighting skills by setting up an online portfolio. Consider using a photography website to showcase your work and attract potential clients. Learn how to build a photography website for clients in 2025.
- Scale Your Business: Once you’ve gained enough experience, raise your pricing, offer packages for larger clients, or even offer monthly retainer services. Learn how to scale a photography business and go full-time.
Conclusion
Mastering video lighting in 2025 is essential for creating professional content, whether you’re producing YouTube videos, streaming, or working on corporate shoots. With the right lighting setup, you can boost the production value of your content, attract clients, and even build a sustainable business. Once you’ve learned how to perfect your lighting skills, it’s time to monetize your expertise and scale your business.
If you're interested in monetizing your photography or video work further, consider learning about passive income through photography sales. Learn how to sell your photos online for passive income in 2025.
By implementing the techniques shared in this guide, you can create videos that stand out and elevate your content to the next level.